-

Originally Posted by
Nigel Allen

Most of these cars do not do high enough mileage to result in rub-throughs on poorly secured wiring, but why find out? Secure the wiring to a smooth surface so that it can't move around or vibrate. If there is nothing close by to fasten the loom to, create a 'tie rail' or similar, to cable tie the loom to.
Cut a piece of 10mm aluminium tube to length.
Squash each end flat, and drill a hole in the flattened ends. Secure to chassis with fasteners in the recently drilled holes. A quick and easy way to fashion a tie rail.
HTH,
Nige.
Thanks Nige! I came to the same conclusion and have secured the loom now.
/Sam
Build 2: Mk5 Complete kit | Coyote Gen 4X | TKX | IRS | Brake Booster | Traction Control | Ordered: 3/18/2026 |
Build Thread
Build 1: Mk4 Roadster | Coyote Gen 4X | Ordered: 1/31/2024 | Delivered: 4/11/2024 | First Start: 8/9/2025 | Legal: 11/5/2025 | Crashed: 2/16/2026
Build Thread
-
Aluminum panels permanently mounted
Before permanently attaching the aluminum panels, I wanted to test the fuel system for leaks. I capped the fuel regulator, filled the fuel tank with 5 gals of ethanol-free 93 octane (Thank you Buc-ees) and attached a power supply to the pump. I re-checked all the fittings, had a fire extinguisher and fire blanket readily at hand, and turned on the pump. Within a few seconds I hear fuel spraying out in the engine bay. Turns out that the only equipment I hadn’t assembled and checked myself were the screws holding the top of the Aeromotive regulator to the base. One screw was not sufficiently tightened to properly compress the gasket, causing the leak. I’m really glad I decided to test the fuel system before I had the engine installed, as it would have been an even bigger mess. I checked and tightened all the screws and re-tested the system, gradually building pressure up to the regulator max. No leaks! A good reminder – always check everything!
I also drilled the roll bar base mounts, as it feels like access will be limited once the aluminum is installed. I stepped up the drill diameter in 3 steps to get to the correct size. It was surprisingly easy to drill, but after 4 holes, the drill bits had taken quite a beating. A drill doctor to the rescue. I had read about the drill doctor on this site, but thought I’d be fine without it. In hindsight, I should have purchased one earlier in the process as it would have saved me some grief and time. It’s a joy to drill with newly sharpened bits.


I then spent the better part of a day mounting all the panels together. It was a good time with all the kids helping out. We followed the order in the manual, starting with the footboxes, cockpit floor and sides and then moved back to our fabricated drop-trunk, and started working our way forward, finishing off with the rear cockpit wall. Since the panels are powder coated, we had to clean out/re-drill most holes to make the rivets fit, but the panels went together quite well. I made sure to cover every hole in the frame with silicone and cleaned up any little excess that got squeezed out.


I’m glad I had a pneumatic riveter, because it would have been painful trying to pull each of those rivets by hand. Maybe we went a little overboard, but it ended up being almost 1000 rivets. But many hands made light (or at least fun) work. There was one rivet that couldn’t be pulled because it was blocked by the coyote accelerator pedal mount, so we just siliconed the rivet head in place to make it look uniform. Happy with how it turned out. It's now starting to look like an actual car!
Build 2: Mk5 Complete kit | Coyote Gen 4X | TKX | IRS | Brake Booster | Traction Control | Ordered: 3/18/2026 |
Build Thread
Build 1: Mk4 Roadster | Coyote Gen 4X | Ordered: 1/31/2024 | Delivered: 4/11/2024 | First Start: 8/9/2025 | Legal: 11/5/2025 | Crashed: 2/16/2026
Build Thread
-
Originally Posted by
TXeverydayDad
I’m glad I had a pneumatic riveter, because it would have been painful trying to pull each of those rivets by hand.
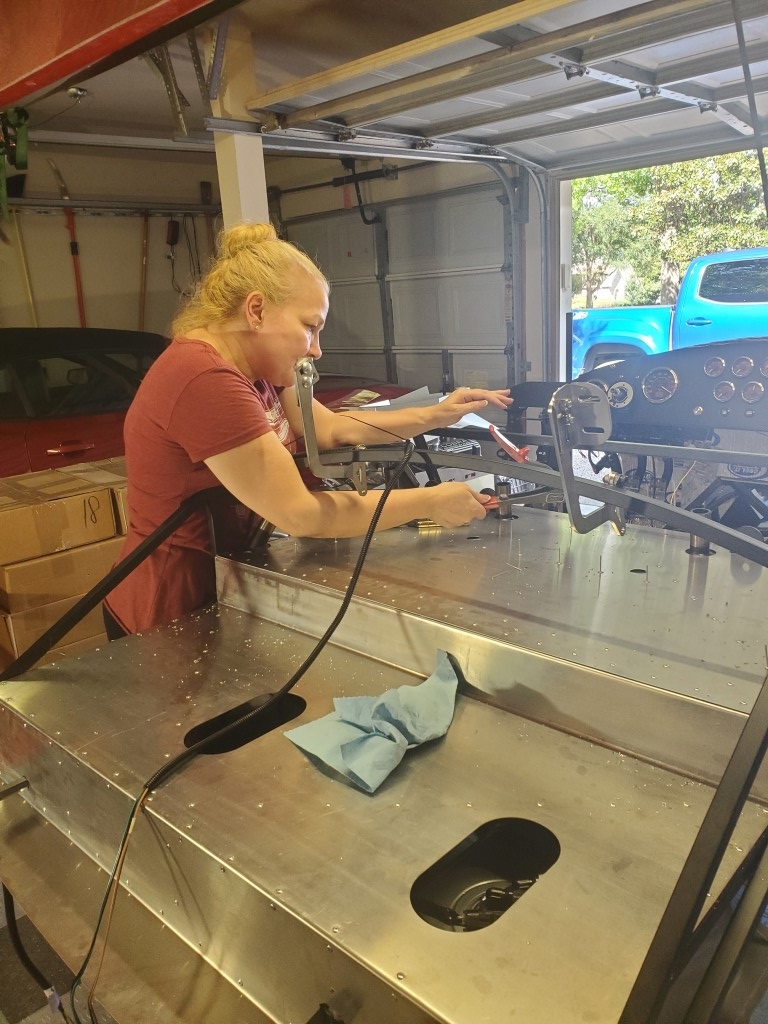
I hear you on that. I used an automatic riveter and it sure saved my forearms
-
Post Thanks / Like - 0 Thanks, 1 Likes
-
Originally Posted by
Mike.Bray
I hear you on that. I used an automatic riveter and it sure saved my forearms
That’s true love right there!
Build 2: Mk5 Complete kit | Coyote Gen 4X | TKX | IRS | Brake Booster | Traction Control | Ordered: 3/18/2026 |
Build Thread
Build 1: Mk4 Roadster | Coyote Gen 4X | Ordered: 1/31/2024 | Delivered: 4/11/2024 | First Start: 8/9/2025 | Legal: 11/5/2025 | Crashed: 2/16/2026
Build Thread
-
Post Thanks / Like - 0 Thanks, 1 Likes
-
Originally Posted by
TXeverydayDad
That’s true love right there!
I like to think but she's a big gearhead and loves it the same as I do.
-
I tested my fuel system with air to avoid the issue you had. Fragola makes a nice test kit for 6AN systems, and you just pressurize with an air compressor.
Built an early MkIII years ago, sold years ago. Back after 18 years to build a MkIV
Build Thread Here Partners: Levy Racing, Summit Racing, LMR, Breeze, Forte's Parts, Speedhut, ReplicaParts
MkIV Complete Kit Ordered 4/18/23, Delivered 7/11/23, First start 3/15/25. Legal 6/13/25. Boss 427W, Edelbrock Pro Flo 4, TKX (.68 5th), IRS, Wilwood Brakes, 18" Halibrands, Toyo R888R Tires, Custom Speedhut Gauges
-
Originally Posted by
gbranham
I tested my fuel system with air to avoid the issue you had. Fragola makes a nice test kit for 6AN systems, and you just pressurize with an air compressor.
In hindsight that would probably have been a better approach. Although I was confident in my lines and fittings, had I just checked the regulator as well, it would have been good. Overall, I’ve been pleasantly surprised by the Dorman quick connect solution. Not as pretty as braided lines, but they don’t look out of place with the Coyote
Build 2: Mk5 Complete kit | Coyote Gen 4X | TKX | IRS | Brake Booster | Traction Control | Ordered: 3/18/2026 |
Build Thread
Build 1: Mk4 Roadster | Coyote Gen 4X | Ordered: 1/31/2024 | Delivered: 4/11/2024 | First Start: 8/9/2025 | Legal: 11/5/2025 | Crashed: 2/16/2026
Build Thread
-
Lizard Skin
Next steps was to prepare for spraying Lizardskin. This is the only part of the build where I have a dead-line since I purchased the Lizardskin during the black Friday sale, and received product that has an expiration date in June. Shouldn’t be an issue, but want to get it done sooner rather than later. The weather is at least back to mid-70s to 80s here so within their temperature band.
With the panels mounted, the to-do list is simple: seal, mask, scuff and clean, before spraying. Simple enough, but time-consuming work. I used Dynatron Seam Sealer to seal all gaps. I used tape on the outside to create a barrier to squeeze the sealer against and it generally worked ok. Since my powder coated panels have texture (black wrinkle), any sealer that got where it didn’t belong didn’t clean up as nicely as I would have hoped, but it’s good enough.


Nothing exciting about masking and scuffing. I used regular masking tape and some paper/plastic to cover most, and finally some aluminum foil for the more difficult shapes. I scuffed with 120 grit sandpaper, which went quite quick. I was wondering whether I would need to scuff given the texture in my power coat, and have tried to contact LizardSkin support to ask them, but they have been unavailable for the past 10 days. I’ve called, left messages, but haven’t gotten ahold of them. Surprising, since many have said their support is great. Don’t know what’s going on there. So I scuffed everything anyway. Then used air to remove any debris, and a final pass with a microfiber cloth with denatured alcohol to degrease. Since I will have the seat heater switches in the dash, I glued the wires running from the seat up to the 4x4.
My plan was to spray the lizardskin outside of the garage so that meant I had to order tires to be able to roll the car out. I decided to go with Falken Azenis RT615k+. 315/30r18 rear and 265/35r18 front. Ordered, mounted and now in my garage. They look great!

The actual lizardskin application was quick and satisfying and it feels good that it’s done. This is also a bit of a milestone, having the car on the ground under its own weight, rolling for the first time!


Build 2: Mk5 Complete kit | Coyote Gen 4X | TKX | IRS | Brake Booster | Traction Control | Ordered: 3/18/2026 |
Build Thread
Build 1: Mk4 Roadster | Coyote Gen 4X | Ordered: 1/31/2024 | Delivered: 4/11/2024 | First Start: 8/9/2025 | Legal: 11/5/2025 | Crashed: 2/16/2026
Build Thread
-
1 year since delivery!
Haven't updated the build thread for a while but wanted to share a quick snapshot of our progress - 1 year since delivery!

Build 2: Mk5 Complete kit | Coyote Gen 4X | TKX | IRS | Brake Booster | Traction Control | Ordered: 3/18/2026 |
Build Thread
Build 1: Mk4 Roadster | Coyote Gen 4X | Ordered: 1/31/2024 | Delivered: 4/11/2024 | First Start: 8/9/2025 | Legal: 11/5/2025 | Crashed: 2/16/2026
Build Thread
-
Progress Catch-up
It’s been a while since my last update but we’ve had too much fun building to spend time in front of a computer. We’ve made good progress with several small projects being finished off, so I will add a few separate updates to catch-up.
We wanted heated seats, so I ordered the WarmSeats from Mike Forte. He only had the water-proof versions so that’s what I went with. It was surprisingly easy to install the heating pads in the seats. Took less than 30minutes per seat, including testing. For the seat back, I simply disconnected the plastic channel locks, slid the pad all the way in and closed it up again. With the seat cushion, I had to tear the covering of the cushion where it was glued, install the pad, and then glue the seat cover back in place. If there was a lack of glue used by F5 previously, that is not the case any more, but it wasn’t difficult to get the seat cover off. I then used 3M 77 adhesive spray to re-attach. The seats have been tested and they get hot. I’ll also need to figure out the best way to route the wires, depending on how I mount the seats, if I use spacers etc, but that will be tackled later. I’ve been considering different approaches, since I’m 6’2” and my wife 5’6”. She’ll probably not want to drive it very often, but when she does, I want to make sure she’s in comfortable reach of all controls, to make the experience as pleasant and safe as possible.


I was considering engine grounds and wanted to heed the advice of having at least two engine to ground connections. I tapped the 3/8-16 hole in the engine mount for the engine strap and then I drilled and tapped a second 3/8-16 hole in the engine mount for a ground cable going to a starter bolt. That will enable me to use parts/cables that I already have. I also added a direct jumper from the engine ground strap back to the ‘main’ ground bolt/stud with the battery negative, to ensure a strong route back to the battery. Overkill, but why not? This stud has connections to the battery, Coyote PCM, fan and now engine block as well.
We then installed the fuel breather tube holder. I used an extra brake reservoir and holder I had on hand and it worked out well. I’m not sure exactly how hard/easy it’ll be to access this when the body is on, but it should be ok. I’ve angled it in such a way to simplify changing out the carbon pack when/if needed. One bolt is tapped into the 3/4” tube and the other if held with a nut.

Finally, we also installed the wiper base to the firewall. We used small rubber spacers and ran the bolts from the firewall side, which should make installation/maintenance easier when we get to that. This is the Specialty Power Windows - WWK2 standard wiper kit.

Last edited by TXeverydayDad; 04-21-2025 at 07:23 PM.
Build 2: Mk5 Complete kit | Coyote Gen 4X | TKX | IRS | Brake Booster | Traction Control | Ordered: 3/18/2026 |
Build Thread
Build 1: Mk4 Roadster | Coyote Gen 4X | Ordered: 1/31/2024 | Delivered: 4/11/2024 | First Start: 8/9/2025 | Legal: 11/5/2025 | Crashed: 2/16/2026
Build Thread
-
This all looks really nice. The dash pulls it together
-
Post Thanks / Like - 1 Thanks, 0 Likes
-
Dashboard
This was a major milestone and one that I was a little hesitant about! Cutting the carbon fiber dash-board. But once I got started, it went pretty well and I’m happy with the outcome. As mentioned by many others – wear a mask/respirator, gloves and long sleeves, to avoid CF dust. I found that when drilling, I got better results with high speed and low pressure. Taking the time to step up in drill size minimized fiber tearing and using a reamer bit was extremely effective. For the larger circle cuts, again, high-speed worked well and I cut about 1/2” smaller and opened the hole up with a drill-mounted sanding drum.
I spent a lot of time measuring and making sure everything was straight, in-line and would fit together, both in-front and behind the dash. I also test-mounted my switches in some cardboard to make sure my design would actually work in real life, ie that I could comfortable operate the switch as intended.


I then mounted all the gauges, switches and LEDs and I’m happy with the outcome. I’m switching out some knobs etc so it’s not fully complete in the pictures, but it’s 95% there.


Build 2: Mk5 Complete kit | Coyote Gen 4X | TKX | IRS | Brake Booster | Traction Control | Ordered: 3/18/2026 |
Build Thread
Build 1: Mk4 Roadster | Coyote Gen 4X | Ordered: 1/31/2024 | Delivered: 4/11/2024 | First Start: 8/9/2025 | Legal: 11/5/2025 | Crashed: 2/16/2026
Build Thread
-
IMO the oil pressure gauge is in a bad spot. When driving it's difficult to see a gauge there because of the steering wheel and oil pressure is one gauge you want to be able to see. I would swap it for a less critical gauge like the clock.
-
Originally Posted by
Mike.Bray
IMO the oil pressure gauge is in a bad spot. When driving it's difficult to see a gauge there because of the steering wheel and oil pressure is one gauge you want to be able to see. I would swap it for a less critical gauge like the clock.
Thanks Mike! I appreciate the feedback.
Build 2: Mk5 Complete kit | Coyote Gen 4X | TKX | IRS | Brake Booster | Traction Control | Ordered: 3/18/2026 |
Build Thread
Build 1: Mk4 Roadster | Coyote Gen 4X | Ordered: 1/31/2024 | Delivered: 4/11/2024 | First Start: 8/9/2025 | Legal: 11/5/2025 | Crashed: 2/16/2026
Build Thread
-
Post Thanks / Like - 0 Thanks, 1 Likes
-
The dash looks sweet! Well done…
-
Originally Posted by
danmas
The dash looks sweet! Well done…
Thanks! I’m happy with how it turned out. The kids wanted a start button and I was worried the ‘tractor’ start button would be too out of place but it actually works. The covered switches were a gamble as well, but turned out well. Now I just have to wire it all… Found a mistake in the RF main harness as well, so need that sorted out before continuing.
Build 2: Mk5 Complete kit | Coyote Gen 4X | TKX | IRS | Brake Booster | Traction Control | Ordered: 3/18/2026 |
Build Thread
Build 1: Mk4 Roadster | Coyote Gen 4X | Ordered: 1/31/2024 | Delivered: 4/11/2024 | First Start: 8/9/2025 | Legal: 11/5/2025 | Crashed: 2/16/2026
Build Thread
-
-
Engine + Transmissio Assembly continued
We confirmed all torque values and then mounted the bellhousing.

We’ll be using a hydraulic release bearing for the clutch (Tilton 60-6102) so we made the necessary measurements and mounted it on the transmission. The threads on the HRB sleeve were really sharp so it drew some blood while I was making final adjustments, so just a good reminder to wear gloves.

The TKX transmission was strapped to a small dolly, which was the perfect height to just slide the transmission straight in. I was almost surprised how easily it all went together. We torqued the transmission to the bellhousing, and again checked the gap between the HRB face and clutch plate fingers.

We connected the drive shaft, turned the engine over manually and everything spins as expected in gear and neutral. It’s a good feeling!

Build 2: Mk5 Complete kit | Coyote Gen 4X | TKX | IRS | Brake Booster | Traction Control | Ordered: 3/18/2026 |
Build Thread
Build 1: Mk4 Roadster | Coyote Gen 4X | Ordered: 1/31/2024 | Delivered: 4/11/2024 | First Start: 8/9/2025 | Legal: 11/5/2025 | Crashed: 2/16/2026
Build Thread
-
Post Thanks / Like - 0 Thanks, 1 Likes
-
Continued Engine Preparation
Continuing with engine preparation, we installed the water and oil sensors, using thread sealant instead of tape. Lots of connections/junctions and I don’t want them leaking. I checked that the wiring didn't interfere with the motor mounts. Given my experience with my fuel regulator not having all screws tight from the manufacturer, we went over all the oil pan plugs and sealed them as well. We then installed the starter motor and motor mounts with ground straps.


Since I will be using a GPS speedo, I had read that for some transmissions, a cover was needed over the mechanical speed signal port. The TKX has what seems to be a plastic plug in the port when delivered. I wasn’t sure if anything else was needed so I called Tremec. They answered the phone immediately and I had my answer in less than 1 minute. Not what I had expected, but I’m impressed. The answer was that nothing else is required for the TKX. The installed plug is enough.

I removed the powder coating where the ground straps will attach and removed the radiator for easier access. The car is on wheel dollies as well. The only thing missing before dropping the engine in was the headers, as I wanted to attach them before dropping the engine all the way down. Don’t know how much difference it will make, but that’s the plan at least.
And luckily, the new Gen 4X Coyote headers just came in from F5. I had ordered my kit with the Coyote headers just as the switch between the Gen 3 and Gen 4X happened, so F5 were very supportive in exchanging the Gen 3 headers that didn’t fit due to the changed bolt pattern. With their new flange design, the headers will now fit all Coyotes. A seemingly good solution. We test mounted them and all is good. I removed all but 2 header studs on both sides, with the thinking it will be easier to hang and align the headers and gaskets on the studs.
I then cleaned up the garage a bit and I think we’re good to drop the engine in…


Build 2: Mk5 Complete kit | Coyote Gen 4X | TKX | IRS | Brake Booster | Traction Control | Ordered: 3/18/2026 |
Build Thread
Build 1: Mk4 Roadster | Coyote Gen 4X | Ordered: 1/31/2024 | Delivered: 4/11/2024 | First Start: 8/9/2025 | Legal: 11/5/2025 | Crashed: 2/16/2026
Build Thread
-
Post Thanks / Like - 0 Thanks, 1 Likes
-
Looking good! Drop that sucker in there!
Greg
Built an early MkIII years ago, sold years ago. Back after 18 years to build a MkIV
Build Thread Here Partners: Levy Racing, Summit Racing, LMR, Breeze, Forte's Parts, Speedhut, ReplicaParts
MkIV Complete Kit Ordered 4/18/23, Delivered 7/11/23, First start 3/15/25. Legal 6/13/25. Boss 427W, Edelbrock Pro Flo 4, TKX (.68 5th), IRS, Wilwood Brakes, 18" Halibrands, Toyo R888R Tires, Custom Speedhut Gauges
-
Post Thanks / Like - 0 Thanks, 1 Likes
-
Just staring each other down.
I noticed this with my build but the transmission to engine size is almost comically out of balance on a coyote. I realize it's all top end bulk but the proportions are funny to me.
Car looks great by the way. Very clean build so far.
-
Post Thanks / Like - 1 Thanks, 0 Likes
-
Haha, yeah, the transmission looks really small. Although the Coyote is also ridiculously large.
Build 2: Mk5 Complete kit | Coyote Gen 4X | TKX | IRS | Brake Booster | Traction Control | Ordered: 3/18/2026 |
Build Thread
Build 1: Mk4 Roadster | Coyote Gen 4X | Ordered: 1/31/2024 | Delivered: 4/11/2024 | First Start: 8/9/2025 | Legal: 11/5/2025 | Crashed: 2/16/2026
Build Thread
-
Maybe I'm missing the focal point of the tkx photo but isn't this the plug they refer to in the instructions, not that nylon filled hole next to the bolt?
PXL_20250507_195553353.jpg
-
Peel and stick wire clips from Amazon...
-
Peel and stick wire clips from Amazon...
-
Originally Posted by
M22_COBRA
Maybe I'm missing the focal point of the tkx photo but isn't this the plug they refer to in the instructions, not that nylon filled hole next to the bolt?
PXL_20250507_195553353.jpg
Interesting. I’m not sure. My instructions look like below. Either way, there’s a plug there so no further actions needed but your picture makes more sense.
IMG_8353.jpeg
Build 2: Mk5 Complete kit | Coyote Gen 4X | TKX | IRS | Brake Booster | Traction Control | Ordered: 3/18/2026 |
Build Thread
Build 1: Mk4 Roadster | Coyote Gen 4X | Ordered: 1/31/2024 | Delivered: 4/11/2024 | First Start: 8/9/2025 | Legal: 11/5/2025 | Crashed: 2/16/2026
Build Thread
-
FWIW, I installed my TKX as delivered, and haven't had any leaks or drips. I connected nothing to my tranny.
Greg
Built an early MkIII years ago, sold years ago. Back after 18 years to build a MkIV
Build Thread Here Partners: Levy Racing, Summit Racing, LMR, Breeze, Forte's Parts, Speedhut, ReplicaParts
MkIV Complete Kit Ordered 4/18/23, Delivered 7/11/23, First start 3/15/25. Legal 6/13/25. Boss 427W, Edelbrock Pro Flo 4, TKX (.68 5th), IRS, Wilwood Brakes, 18" Halibrands, Toyo R888R Tires, Custom Speedhut Gauges
-
Post Thanks / Like - 0 Thanks, 1 Likes
-
Originally Posted by
gbranham
FWIW, I installed my TKX as delivered, and haven't had any leaks or drips. I connected nothing to my tranny.
Greg
Thanks Greg! I’ll only be connecting the reverse lights connector. What did you do with the other connectors? Did you cut them off or ziptie them to the trans? Or just leave them loose?
Build 2: Mk5 Complete kit | Coyote Gen 4X | TKX | IRS | Brake Booster | Traction Control | Ordered: 3/18/2026 |
Build Thread
Build 1: Mk4 Roadster | Coyote Gen 4X | Ordered: 1/31/2024 | Delivered: 4/11/2024 | First Start: 8/9/2025 | Legal: 11/5/2025 | Crashed: 2/16/2026
Build Thread
-
Originally Posted by
TXeverydayDad
Thanks Greg! I’ll only be connecting the reverse lights connector. What did you do with the other connectors? Did you cut them off or ziptie them to the trans? Or just leave them loose?
If memory serves, there was only one pigtail connection as-shipped, toward the rear of the tranny on the passenger side. I ziptied it to something, out of the way.
Built an early MkIII years ago, sold years ago. Back after 18 years to build a MkIV
Build Thread Here Partners: Levy Racing, Summit Racing, LMR, Breeze, Forte's Parts, Speedhut, ReplicaParts
MkIV Complete Kit Ordered 4/18/23, Delivered 7/11/23, First start 3/15/25. Legal 6/13/25. Boss 427W, Edelbrock Pro Flo 4, TKX (.68 5th), IRS, Wilwood Brakes, 18" Halibrands, Toyo R888R Tires, Custom Speedhut Gauges
-
Post Thanks / Like - 0 Thanks, 1 Likes
-
The Engine is in!
The time has finally come to drop in the engine and transmission! I had help from my son, brother, dad, and a good friend and the engine pretty much just dropped straight in! It took about 10 minutes, using a combination of recommendations from this site, with a strap to get the transmission tail down, the engine was in! It’s a tight fit, but looks to be right at home once it’s in. We had removed the shifter from the transmission and the steering shaft from the car, but the engine was fully dressed. It was also a relief that the TDMotion lift brackets could be removed without any difficulty once the engine was in. No interference with headers or footboxes etc.


The headers took a little over an hour to get mounted. My plan of mounting them before seating the engine changed as we didn’t want to be under a suspended engine, and the difference in access wasn’t significant. The passenger side header, as expected, was not very difficult, although one bolt needed to be turned a quarter turn at a time. It would have been good to have some racheting box wrenches for this, but good ol’ wrenches still work. The 2 studs did make it easier to align and mount the gasket and header here.
On the driver side, the studs, which had not been cut down, made it impossible to seat the header. Couldn’t get the header in at all. So we removed all the studs and just used bolts. The Gen 4x Coyote bolt pattern on the driver’s side makes especially 1 bolt really annoying, both to get started and to tighten. It's practically right over one of the tubes (the rearward bolt in the photo). It was a strange angle to get to and the tubes made it very difficult to turn your hand when holding the screw. We also used Permatex Ultra Copper 81878 for the bolts which added extra resistance when trying to spin it in. Anyway, that bolt took probably 15 minutes. But it’s in and tight now. The other bolts, although space constrained, were easier.

Once everything was in, we attached the driveshaft and mounted the shifter. The motion and position feels good! I hadn’t noticed before that the IRS has a slight positive pinion, whereas the transmission is negative. A couple of shims should get them more parallel, and the drive shaft angle should still be ok but that remains to be confirmed. I have about 1” of yoke showing which is in line with expectations.


Overall, a very successful day! The Coyote looks really good in there!

Build 2: Mk5 Complete kit | Coyote Gen 4X | TKX | IRS | Brake Booster | Traction Control | Ordered: 3/18/2026 |
Build Thread
Build 1: Mk4 Roadster | Coyote Gen 4X | Ordered: 1/31/2024 | Delivered: 4/11/2024 | First Start: 8/9/2025 | Legal: 11/5/2025 | Crashed: 2/16/2026
Build Thread
-
Post Thanks / Like - 0 Thanks, 1 Likes
-
Literally nobody drops a Coyote in a roadster in 10 minutes.
TX dad - "hold my beer"
Nice work, this where the build gets really fun IMO.
-
Originally Posted by
Blitzboy54
Literally nobody drops a Coyote in a roadster in 10 minutes.
TX dad - "hold my beer"
Nice work, this where the build gets really fun IMO.
Haha, it’s only due to all the great tips and tricks on this forum. I just listen to wise people and learn from them. Together with my friend who has dropped in a few engines in his life, it just worked.
If this is where the build gets fun, then I’m in for a blast. It’s been really fun up until this point! But it does feel significantly more real now, seeing the engine in.
Build 2: Mk5 Complete kit | Coyote Gen 4X | TKX | IRS | Brake Booster | Traction Control | Ordered: 3/18/2026 |
Build Thread
Build 1: Mk4 Roadster | Coyote Gen 4X | Ordered: 1/31/2024 | Delivered: 4/11/2024 | First Start: 8/9/2025 | Legal: 11/5/2025 | Crashed: 2/16/2026
Build Thread
-
Pinion angle
It’s been a long time since my last update. Life, vacation and other fun things that took priority. We took a road trip around New England after the kids finished the school year and had the opportunity to stop by factory five to do a factory tour. Couldn’t time it with the Open House, but we had a great time. My eldest son now has his own plans to build a 65 coupe… It was also a good opportunity for me to really look at the other builds that were on display.

Once we were back home, the first order of business was to check the pinion angle. Lots of discussion around that on the forum, with some claiming it’s extremely important, others that it’s not worth the worry. In the end, my pinion angle is less than 2* and I’m happy with that. I have the 0.4” spacers from the kit already installed and I added another 3/4” spacer under the transmission mount, which is pretty much as high as the transmission will go in the tunnel. Seems to be in the ball park of what others with a Coyote and TKX have added.

I found that using a digital angle finder app on my phone worked better than a magnetic digital level, since the magnetic digital level only showed 0-90* with an arrow up or down and since my measurements were all around 90*, it’s frustrating looking for that little arrow. The phone app measured 0-180*, which made it a lot easier. YMMV, but it worked well for me.
I then test fitted the Metco driveshaft hoop and will be adding the same 3/4” spacers to that as well, to get good clearance around the drive shaft. With the spacers fabricated, painted and installed, the drive train is complete, aligned and bolted down.


On to the plumbing…
Build 2: Mk5 Complete kit | Coyote Gen 4X | TKX | IRS | Brake Booster | Traction Control | Ordered: 3/18/2026 |
Build Thread
Build 1: Mk4 Roadster | Coyote Gen 4X | Ordered: 1/31/2024 | Delivered: 4/11/2024 | First Start: 8/9/2025 | Legal: 11/5/2025 | Crashed: 2/16/2026
Build Thread
-
Plumbing
For the cooling system, I decided to deviate from the kit and go with the original Coyote set-up with an expansion tank. It just makes sense to the engineer in me. It does require a few extra parts which have been documented in many other threads and I used the UPR expansion tank and the Mishimoto Radiator overflow hoses (MMHOSE-MUS8-15ANC). The rest of the hoses were included in the kit and just needed slight modifications to fit well.
I test-fitted the hoses and determined a good location for the expansion tank was 4 inches from the passenger side frame. Based on input from others on the forum, I made the mount slightly lower than the cross bar and it should not have any clearance issues.

Before mounting all the hoses, we installed the power steering lines, added fluid and did an initial burping by turning the wheel slowly back and forth a few times. We found that we got the best line route by having both 90* fittings on the pump side and then the straight fittings to the rack.

With that done, the coolant hoses connected up easily. I slightly clocked the Coyote fitting on the upper radiator hose to clear the power steering pump and routed the lower radiator hose over the X-frame and under the power steering lines. It seems to fit well, clears everything essential and no need for any other junctions or extra connections. I replaced the top radiator bleed valve with a 90* elbow 3/8” barb x ¼”NPT fitting to connect the hose to the expansion tank, and added the remaining hoses to the system.


Then it was back to the manual to complete the rest of the plumbing connections. I added the heater core bypass hose, plugged the vacuum ports on the intake manifold and just behind the throttle body and connected the 2 valve cover hoses as described there. As some might notice, the MAF sensor is clocked incorrectly in the picture.


I also connected the vacuum line to the fuel regulator. There’s conflicting information as to whether it’s needed but that will be decided in discussion with the tuner at a later stage. It’s easy to remove.
This should wrap up the plumbing for the Coyote, apart from adding fluids.
Build 2: Mk5 Complete kit | Coyote Gen 4X | TKX | IRS | Brake Booster | Traction Control | Ordered: 3/18/2026 |
Build Thread
Build 1: Mk4 Roadster | Coyote Gen 4X | Ordered: 1/31/2024 | Delivered: 4/11/2024 | First Start: 8/9/2025 | Legal: 11/5/2025 | Crashed: 2/16/2026
Build Thread
-
Engine Bay wiring
With the plumbing done, it’s time to move on to wiring. Fun! Or not, we’ll see. I figured we’d take it one step at a time, starting with the engine bay.
We started by connecting the wiring that was already laid out and ready. Making our way around counter clockwise on the low side of the engine, we connected the starter power, signal and ground, the engine ground and battery/chassis ground. Then the Coyote fan wire and ground and alternator power wire.

Moving to the high side of the engine, we connected all the harnesses to the Coyote Computer, routed the sensor harness leg around the back of the engine and connected the MAF sensor, alternator and oil pressure gauge for the engine. We have the vintage gauges and ran the gauge wires for oil pressure and water temperature along the frame, next to the alternator power wire (hope I don’t get interference) back to the firewall and through the grommet for the rear harness, ready to connect to the dash.


We dieted out the O2 sensor harness, removing the unnecessary wires and routed the harness across the front of the engine. That way the harness could reach the sensors without needing any extensions. The connectors are also forward of the headers, minimizing the concern about heat. I’m happy with how it turned out.


The final engine bay wire to be added was the tachometer pulse wire, connected to one of the coils.
On to the main wiring!
Build 2: Mk5 Complete kit | Coyote Gen 4X | TKX | IRS | Brake Booster | Traction Control | Ordered: 3/18/2026 |
Build Thread
Build 1: Mk4 Roadster | Coyote Gen 4X | Ordered: 1/31/2024 | Delivered: 4/11/2024 | First Start: 8/9/2025 | Legal: 11/5/2025 | Crashed: 2/16/2026
Build Thread
-
Wiring!
Wiring – what can I say. This is the part of the build that I have been most worried about, just because it has felt overwhelming. But then you just start wiring up one item, move on to the next and many hours later, you’re done! We mainly used the RF harness as provided, but dieted out some wires, and re-routed some.
The main changes are:
- Coyote Fuel Pump – cut and joined the orange and tan fuel pump wires together to be controlled by the Coyote PDM (thick green wire from 6-pin connector)
- Ignition protected toggle switch wired from the IGN on the ignition switch (keyed), going to the Coyote green pigtail
- Fuel Pump protected toggle switch – in series with the inertia switch
- Start button – Powered by the protected ignition toggle switch, going back to the start terminal on the ignition switch, connected to the Coyote SMR pigtail. The car can be started with either the key or the start button. (Ford confirmed that the wires are fused on the Coyote side, so no need to run through a RF fuse).
- Heated seats – Powered by the RF Heater wire.
- All Vintage gauges are powered by the Brown gauge feed wire, except the clock, which is powered by the Coyote HAAT A from the C8 PATS connector/module.
- IE427 turn signal – stalk controls turn signals and High beams. Used the RF Fan relay to power the high-beams through the stalk (only flash-to-pass). Wired in parallel to the standard RF hi/lo-beam switch.
- MIL light – used a relay (thanks Blitzboy54) to only illuminate when active, and not have a permanent 'glow'
- Seat Heaters – used the RF Heater circuit.
- Reverse lights – Brown Radio power from ACC to transmission switch to LEDs to ground.
- 3rd brake lights – left the purple brake wire intact and spliced the trailer controller behind the dash. Purple wire provides 3rd brake lights according to RF layout, while the trailer controller supplies brake signal to the rear rectangular lights.
- Trunk light – 12V from BATT courtesy light, with a ball switch/tilt switch to ground in the trunk
- EFI Coil circuit for both a USB and 12V outlet.
I tested each circuit for continuity with a voltmeter. Once I was satisfied, I connected a power supply to the main power bus/stud on the switched side of the master disconnect and did a complete system test. I could power almost everything, except for high-beams and horns. The only thing remaining to test is the fuel pump, which I will do as part of the first start process. I did have an issue with a faulty ignition switch, where the switch would not reliably make a connection to ACC. F5 was quick to support and the new switch is working.


I then went back and cleaned up the wiring, making sure everything was cut to length, labelled, zip-tied and wrapped to make it as neat as possible. I also calibrated/set-up the vintage gauges as required. I’ve spent many hours on wiring, but it’s now done, apart from the final headlights/taillights and courtesy lights. It took a lot of time, but ultimately not very difficult, as long as you follow your schematics/designs one circuit at a time.

Build 2: Mk5 Complete kit | Coyote Gen 4X | TKX | IRS | Brake Booster | Traction Control | Ordered: 3/18/2026 |
Build Thread
Build 1: Mk4 Roadster | Coyote Gen 4X | Ordered: 1/31/2024 | Delivered: 4/11/2024 | First Start: 8/9/2025 | Legal: 11/5/2025 | Crashed: 2/16/2026
Build Thread
-
First Start!
With the wiring done, we started prepping for first start. I went over the coyote installation procedure again, added all engine, cooling and transmission fluids and did a final electrical check. Everything checked out, so I powered the fuel pump to fill the engine rail with fuel as well as set the fuel pressure to 65psi. It took a good 10-15 seconds to hear the rail fill up completely and for pressure to build. I’ll check the pressure again when the engine is running. With that done, I connected the battery and attached the side pipes…and then I was out of excuses.
The video tells the rest of the story!
It’s a great feeling to hear it come alive for the first time!
I started the car several more times, got it up to temperature and had the fan kick in and turn off when the temperature got low again, so we have confirmed that the fan control is working. We didn’t find any leaks either! We lifted the front wheels off the ground, turned the steering wheel slowly to the right and left several times to make sure the PS was bled, and then lifted the rear wheels off the ground to check the transmission/driveline.
A few observations:
- The fan kicks on at 205* and quite quickly brings the temperature down to 200* when it switches off again. From what I have understood from this forum, at least for previous gen Coyotes, the fan kicks in at a lower temp and that the running temperature is pretty much 180*. Could be a change in the Gen 4x, so interested in hearing about others’ experience. But since the fan is controlled by the Coyote, and it both starts and shuts off automatically, I’m certain it works as intended. It’s just interesting that it’s at a higher than expected temperature. Granted, this was a first start, standing still, in 104F weather.
- I heard an intermittent metal on metal sound (ping) from the left rear wheel area when the wheels were turning, both in forward and reverse. I couldn’t feel any vibration, movement or impact in the axle. Didn’t hear anything from the diff or transmission. When I took off the tire, the intermittent sound wasn’t heard. My best guess is that it could be a bad wheel bearing since it’s only heard when there’s weight on the bearing. I drove the car back and forth on my driveway and could hear it every now and again when moving as well. I’ll post a separate post with the video of the sound to get input there. Any thoughts?
In the end, I took the car on a short go-kart ride as well. It is such a surreal feeling to have built this in my garage!
Build 2: Mk5 Complete kit | Coyote Gen 4X | TKX | IRS | Brake Booster | Traction Control | Ordered: 3/18/2026 |
Build Thread
Build 1: Mk4 Roadster | Coyote Gen 4X | Ordered: 1/31/2024 | Delivered: 4/11/2024 | First Start: 8/9/2025 | Legal: 11/5/2025 | Crashed: 2/16/2026
Build Thread
-
YooHoo! Congratulations! That's a big moment.
-
Post Thanks / Like - 1 Thanks, 0 Likes
-
-
Post Thanks / Like - 1 Thanks, 0 Likes
-
Thanks! Yes, it’s a great feeling that everything just started as expected without leaks!
I agree - it sounds really good!
Build 2: Mk5 Complete kit | Coyote Gen 4X | TKX | IRS | Brake Booster | Traction Control | Ordered: 3/18/2026 |
Build Thread
Build 1: Mk4 Roadster | Coyote Gen 4X | Ordered: 1/31/2024 | Delivered: 4/11/2024 | First Start: 8/9/2025 | Legal: 11/5/2025 | Crashed: 2/16/2026
Build Thread



 Thanks:
  Likes:


 Reply With Quote
