-
02-21-2026, 08:40 PM
#281
Nice work Hank. It can be overwhelming but stay at it. I'm at this exact stage on my Mk5 build. A little less complicated but then again a little less room. No DGD this time around, but do have cruise control which is a similar size box. Trying to pull off ducts in the dash (again) with a glovebox.
Last edited by edwardb; 02-22-2026 at 05:40 PM.
Build 1: Mk3 Roadster #5125. Sold 11/08/2014.
Build 2: Mk4 Roadster #7750. Sold 04/10/2017.
Build 3: Mk4 Roadster 20th Anniversary #8674. Sold 09/07/2020.
Build Thread and
Video.
Build 4: Gen 3 Type 65 Coupe #59. Gen 3 Coyote. Legal 03/04/2020.
Build Thread.
Build 5: 35 Hot Rod Truck #138.
Build Thread. Sold 11/9/2023.
Build 6: Mk5 Roadster 30th Anniversary #11,258.
Build Thread.
-
Post Thanks / Like - 1 Thanks, 0 Likes
-
02-22-2026, 05:28 PM
#282

Originally Posted by
edwardb

Nice work Hank. It can be overwhelming but stay at it. I'm at this exact stage on my Mk5 build. A little less complicated but then again a little less room. No DGD this time around, but do have cruise control which is a similar size box. Trying to pull of ducts in the dash (again) with a glovebox.
Thanks Paul, always enjoy watching your builds and appreciate your input…I think you might build 2 FFRs and a Plane in the time it takes me to get this coupe done!
-
Post Thanks / Like - 0 Thanks, 1 Likes
-
02-22-2026, 05:58 PM
#283
Dash and Gauges
Spent some time putting the gauge cluster together today and for the most part it seems done. I’ve had the gauges in the panel and the car before but now thinking about layout with all the wires seems rational, then you put in 2 sets of jumpers to the gauges and instant birds nest:

Not to mention how to get everything else in there. I have the Vintage Speedhut gauge kit, and converted my GPS speedo to a VSS speedo that will take the gray and green transmission wires from the T-56 computer and convert to speed. What I learned today is you lose the clock that is otherwise in the GPS gauge, so guess I’ll be wearing a watch when driving  . My gauges also come with the dimming switch and converter and they work and dim when hooked up to the power probe. I also bought Alpinetech 8 mm black LED indicator lights for turn signals, high beam, low beam, fog light, and Digital Guard Dawg ignition and added these to the dash, they’re high quality and subtle.
To get the wires organized and attached I made a bracket that goes over the 4 smaller gauges and sits on their spacers so its gapped a bit from the front panel, then is held down by the screw on backs of the gauges. So the gauge goes into the panel, then the spacer, then the screw on back.

I then added a couple of brackets to it - one to hold the dimmer resistor (3M auto taped and zip-tied to the bracket), and the other to hold where I imagined the main part of the harness would attach. I then drilled a bunch of holes into it like a peg board so I could insert zip-ties here and there and hold things down…that ended up working nicely. Not the prettiest, but works.

Here it is installed without wires:

And here it is “Finished”

Not really finished, need to hook up 3 gauges to their senders still and need to run leads in for the headlight, fog light, Digital Guard Dawg indicator lights. The red plus sign was the most generic that they had, and I will be burying the DGD ignition button under my dash and it will be activated by an old Lucas-style button. I tapped into the LED of the DGD ignition button and the red “+” sign will light up on the dash to let me know what the DGD is up to (thanks Paul for this tip, as the DGD gives info to the driver via its LED light).
Here are the wires up close. I know it’s a birds nest, but it seemed to fall into place. The zip ties through the holes of the bracket came in very handy. Not sure this is totally finished as need to run in the other wires as noted above. There was a system to the wiring, then it all went out the window.

Final pics in the next post:
-
02-22-2026, 05:59 PM
#284
Dash and Gauges (cont’d)
Finally, here she is…I’m a right side Tach person, not sure there’s a rule here for speedo vs tach position:

And if anyone needs help testing electronics with the Power Probe, I am happy to show up to your place with beverages and power probe away. I love the thing…all the lights work (I even tapped the signal and highbeam lights in the speedo to the indicators in the dash in case something burns out, didn’t add any wires to the project). The needles and bezels light up, and the dimmer works. I will say at full brightness, the gauge faces aren’t that bright, so I’m not sure the dimming adds that much, but it’s there. I also ran a common ground wire to everything in there (16G), used one of the 2 “Gauge Power” brown wires (removed the other one), and trimmed out the 4 or 5 white gauge face wires to just the primary wire. I left the Clock/Memory wire in there and capped it, just in case.
And here are the indicators…This is before I hooked up the turn signals and highbeam indicator in the speedo gauge indicators, but they will now turn on with their respective indicators…After this picture I flip flopped the position of the Fog and main Headlight indicators after this picture, dunno why, just a feeling…

I’m very happy with this, also took more time than I thought it would. I will likely re-jigger the wiring in there, so if anyone has suggestions, I’m all for them!
For interest here’s a picture of the indicators I used and their part numbers:

Last edited by rhk118; 02-22-2026 at 06:10 PM.
-
Post Thanks / Like - 0 Thanks, 1 Likes
-
02-22-2026, 08:40 PM
#285
Looks great Hank. I received a Power Probe for Christmas at the same time my car arrived and I have yet to use it (14 months later). Mostly because I don't know how but I probably need to dig into it - I'm pretty sure it can help me.
-
Post Thanks / Like - 0 Thanks, 1 Likes
-
02-22-2026, 09:05 PM
#286
Originally Posted by
PNWTim
Looks great Hank. I received a Power Probe for Christmas at the same time my car arrived and I have yet to use it (14 months later). Mostly because I don't know how but I probably need to dig into it - I'm pretty sure it can help me.
There are a couple of great videos out there on it, once you use it a bit it is absolutely second nature. You can test anything, check for ground, continuity, apply 12 volts, check voltage reading…etc. Really super easy to just put the leads on a + and - and test something. It’s fun. Not sure I would have found the wire for the LED light in my ignition button harness without it.
Last edited by rhk118; 02-28-2026 at 12:53 PM.
-
02-26-2026, 01:11 PM
#287
Great progress, Hank! Wiring can seem like it will never end at times. You're moving right along. Times two on the great functionality of the Power Probe. I used it to individually test all my circuits one at a time instead of waiting until the end and flipping the master cutoff switch. I plan to do the same on my Coupe build. Thanks for keeping us up to date.
Chris
Coupe complete kit. Index. Delivered: 4/22/24.
Build Thread. Coyote Gen 4X. T-56. IRS w/3.55. Wilwoods. PS. HVAC. Side windows.
MK4 Complete kit.
Build Thread Index. Delivered: 10/15/2020. Legal: 7/25/23. Coyote Gen3. TKO600 (0.64 OD). IRS w/3.55. PS. Wilwoods. Sway bars. This build is dedicated to my son, Benjamin.
Build Thread.
-
Post Thanks / Like - 0 Thanks, 1 Likes
-
04-06-2026, 05:03 PM
#288
Originally Posted by
rhk118
Back at it
pun intended...
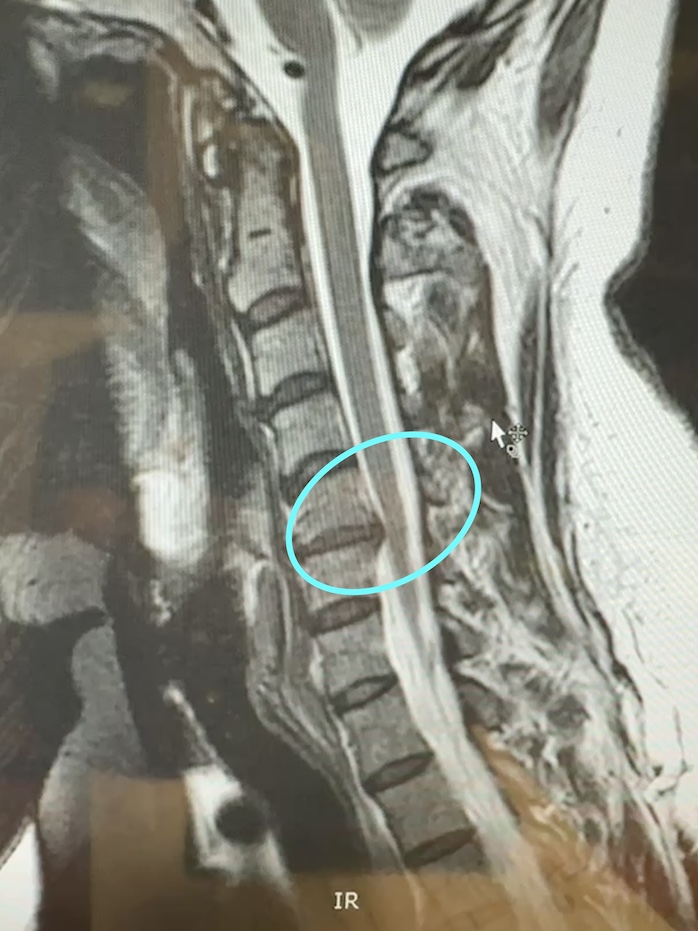
OUCH! This happened last Thanksgiving and 100% would not recommend a herniated disk with pinched nerves (not even 1 star out of 5 on yelp). Its been 8 months and Im starting to have more good days to the point that I feel safe working on the car again despite my bodys new feature. All I have to say about that is don't drink water too hard (haha). Or sneeze with your head in the wrong direction.
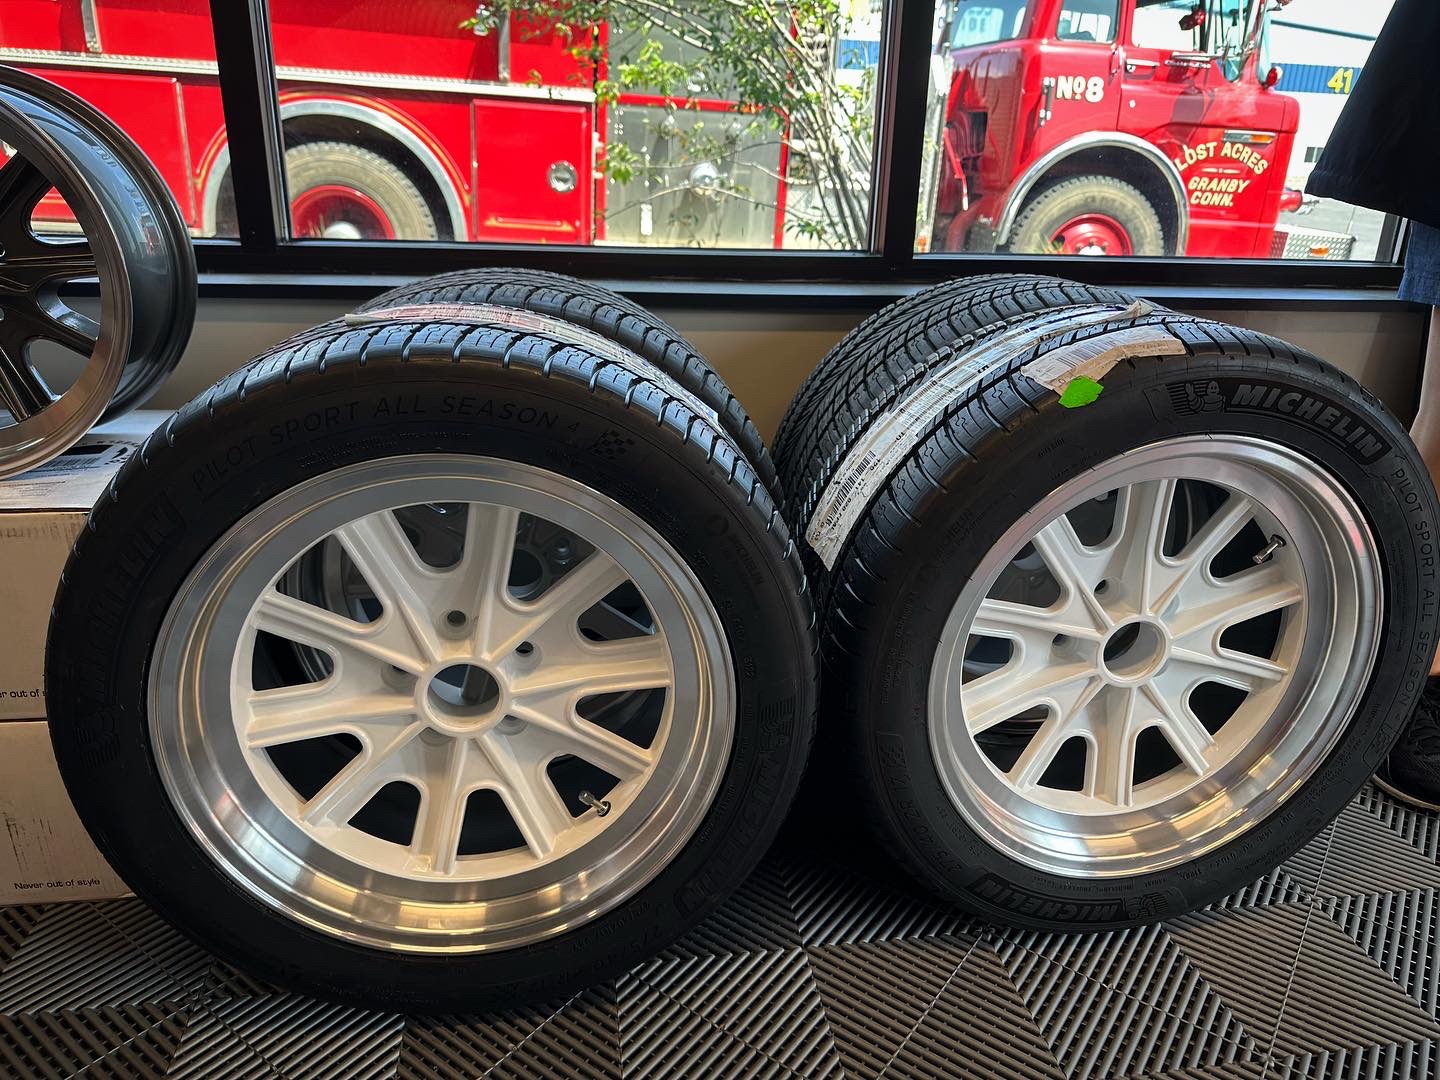
Not much has happened in the past 8 months. Tires got mounted. My kids pointed out that they look exactly like wheels on any Lego car
.I cant say theyre wrong but it made me laugh as I didnt make that connection and maybe just living out a childhood dream
Tires are Michelin Pilot Sport all season 4. Live in New England and these will see time in winter during the build and likely during some shake down runs. I don't want to have to worry about using a summer tire in 20-30 degree weather and wondering if any skittishness is the suspension setup, swaybars contacting in a corner, or just cold summer tires that have turned to plastic under 40 degrees. I'm sure these won't last long and are great for the roller and "honeymoon" phase...
Not much else has happened over 8 months. Got some panels powder-coated. Still dont have an engine (been almost a year at the builder now) and it seems that will be another 6 months at least as Im completely on other peoples timeframes with that. The engine needs to get dynoed, tuned, and painted, then I need to build a custom front end on it. Then need to mate the T-56 and test fit to see if I need to modify the transmission mount or cut the crossbar as others have had to do and see if I have the correct driveshaft length. Also waiting on some welding that Im going to have a shop do as I dont weld. Also on other peoples timeframes. Was going to be March, then May, then June, and supposed to get in early July. I am hoping for before next year at this point.
In the meantime, I did get the fuel filler neck into the gas tank and here is my iteration of that. I was able to use the FFR supplied bracket and used a nut-sert on the frame with a bolt going through the holes on the tank and the bracket:
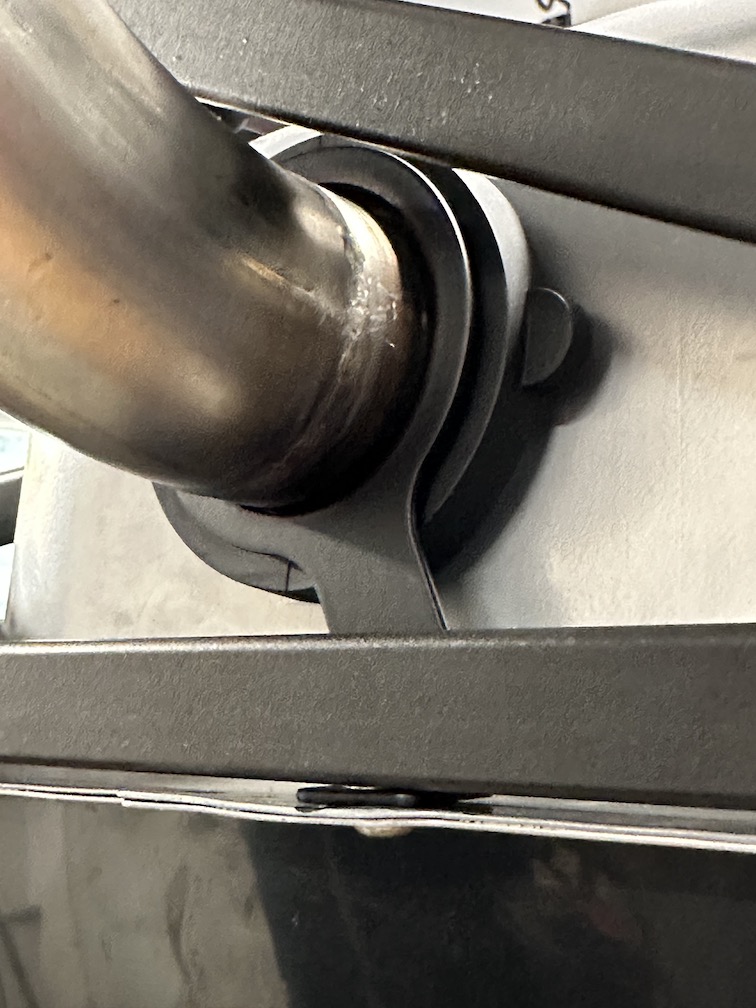
Disadvantage of this vs making my own Paul-style U shaped bracket is I need to drop the tank to change that if anything leaks or needs replacing and it cant easily be taken off.
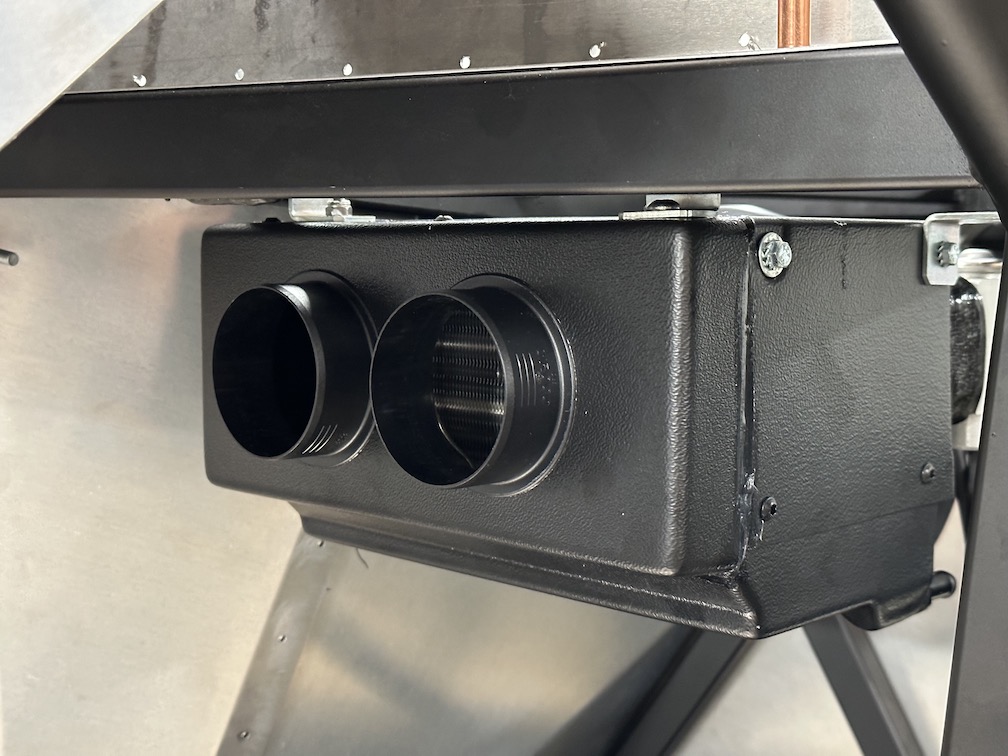
Also got the evaporator installed in what seems like the same orientation as the manual. This was much more straightforward than I thought, or maybe sometimes its better to be lucky than good. Seems all the rear end hookups are far enough from the frame that there wont be interference. Ask me later when that all needs to be hooked up.
Yesterday I installed the Tolton 90 degree adapter for the Wilwood brake bias adjuster.
How have you found the Michelin Pilot Sport AS4 on the car?
-
Post Thanks / Like - 0 Thanks, 1 Likes
-
04-07-2026, 09:39 AM
#289
For now they are doing well just sitting there on the car haha! It isn't a driver yet, plan is for this summer. I got those as it is currently snowing here today, and I need something that will work for driving in the summer fairly aggressively, but also perform well in the marginal spring and fall weather that crops up on us. They get good reviews, and the Corvette guys like them, so I imagine for my daily driving they will do well. But still a lot of wiring to go, then can finish putting the engine together and fire her up!
-
04-20-2026, 11:49 PM
#290
Hi Hank,
I have spent the last half hour reading through your posts. Not only are you doing a great job at building your car you are an excellent technical writer!
I was partly reading through because I want to replace my headlights with the trident ones and I remembered you had them. Sure enough I found them neatly logged and indexed in your thread! I also bought the diff vent parts you bought because mine is currently just pointing down towards the ground.
I rushed quite a few things last spring/summer to get my car on the road. I do not regret it and thoroughly enjoyed the 1000 miles I drove. I am now replacing a leaky power steering pump, trying to get my AC working, fiddling with the webers, and chasing an oil leak. I took all the webers apart which kind of felt like taking a watch apart when I was a kid. I have them back together but have not run the engine yet. I am also working on getting the p/s door to fit better, tidying up wiring. I entirely redid my wiring at the end of 2023 because it became such a mess. I followed much the same process youl are following and am very happy I did. I got to the end and then realized I did not have wiring for the fog lights, so I added couple of relays (one to only allow the fog lights to come on if the low beams are on, and the other to actually switch them on). I had intermittent issues with the headlights going on and off - apparently there is a the headlight switch has some sort of heat based cutoff. I did not realize there wasn't a headlight relay, so I added one. I also added air fuel wideband sensors to help me tune the webers (another relay) and am adding a microcontroller to allow me to add heat sensors and a few other gadgets. Anyway, I am about ready to rewire a second time because of the additional wires. Fortunately I labeled every wire which has saved me many times. I mention the relays in case you have not dealt with the fog lights.
Anyway, keep up the great work!
-
Post Thanks / Like - 0 Thanks, 1 Likes


 Thanks:
  Likes:


 Reply With Quote
