-
07-08-2022, 10:43 AM
#441

Originally Posted by
orangecruz

Hey Chris
Wow what can i say super jealous of your build. over the last few days I've read start to finish around work commitments.
What a car and what attention to detail Well done sir
Sorry to hear about Ben also , condolences to you and the family.
Keep up the excellent work

Hi Orangecruz. That W.O.R.K. thing gets in the way of what's important, no? 
Thanks for your generous encouragement. This has been quite an adventure so far, and a big challenge for me. I'm indebited to a number of the builders on this forum for so many great ideas, and help along the way. I don't know if you will be building a Roadster (or other F5 kit), but one of the cool aspects is you get to build it just how you want. No doubt you've already picked up on that. Keep us posted if you end up building one. In the meantime, there are a lot of great builds on this forum for you to check out.
I appreciate your kind words about Ben. He would have had an ear-to-ear grin listening to the Coyote rumble.
Originally Posted by
Ted G
Looking great Chris!
Thanks, Ted! Isn't this a blast?
Last edited by 460.465USMC; 07-08-2022 at 10:59 AM.
Chris
Coupe complete kit. Index. Delivered: 4/22/24.
Build Thread. Coyote Gen 4X. T-56. IRS w/3.55. Wilwoods. PS. HVAC. Side windows.
MK4 Complete kit.
Build Thread Index. Delivered: 10/15/2020. Legal: 7/25/23. Coyote Gen3. TKO600 (0.64 OD). IRS w/3.55. PS. Wilwoods. Sway bars. This build is dedicated to my son, Benjamin.
Build Thread.
-
07-16-2022, 09:00 PM
#442
Wilwood Pedal Box Completed with Brake Bias
The first time I saw the Wilwood remote brake bias was on Fman's build. At the time it hadn't even crossed my mind (no surprise there!). But after some thought seems like a very functional improvement. Especially, since I'd eventually like to check out Autocross. Now's the time to do it while everything is easily accessible.
I made a bracket to mount the adjustment knob underneath the steering shaft, just to the right of the RF fuse panel. It's a great spot JohnK identified, so I did what any good junior-assistant builder would do, and copied him. I drilled out the holes in the 2" square bracket for the Wilwood knob for some socket head 6-32" screws I had on hand. Added anti-seize to lube the threaded balance bar to avoid binding and ensure smooth operation from the bias adjustment knob. Also added anti-seize to the threaded rods as they engage the pedal clevis. Question for the forum: if you have successfully applied anti-seize without getting it all over everything, even once in your lifetime, my hat's off to you!

I watched a Tilton video showing how to adjust a pedal box balance bar. Their balance bar setup in the video looks pretty much identical in function to Wilwood's. It demonstrated how moving the spherical bearing (that rides the threaded balance bar) toward a particular MC increases the braking force applied by that MC. Translated to my Wilwood setup, rotating the knob clockwise (looking at the knob face) will move the spherical bearing closer to the front brake MC. So, I chose that sticker. Like JohnK said, there's a 50/50 shot at getting it right. Wilwood supplies a second sticker in their kit showing the opposite direction, so either way I'm covered.
Here's the YouTube video: "How to Properly Adjust Your Balance Bar".
Wilwood remote bias installed. (I also replaced the 1/8" rivets securing the RF fuse panel with 10-32 riv nuts. The wisdom of the forum seems nearly unanimous about making the panel removable to ease the windshield installation).
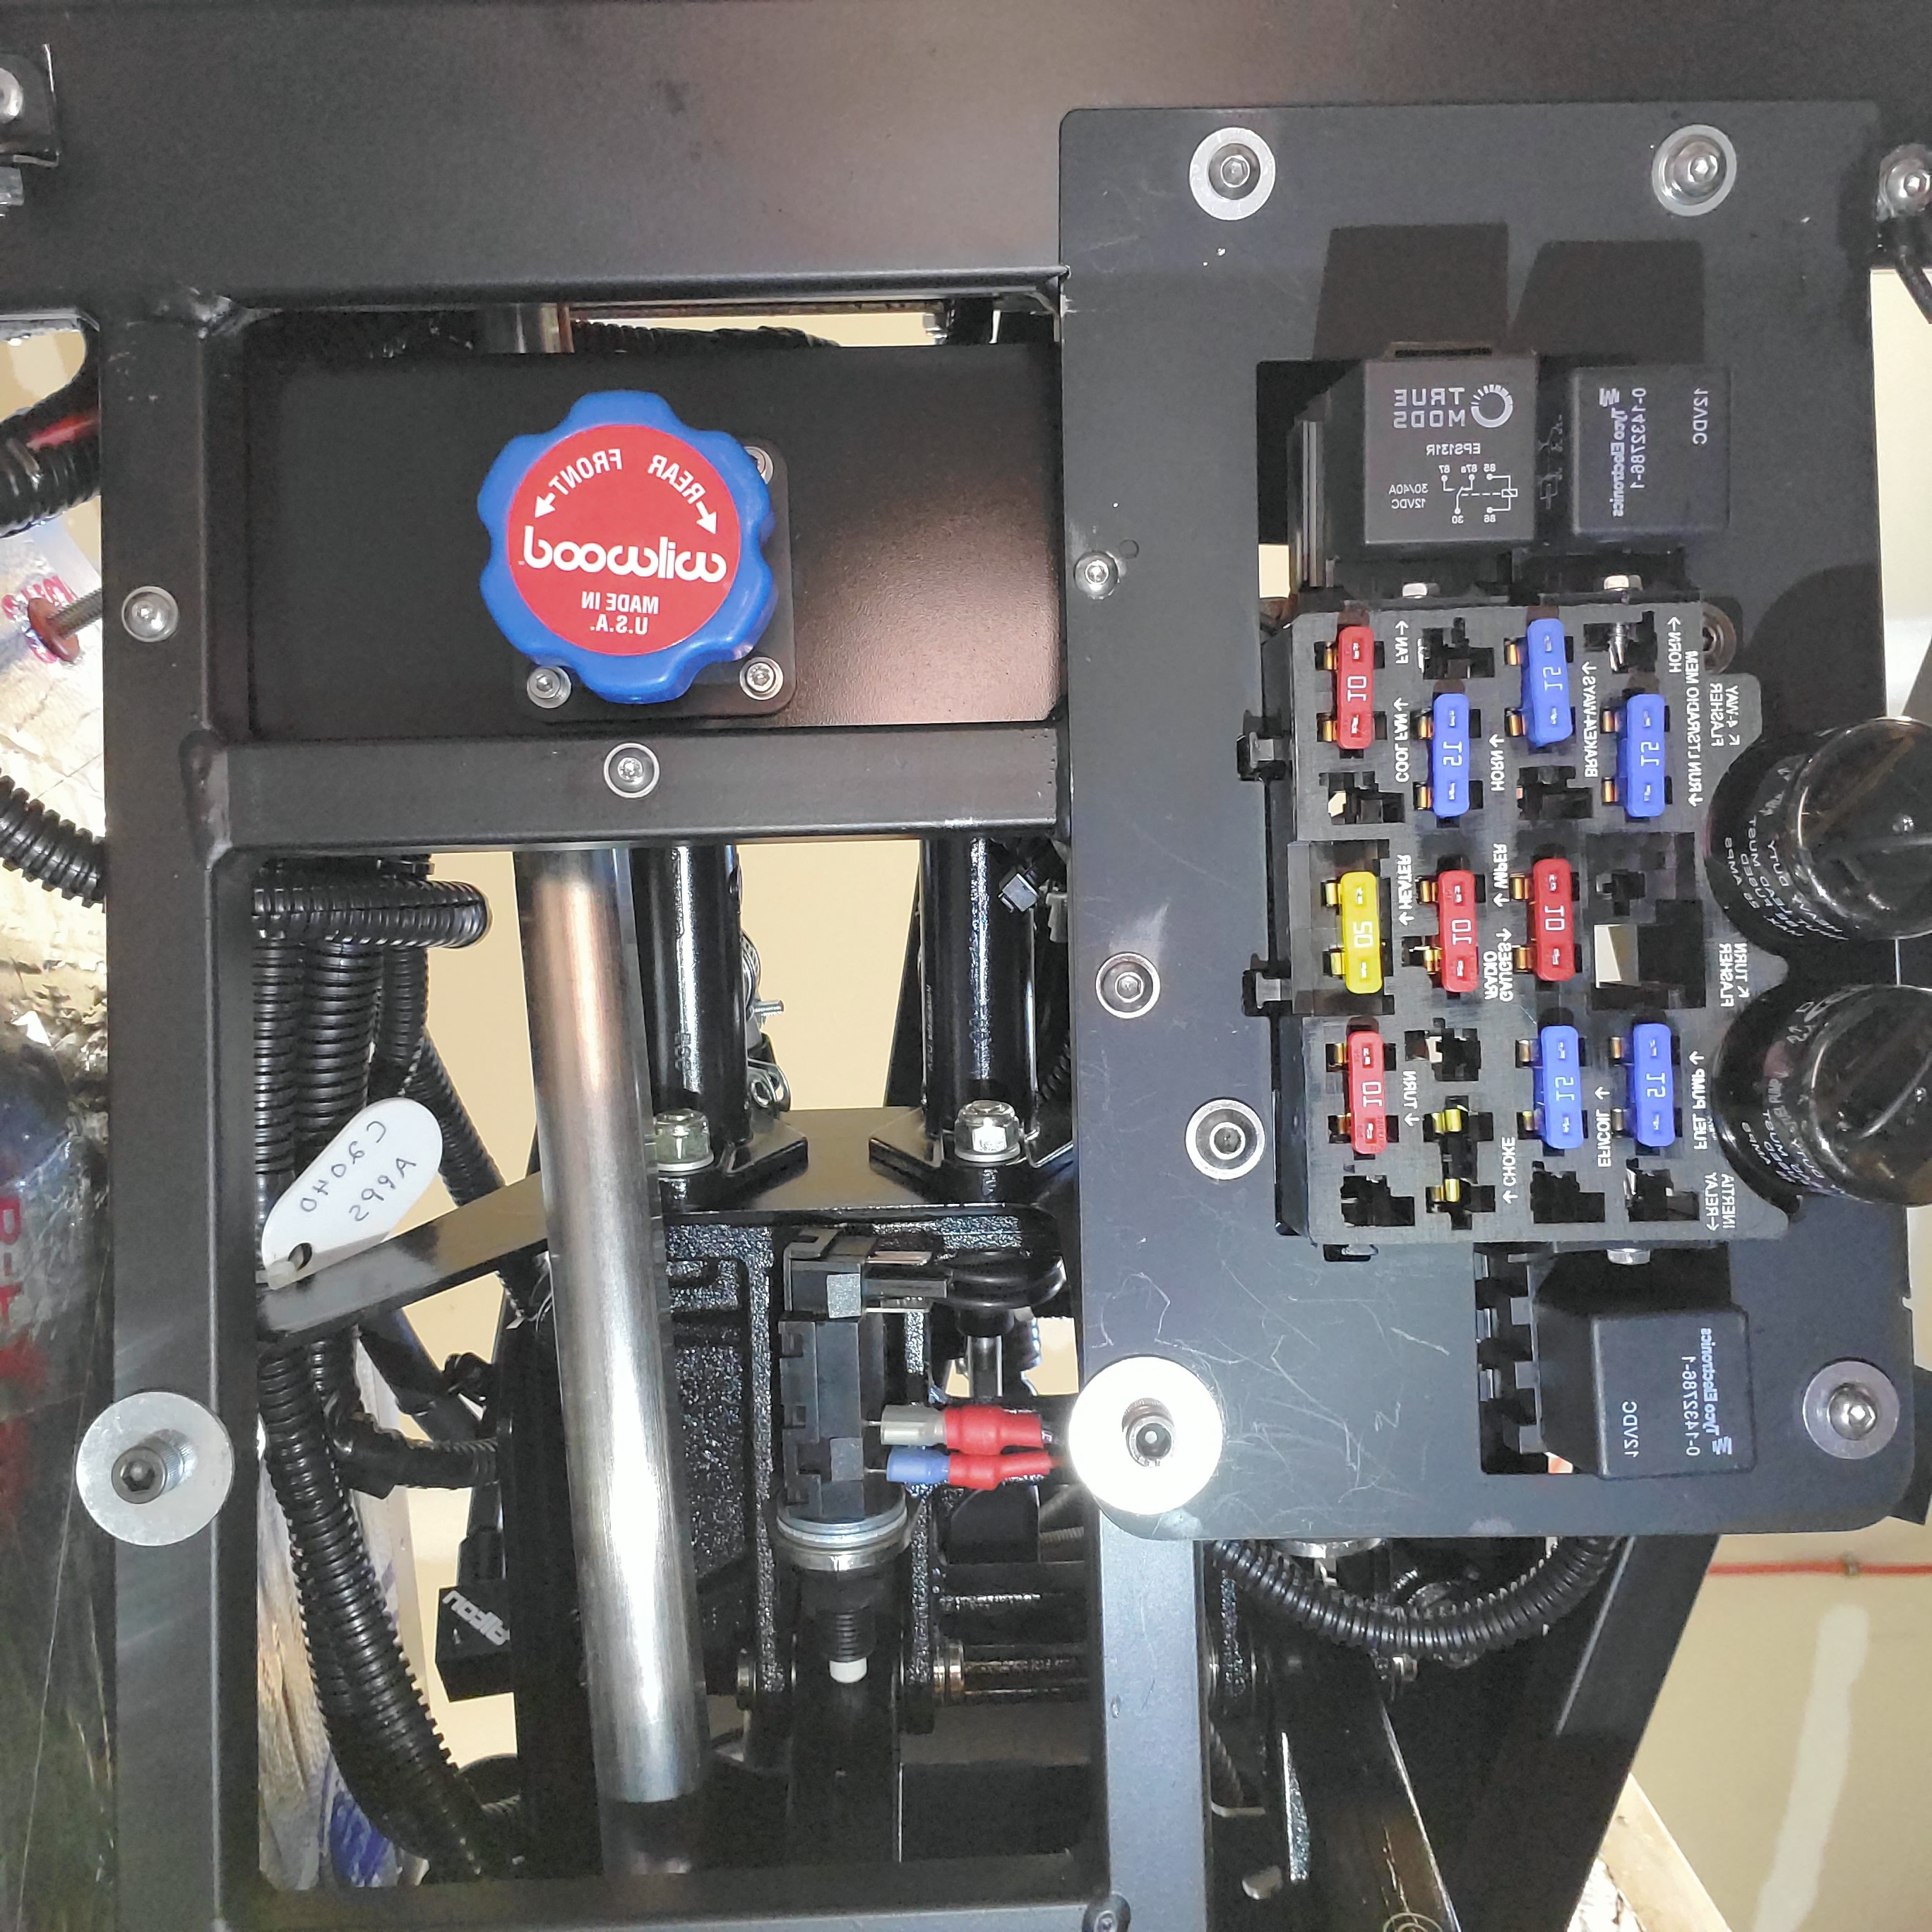
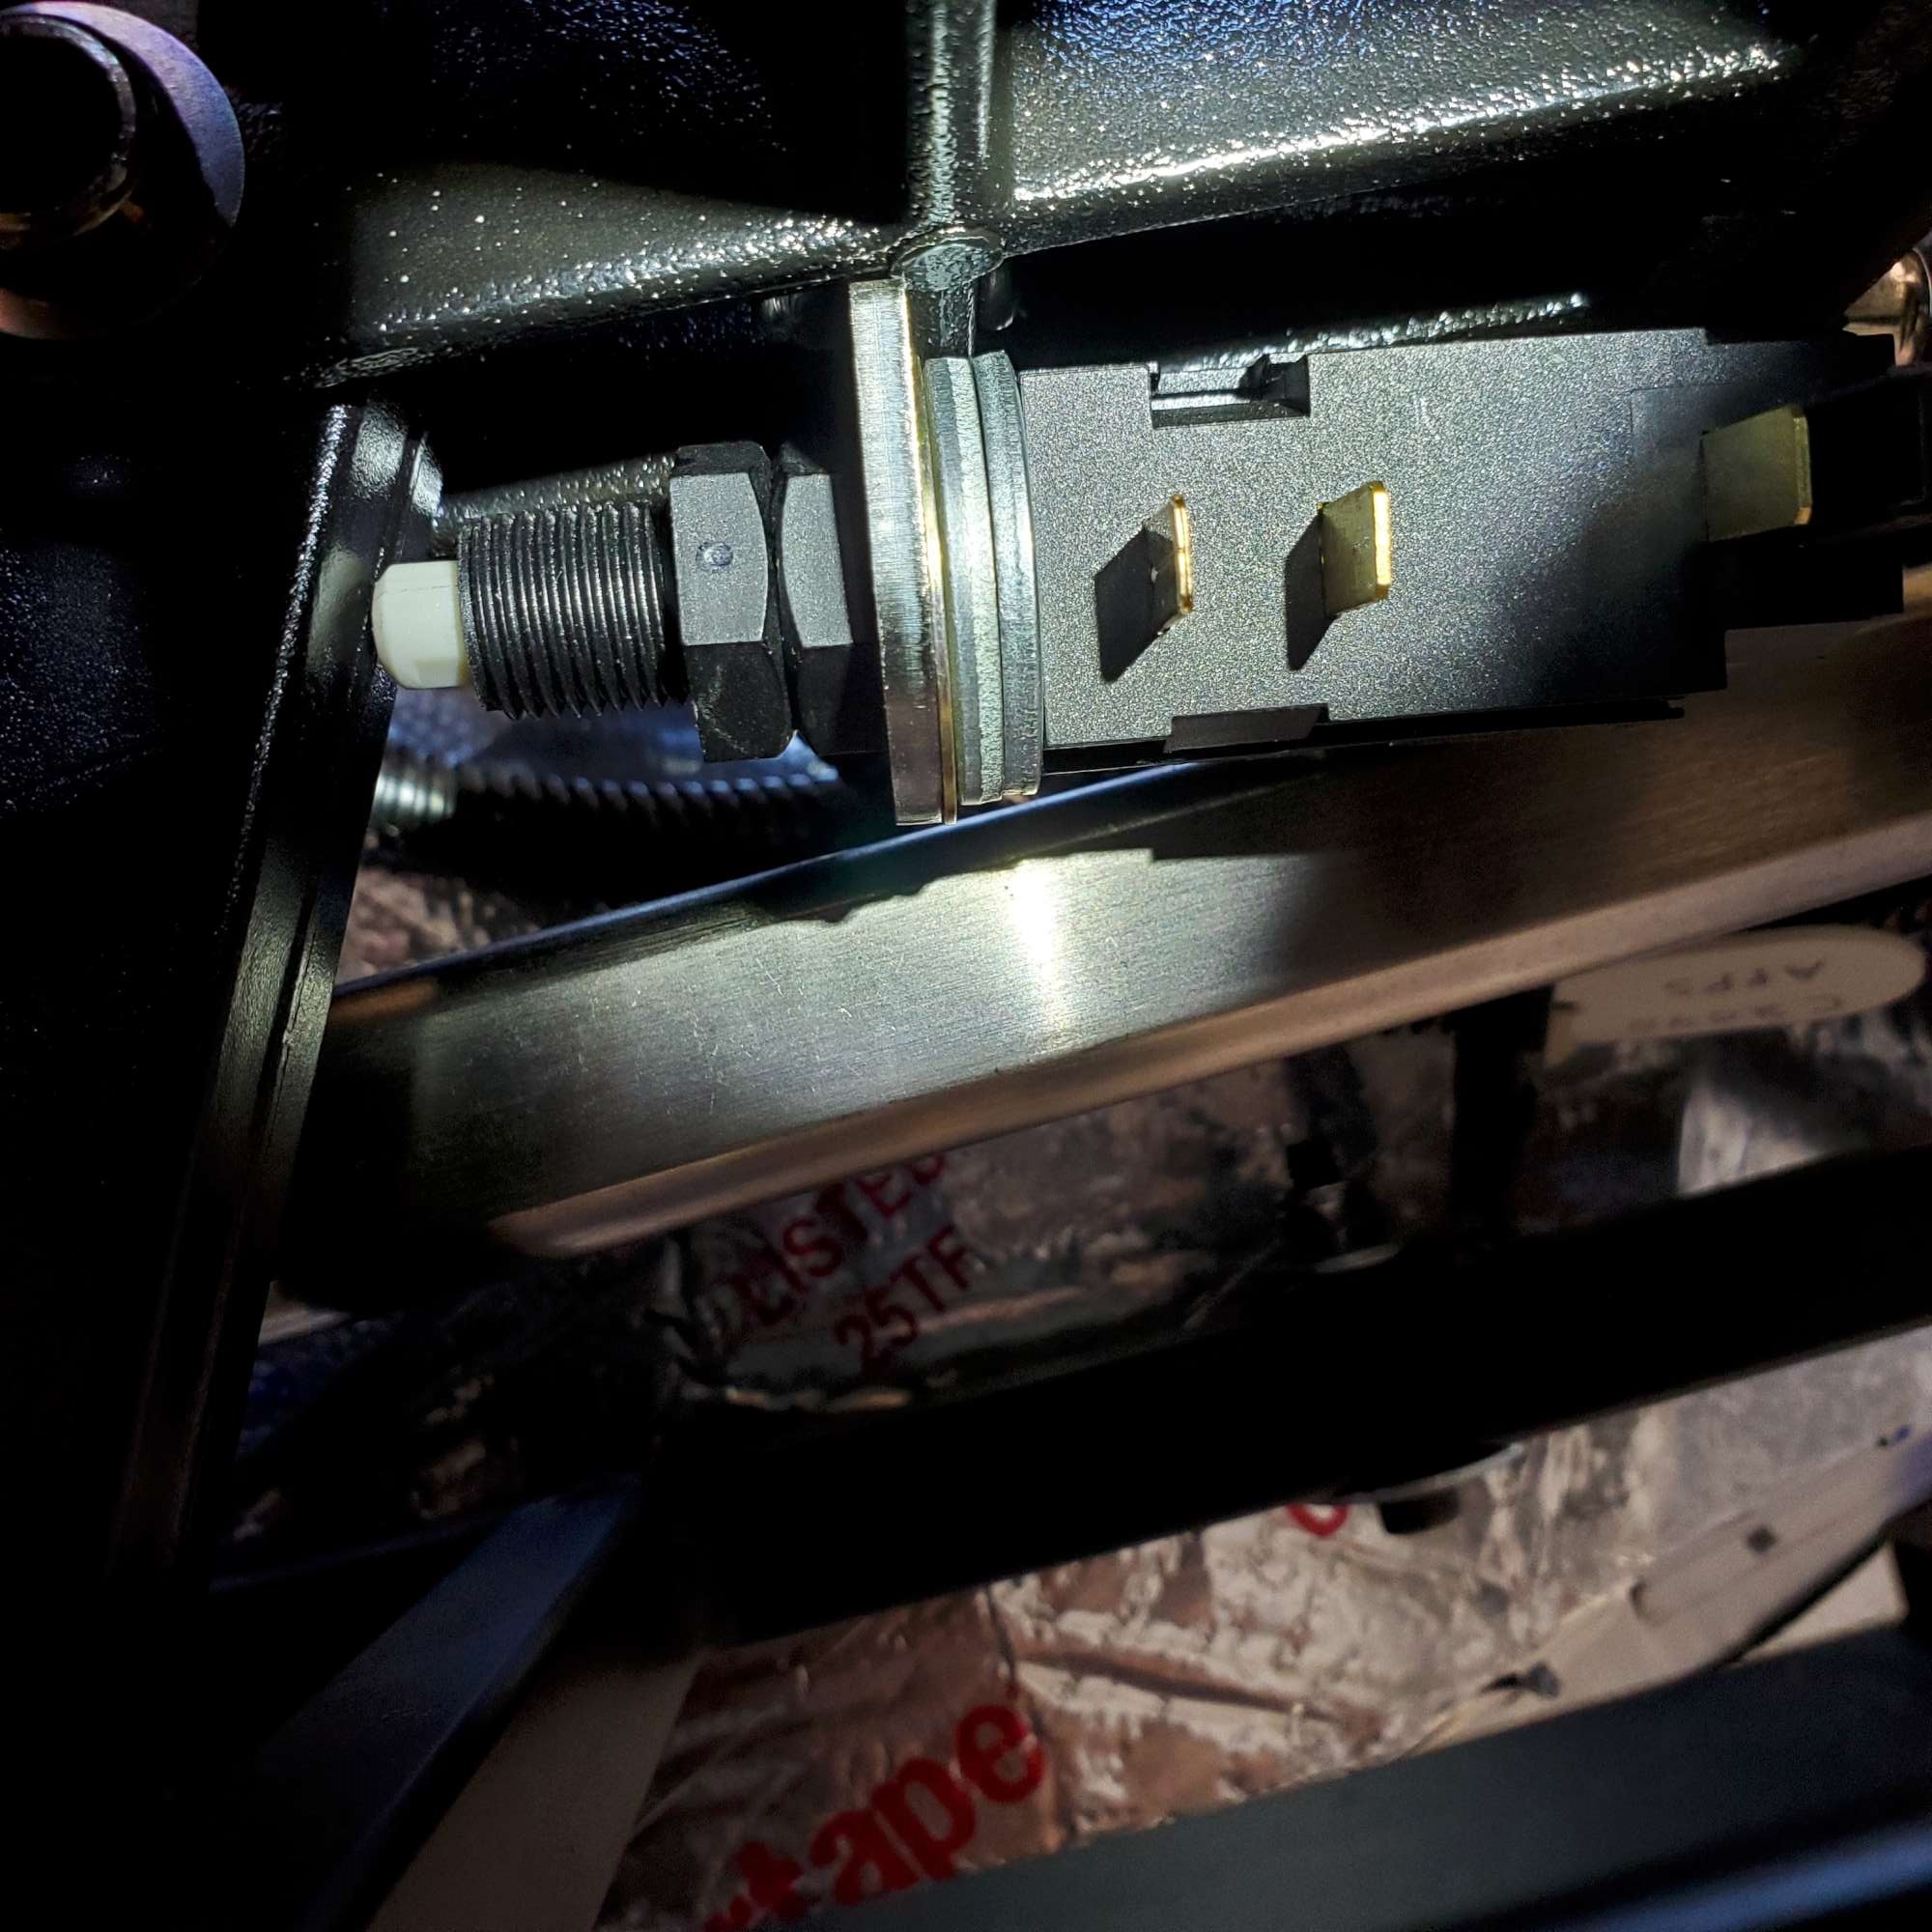
Brake light switch adjustment: this switch also feeds a safety start lockout input to my Digital Guard Dawg ignition. For whatever reason I mounted the brake switch bracket on the forward side (1+ years ago). I think this is at least partially why I had to add washers to push the switch rearward to match my brake pedal position at rest. (Mounting the bracket on the forward side moves the switch forward about 1/8"-3/16"). The switch closes electrically at ~1/2" of travel. I figure this will give me enough margin to avoid false brake light activation, yet still activate with minimal pedal travel. Will need some real world testing to know for sure.
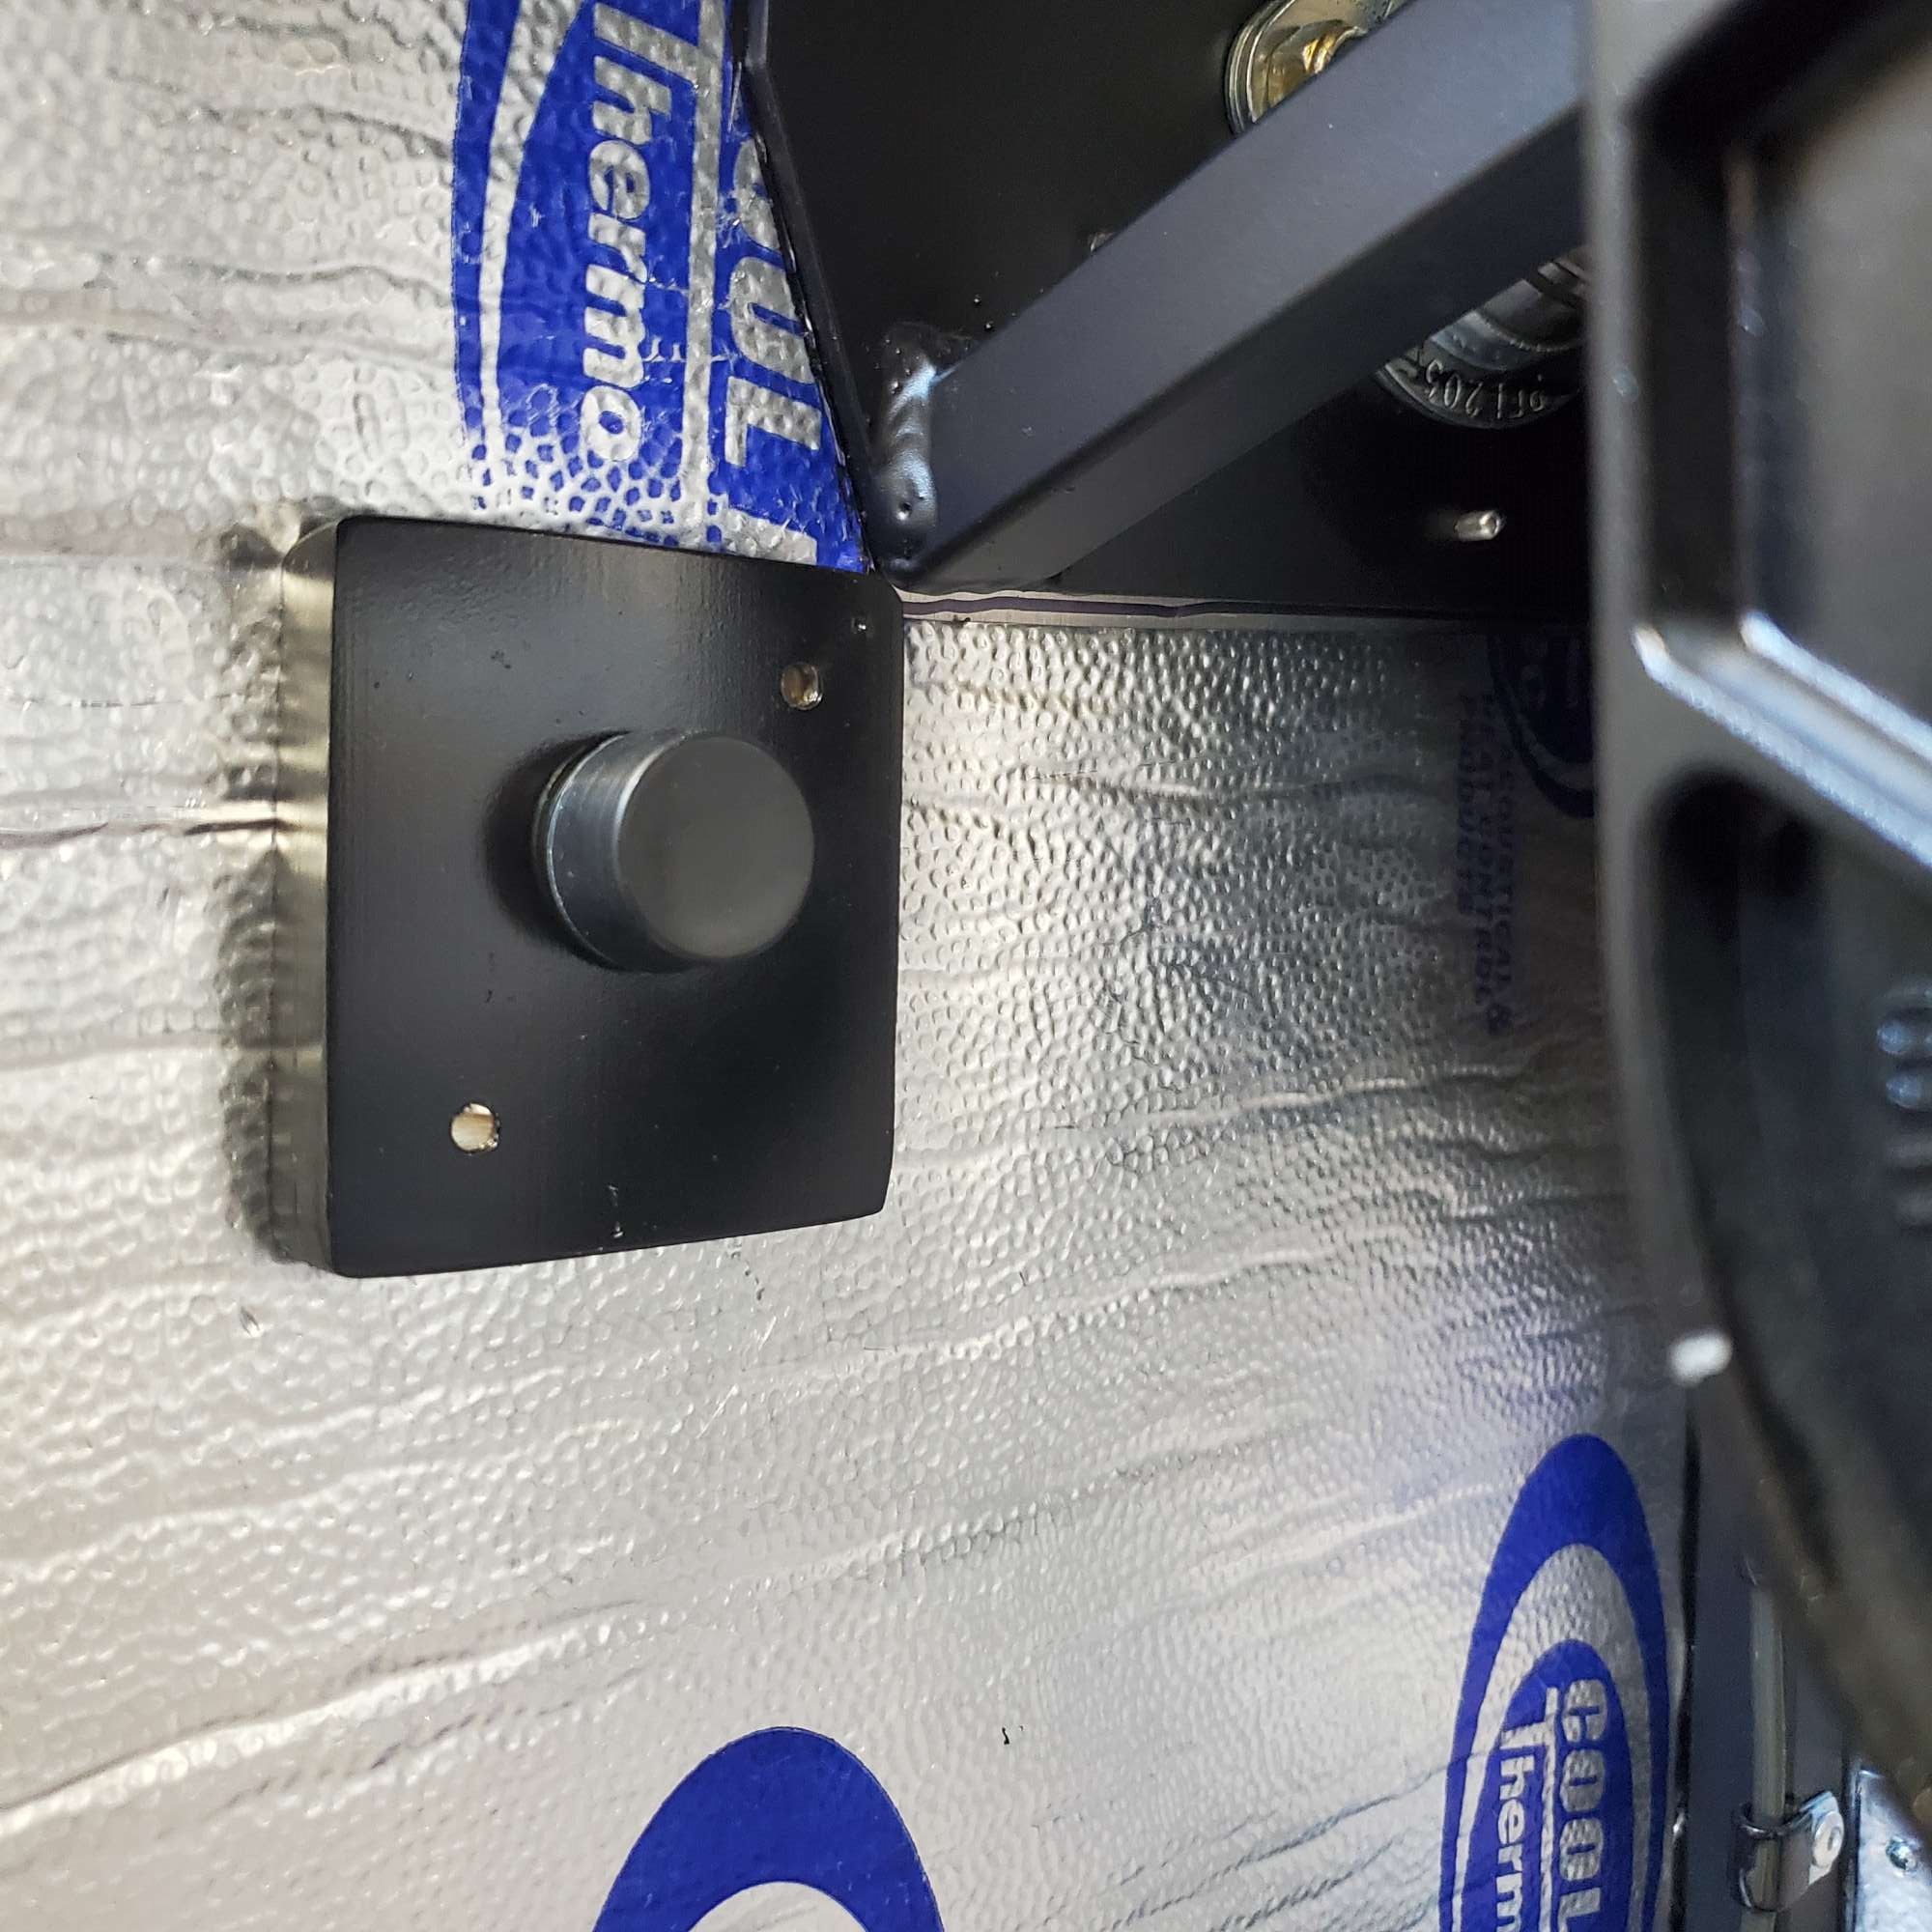
Clutch pedal and pedal stop: I played around quite a bit trying to find the optimum position for the clutch switch, clutch pedal position at rest, and pedal travel distance to engage/disengage. I also thought a bit about whether I should install a pedal stop. I think I could probably get by without a pedal stop, but decided to install one anyway. If I don't end up using it, no biggie. Just unthread the 5/16"-18 bolt. Plus, it's got to be easier to install now.
Using JB Weld I fastened together two pieces of 2" wide x 1/4" thick aluminum stock I had laying around. Tapped for 10-32 screws to attach it to the forward wall of the FB. Then tapped for the stop bolt. The stop bolt is a GM hood stop bolt with removable rubber head. I'm pretty sure I bought it on Amazon after seeing someone (Fman?) use it. A pair was around $10 or so.
With the pedal position I chose, the clutch engages/releases when the pedal is 1 5/8"-2" from the FB wall. I trimmed the clutch stop bolt so that the pedal can travel a bit past the engage/disengage point. I set it up this way to give my foot some extra pedal travel when starting from a dead stop. I don't want the clutch to grab immediately off of the floor. We'll see how it feels once I'm actually driving it.
I also wanted a little bit of margin on the engagement of the clutch switch. Meaning when the clutch pedal is fully extended (toward the front of the FB) the switch button does not bottom out. Bottoming out puts undo pressure on the switch.
I adjusted my clutch pedal to sit just about one inch above my brake pedal. The brake pedal sits a little above the gas pedal.
Here's a 24 second video of my clutch fork travel: Forte slave cylinder and bracket setup.
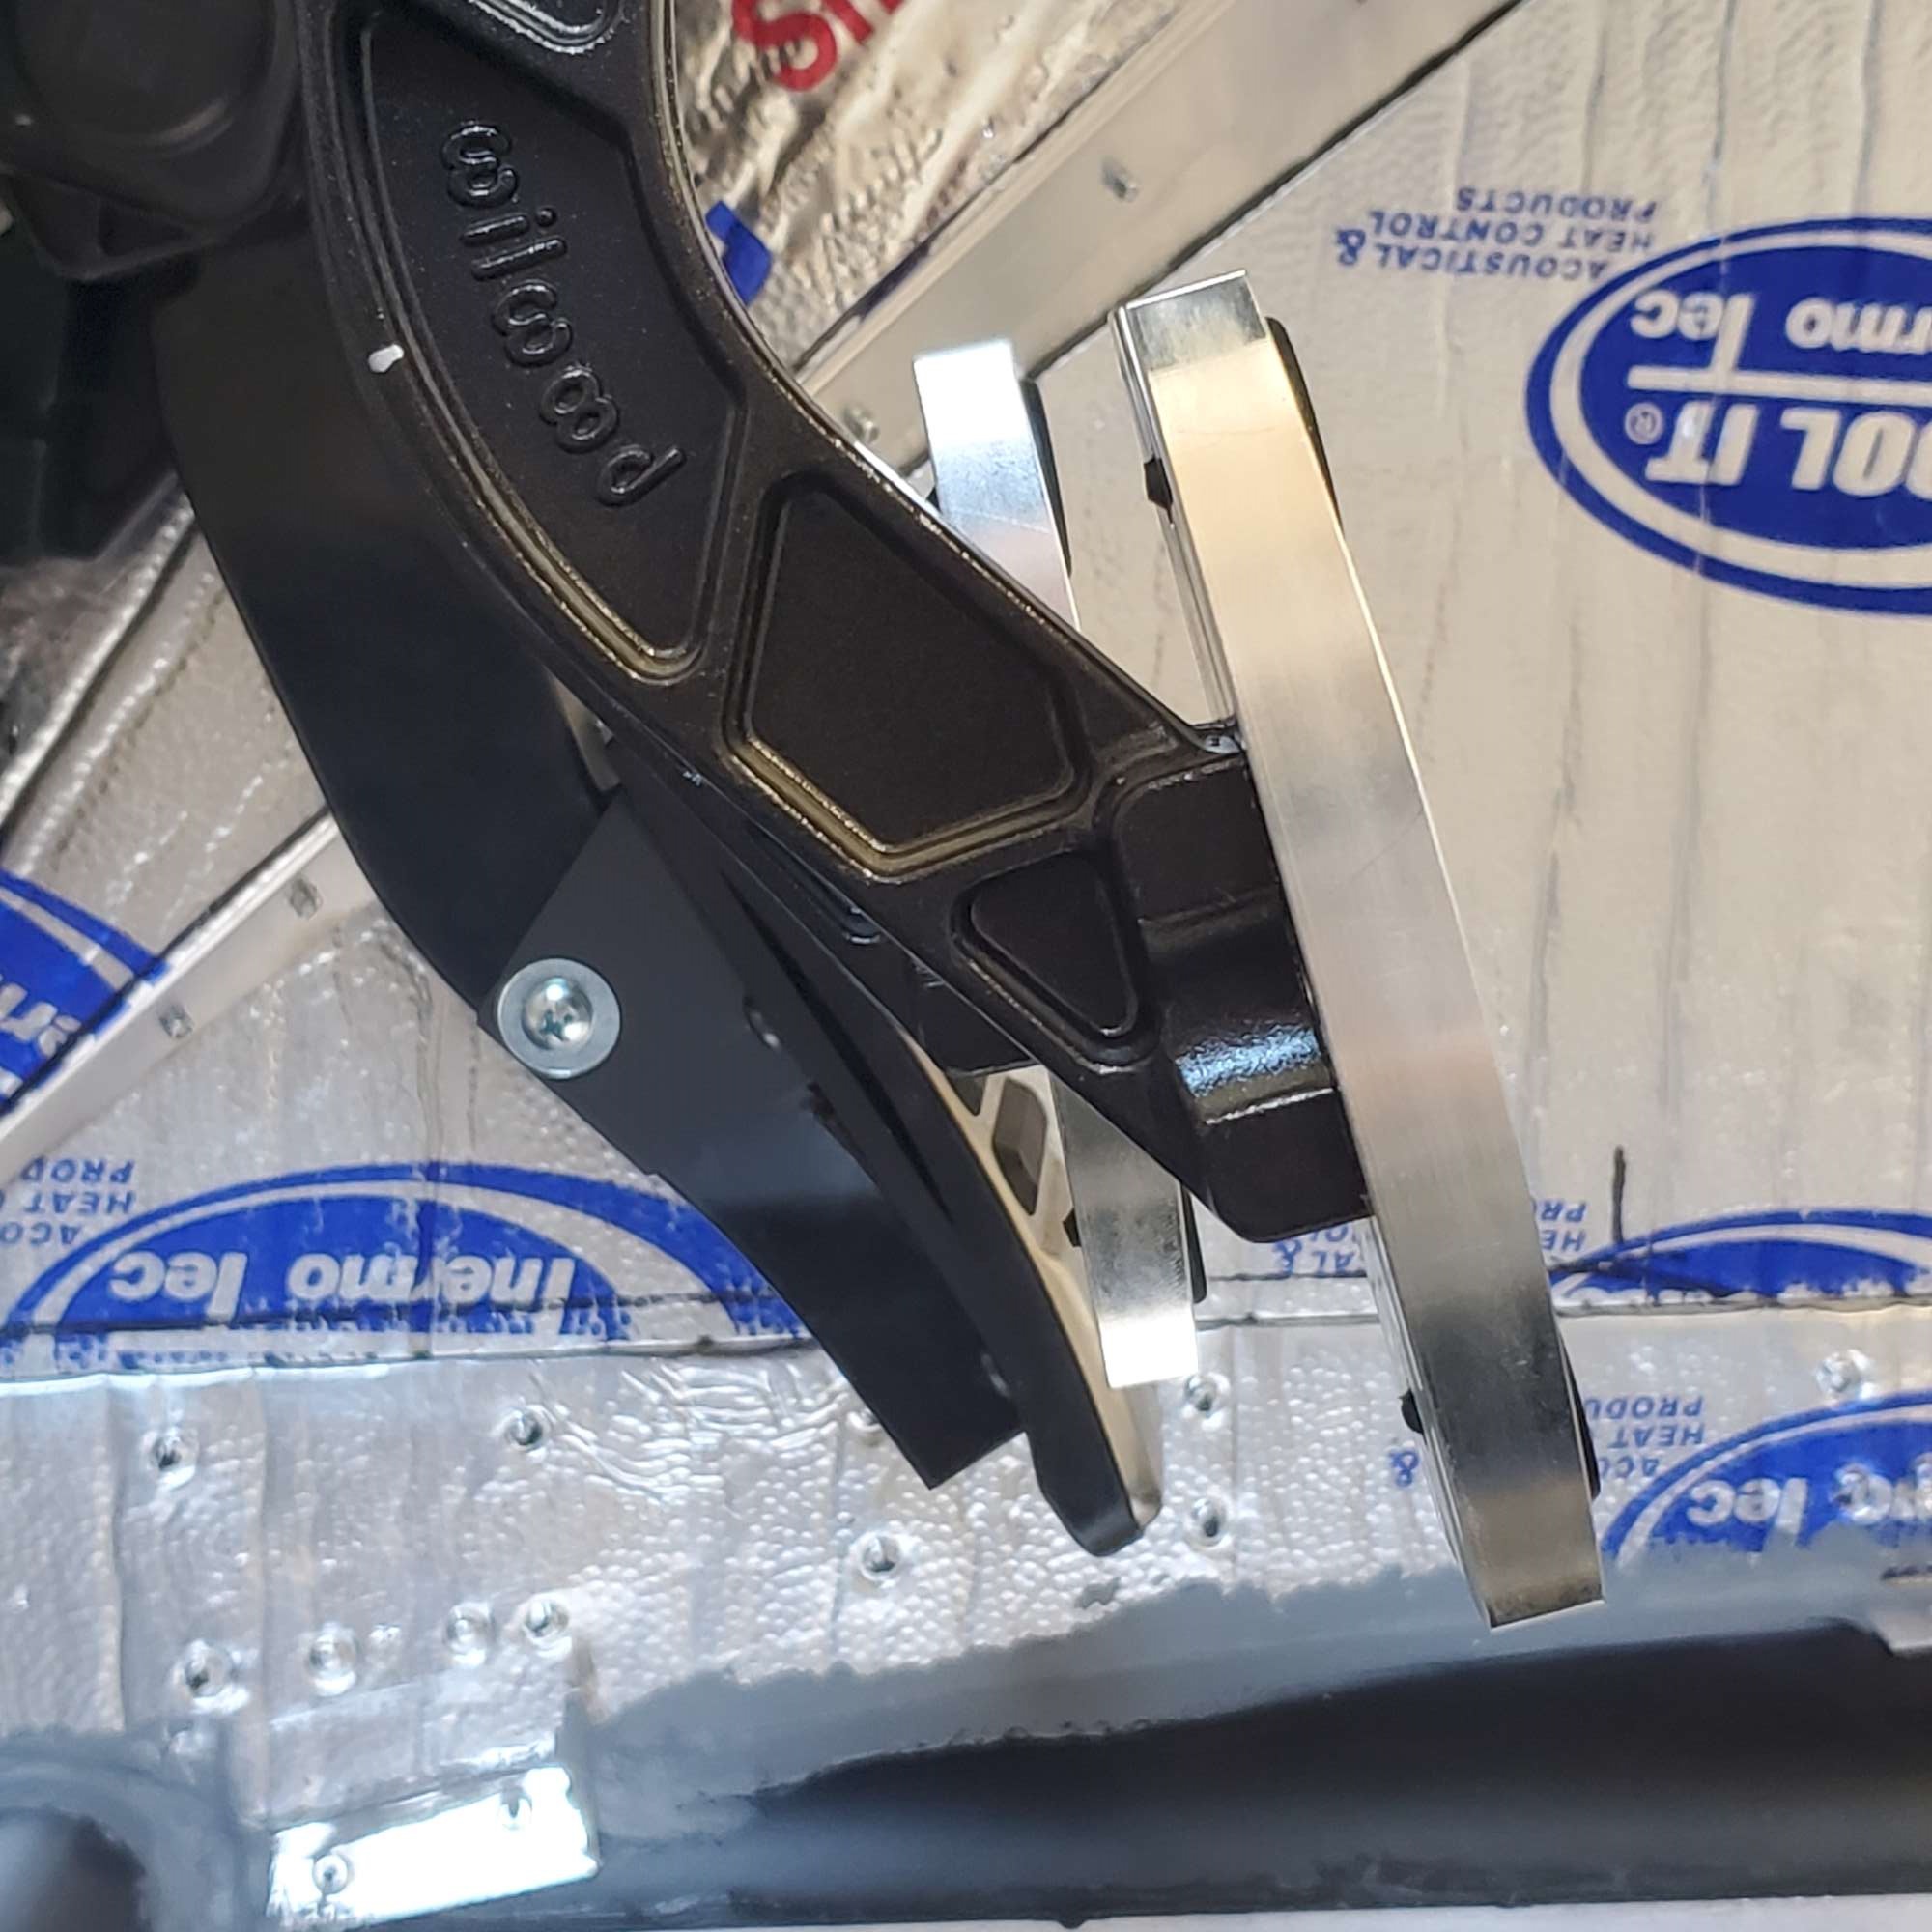
Here's a view of the pedals/pedal stop:

All in all I spent some quality time with the Wilwood pedal box, learned a ton about the balance bar, pedal placement, and the interaction between it all. Hopefully, I'm in the ballpark when I go-kart.
Last edited by 460.465USMC; 07-16-2022 at 09:21 PM.
Chris
Coupe complete kit. Index. Delivered: 4/22/24.
Build Thread. Coyote Gen 4X. T-56. IRS w/3.55. Wilwoods. PS. HVAC. Side windows.
MK4 Complete kit.
Build Thread Index. Delivered: 10/15/2020. Legal: 7/25/23. Coyote Gen3. TKO600 (0.64 OD). IRS w/3.55. PS. Wilwoods. Sway bars. This build is dedicated to my son, Benjamin.
Build Thread.
-
Post Thanks / Like - 0 Thanks, 3 Likes
-
07-18-2022, 09:52 AM
#443
Awesome work, very clean.
Could I trouble you to ask what the connection for the bias adjuster to the balance bar looks like from the top? Are you using a 90 degree adapter?
-Brandon
FFR MKIV 8309, FMS 306 Crate w/Edelbrock EFI, T5, 3.55 Three Link, Wilwood Brakes
-
Post Thanks / Like - 1 Thanks, 0 Likes
-
07-18-2022, 12:55 PM
#444
Hi Chopper. Thanks!
It's pretty crowded on top of the FB, but here's a picture of the connection using the Tilton 90 deg. adapter. I don't know how else to cleanly make the attachment, so I coughed up the $94 for that little guy.
Not a great picture, but about the best I could get to look through all of the plumbing.


Chris
Coupe complete kit. Index. Delivered: 4/22/24.
Build Thread. Coyote Gen 4X. T-56. IRS w/3.55. Wilwoods. PS. HVAC. Side windows.
MK4 Complete kit.
Build Thread Index. Delivered: 10/15/2020. Legal: 7/25/23. Coyote Gen3. TKO600 (0.64 OD). IRS w/3.55. PS. Wilwoods. Sway bars. This build is dedicated to my son, Benjamin.
Build Thread.
-
Post Thanks / Like - 1 Thanks, 2 Likes
-
07-18-2022, 01:46 PM
#445
Chris, thanks. I really like the mounting location of the knob for a cleaner dash.
-Brandon
FFR MKIV 8309, FMS 306 Crate w/Edelbrock EFI, T5, 3.55 Three Link, Wilwood Brakes
-
07-18-2022, 01:51 PM
#446
Thanks for the pictures Chris! I'll need to do my bias balance bar soon too!
-
Post Thanks / Like - 0 Thanks, 1 Likes
-
07-18-2022, 02:07 PM
#447
Originally Posted by
Chopper
Chris, thanks. I really like the mounting location of the knob for a cleaner dash.
-Brandon
Agreed! The location JohnK found is like it was made for it. Easy to reach yet out of sight.
Chris
Coupe complete kit. Index. Delivered: 4/22/24.
Build Thread. Coyote Gen 4X. T-56. IRS w/3.55. Wilwoods. PS. HVAC. Side windows.
MK4 Complete kit.
Build Thread Index. Delivered: 10/15/2020. Legal: 7/25/23. Coyote Gen3. TKO600 (0.64 OD). IRS w/3.55. PS. Wilwoods. Sway bars. This build is dedicated to my son, Benjamin.
Build Thread.
-
Post Thanks / Like - 1 Thanks, 0 Likes
 JohnK
JohnK thanked for this post
-
07-22-2022, 09:50 AM
#448
I did the same thing to my clutch pedal. I found for me it functions better closer, plus keeps me from double tapping it when braking.
-
Post Thanks / Like - 0 Thanks, 1 Likes
-
07-24-2022, 10:54 PM
#449
Air Straightener | Steering Shaft Finalized
I continue to chip away at the items I want to get done before first go-kart. This week I checked off a few.
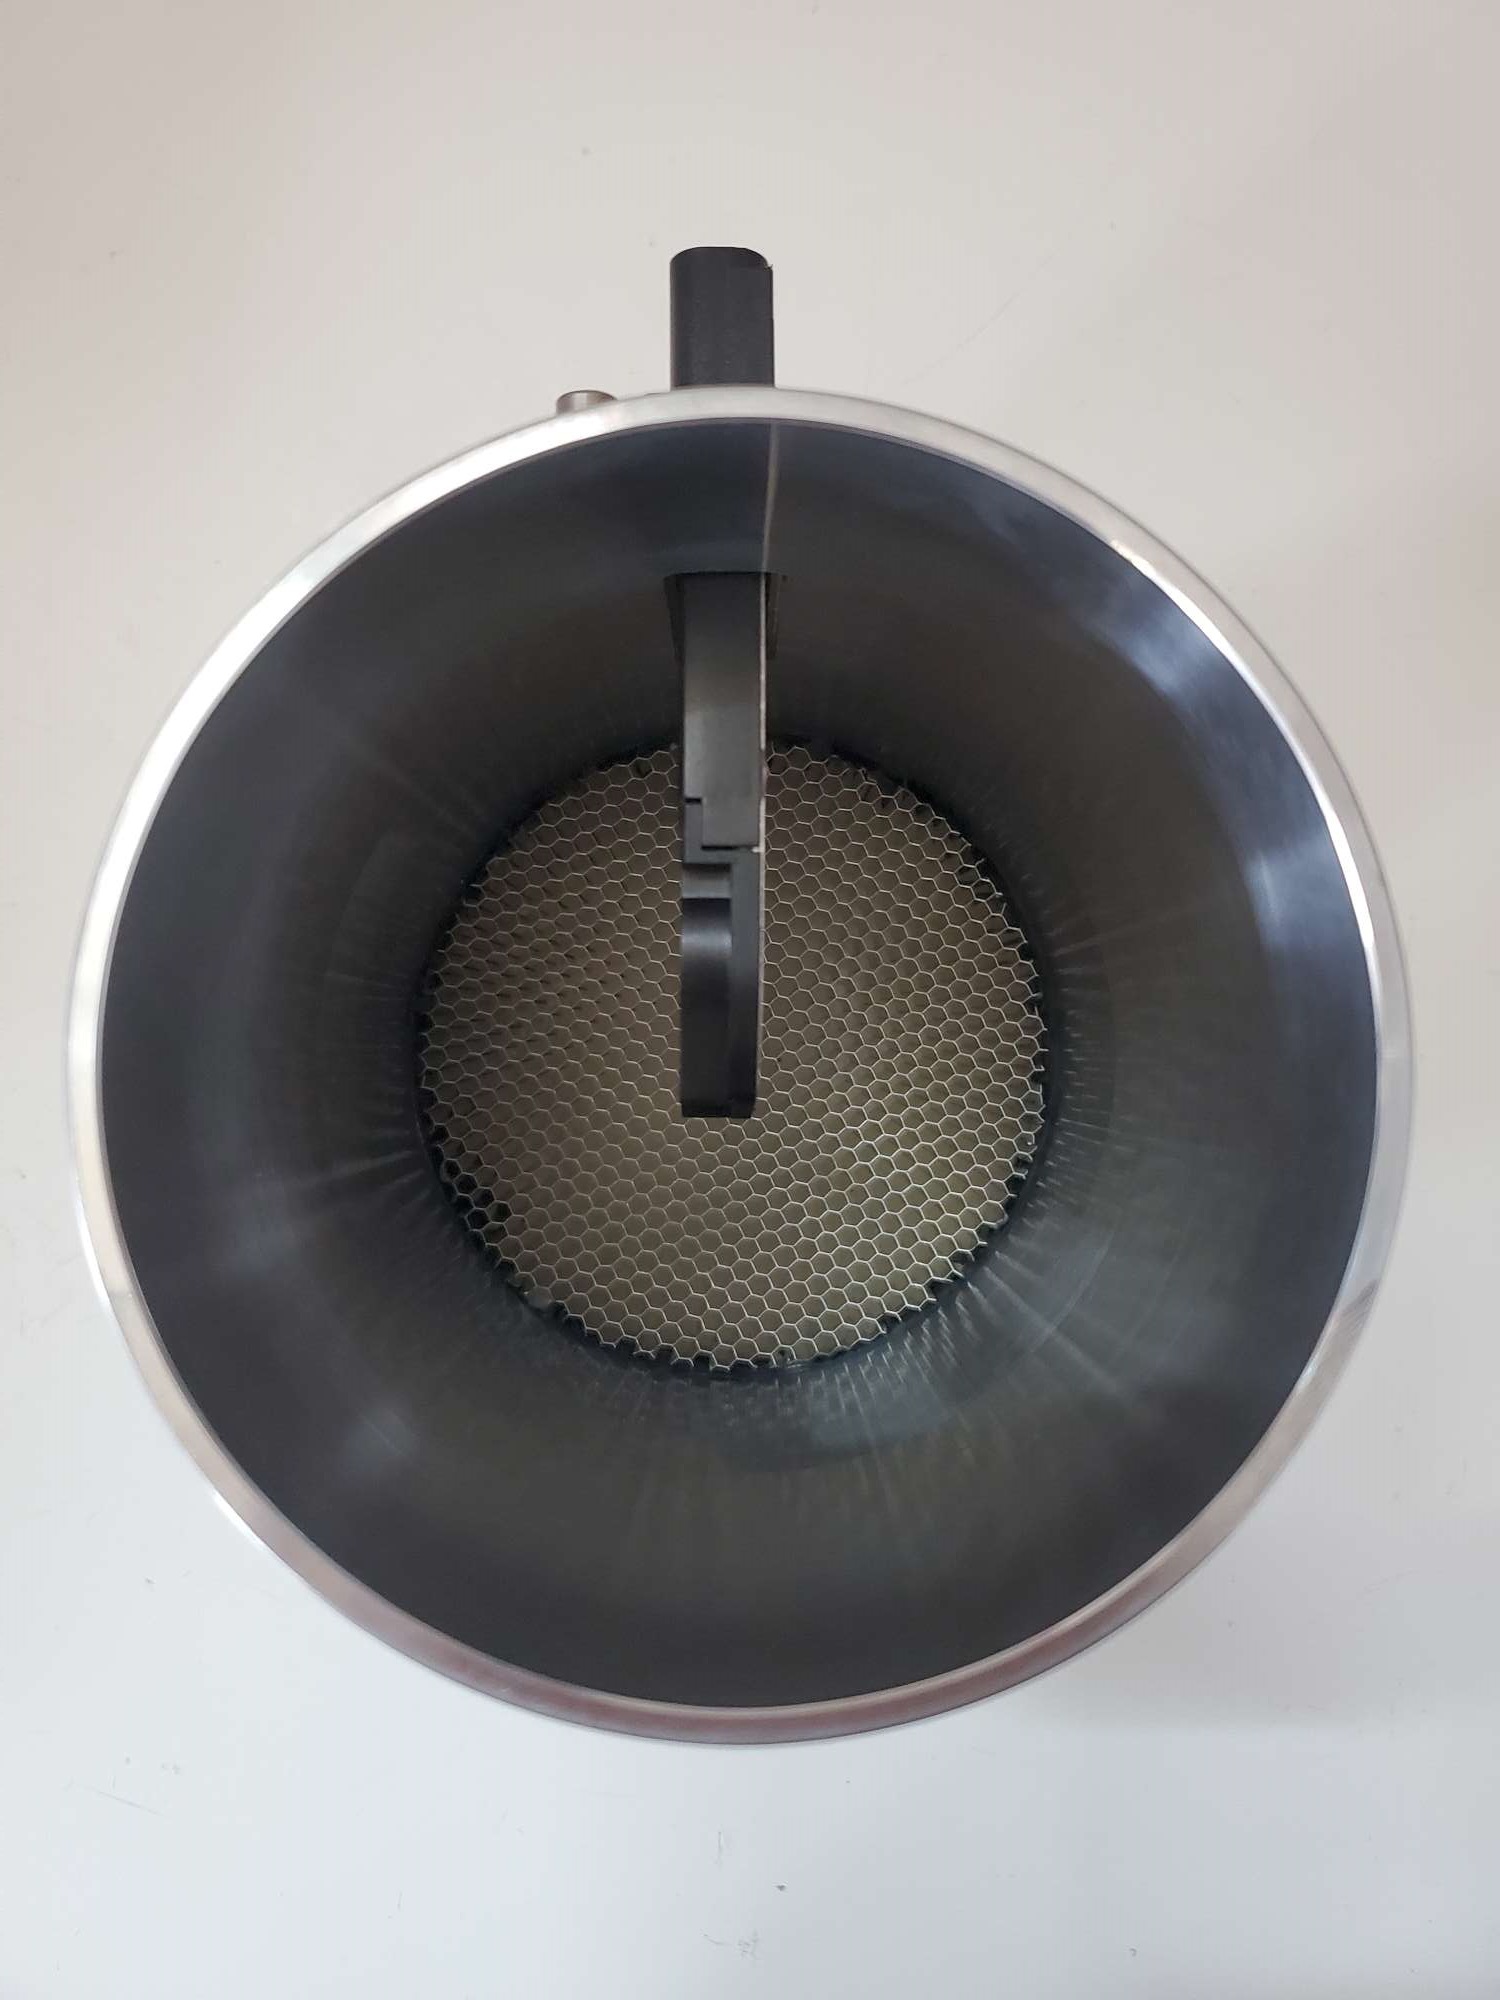
Treadstone Perf - Honeycomb Air Straightener: I ordered the 4" version and secured in place with JB Weld. It sits about 1/2" from the air filter side of the 4" Spectre tube, and ~2.5"-3" from the MAF sensor. No trimming required. The fit could have been a little tighter, but I guess it doesn't matter since it's locked in place now. Wanted it in place before I get a custom tune someday.
Here it is installed as viewed from the rear, i.e. air will flow toward you.
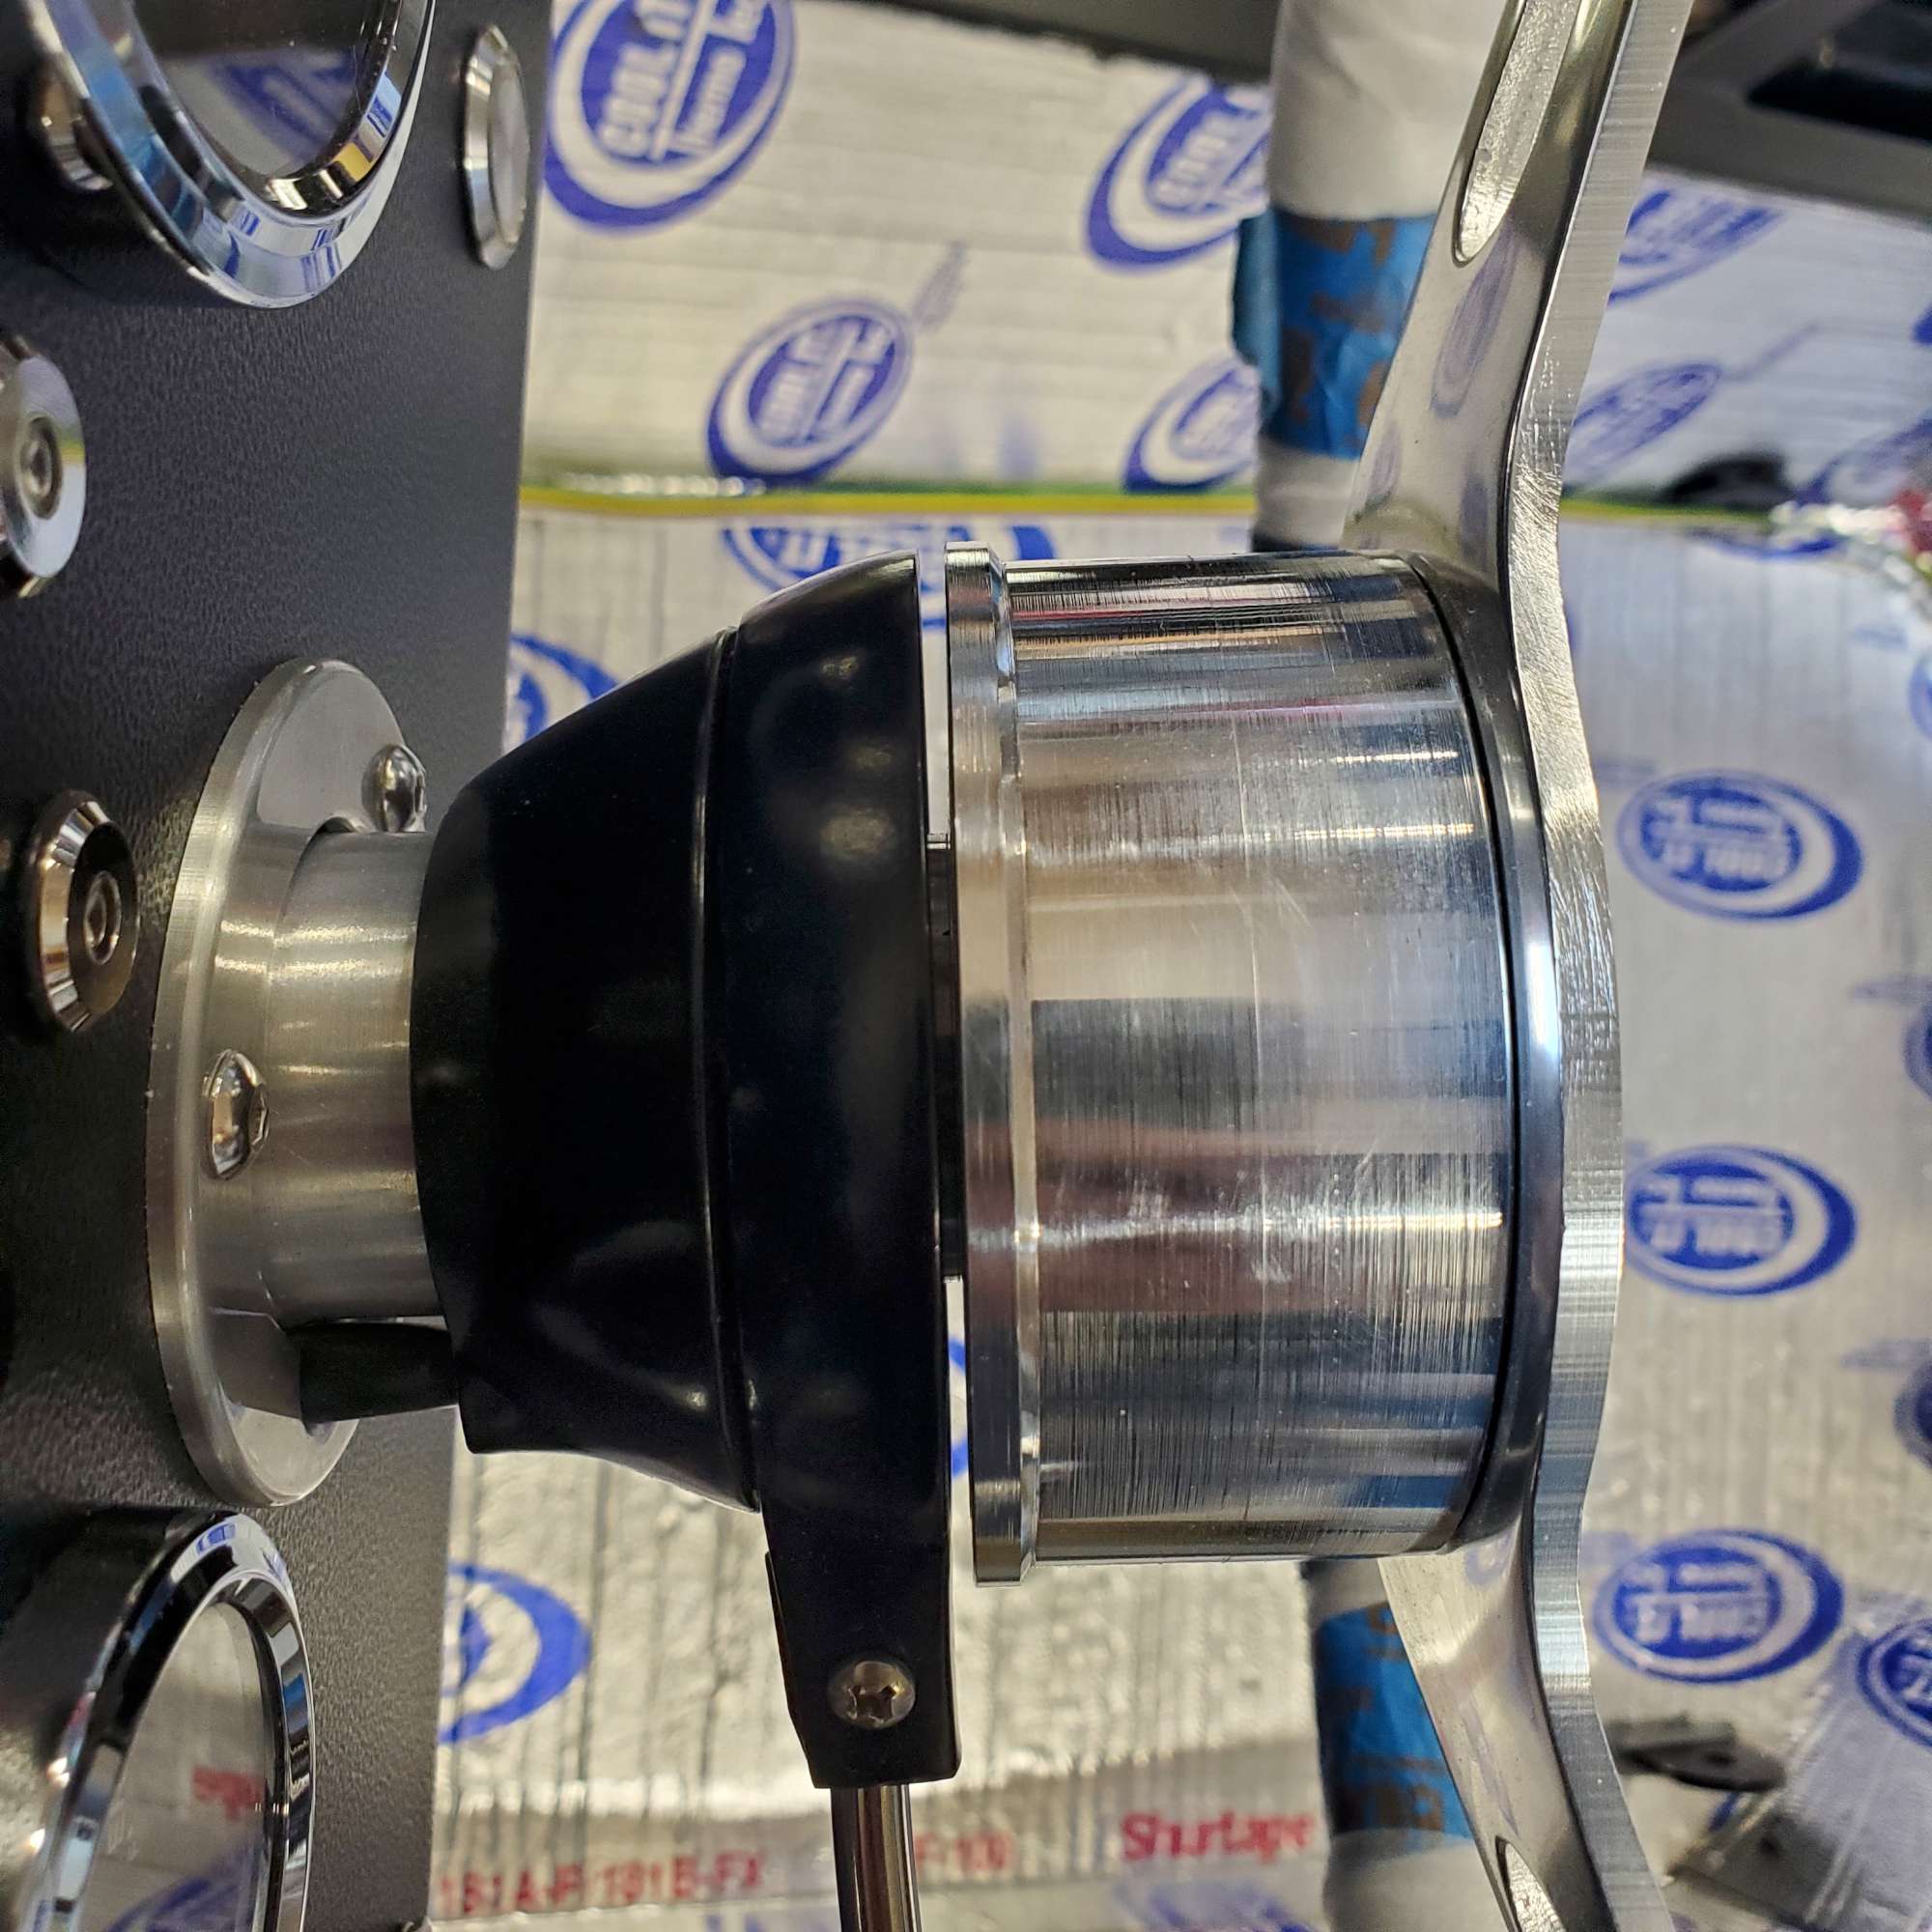
Steering shaft finalized: When I originally installed the steering shaft (~1.5 years ago) I didn't realize it was adjustable, and the mid- and upper-shaft pieces are supposed to slide together by hand. Or, with only light taps from a mallet. I'm using the Russ Thompson turn signal setup. Had ~ 1 inch gap between the polished hub and the switch collar. Not good. So, I removed the shaft and disassembled it.
As I alluded to above, my upper steering "D" shaft didn't slide very easily into the mid-shaft. Thankfully, I was able to separate with just a bit of persuasion. I slid a piece of rebar into the bottom of the mid-shaft, and separated them with a few knocks from a hammer. I've read a number of threads where builders report these don't slide together as issued by F5. Mine was in that camp.
So, I put some elbow grease into it using a piece of abrasive open mesh cloth. The idea was to remove any burs or rough spots on the upper shaft. Unfortunately, I didn't have a good way to polish the inside of the mid-shaft. So, reached in there as far as I could with the mesh cloth using my finger. I also used my Dremel to remove any burs from the edge of the mid-shaft where the upper shaft slides in. Then I added a thin layer of bearing grease. This really helped them slide together more easily.
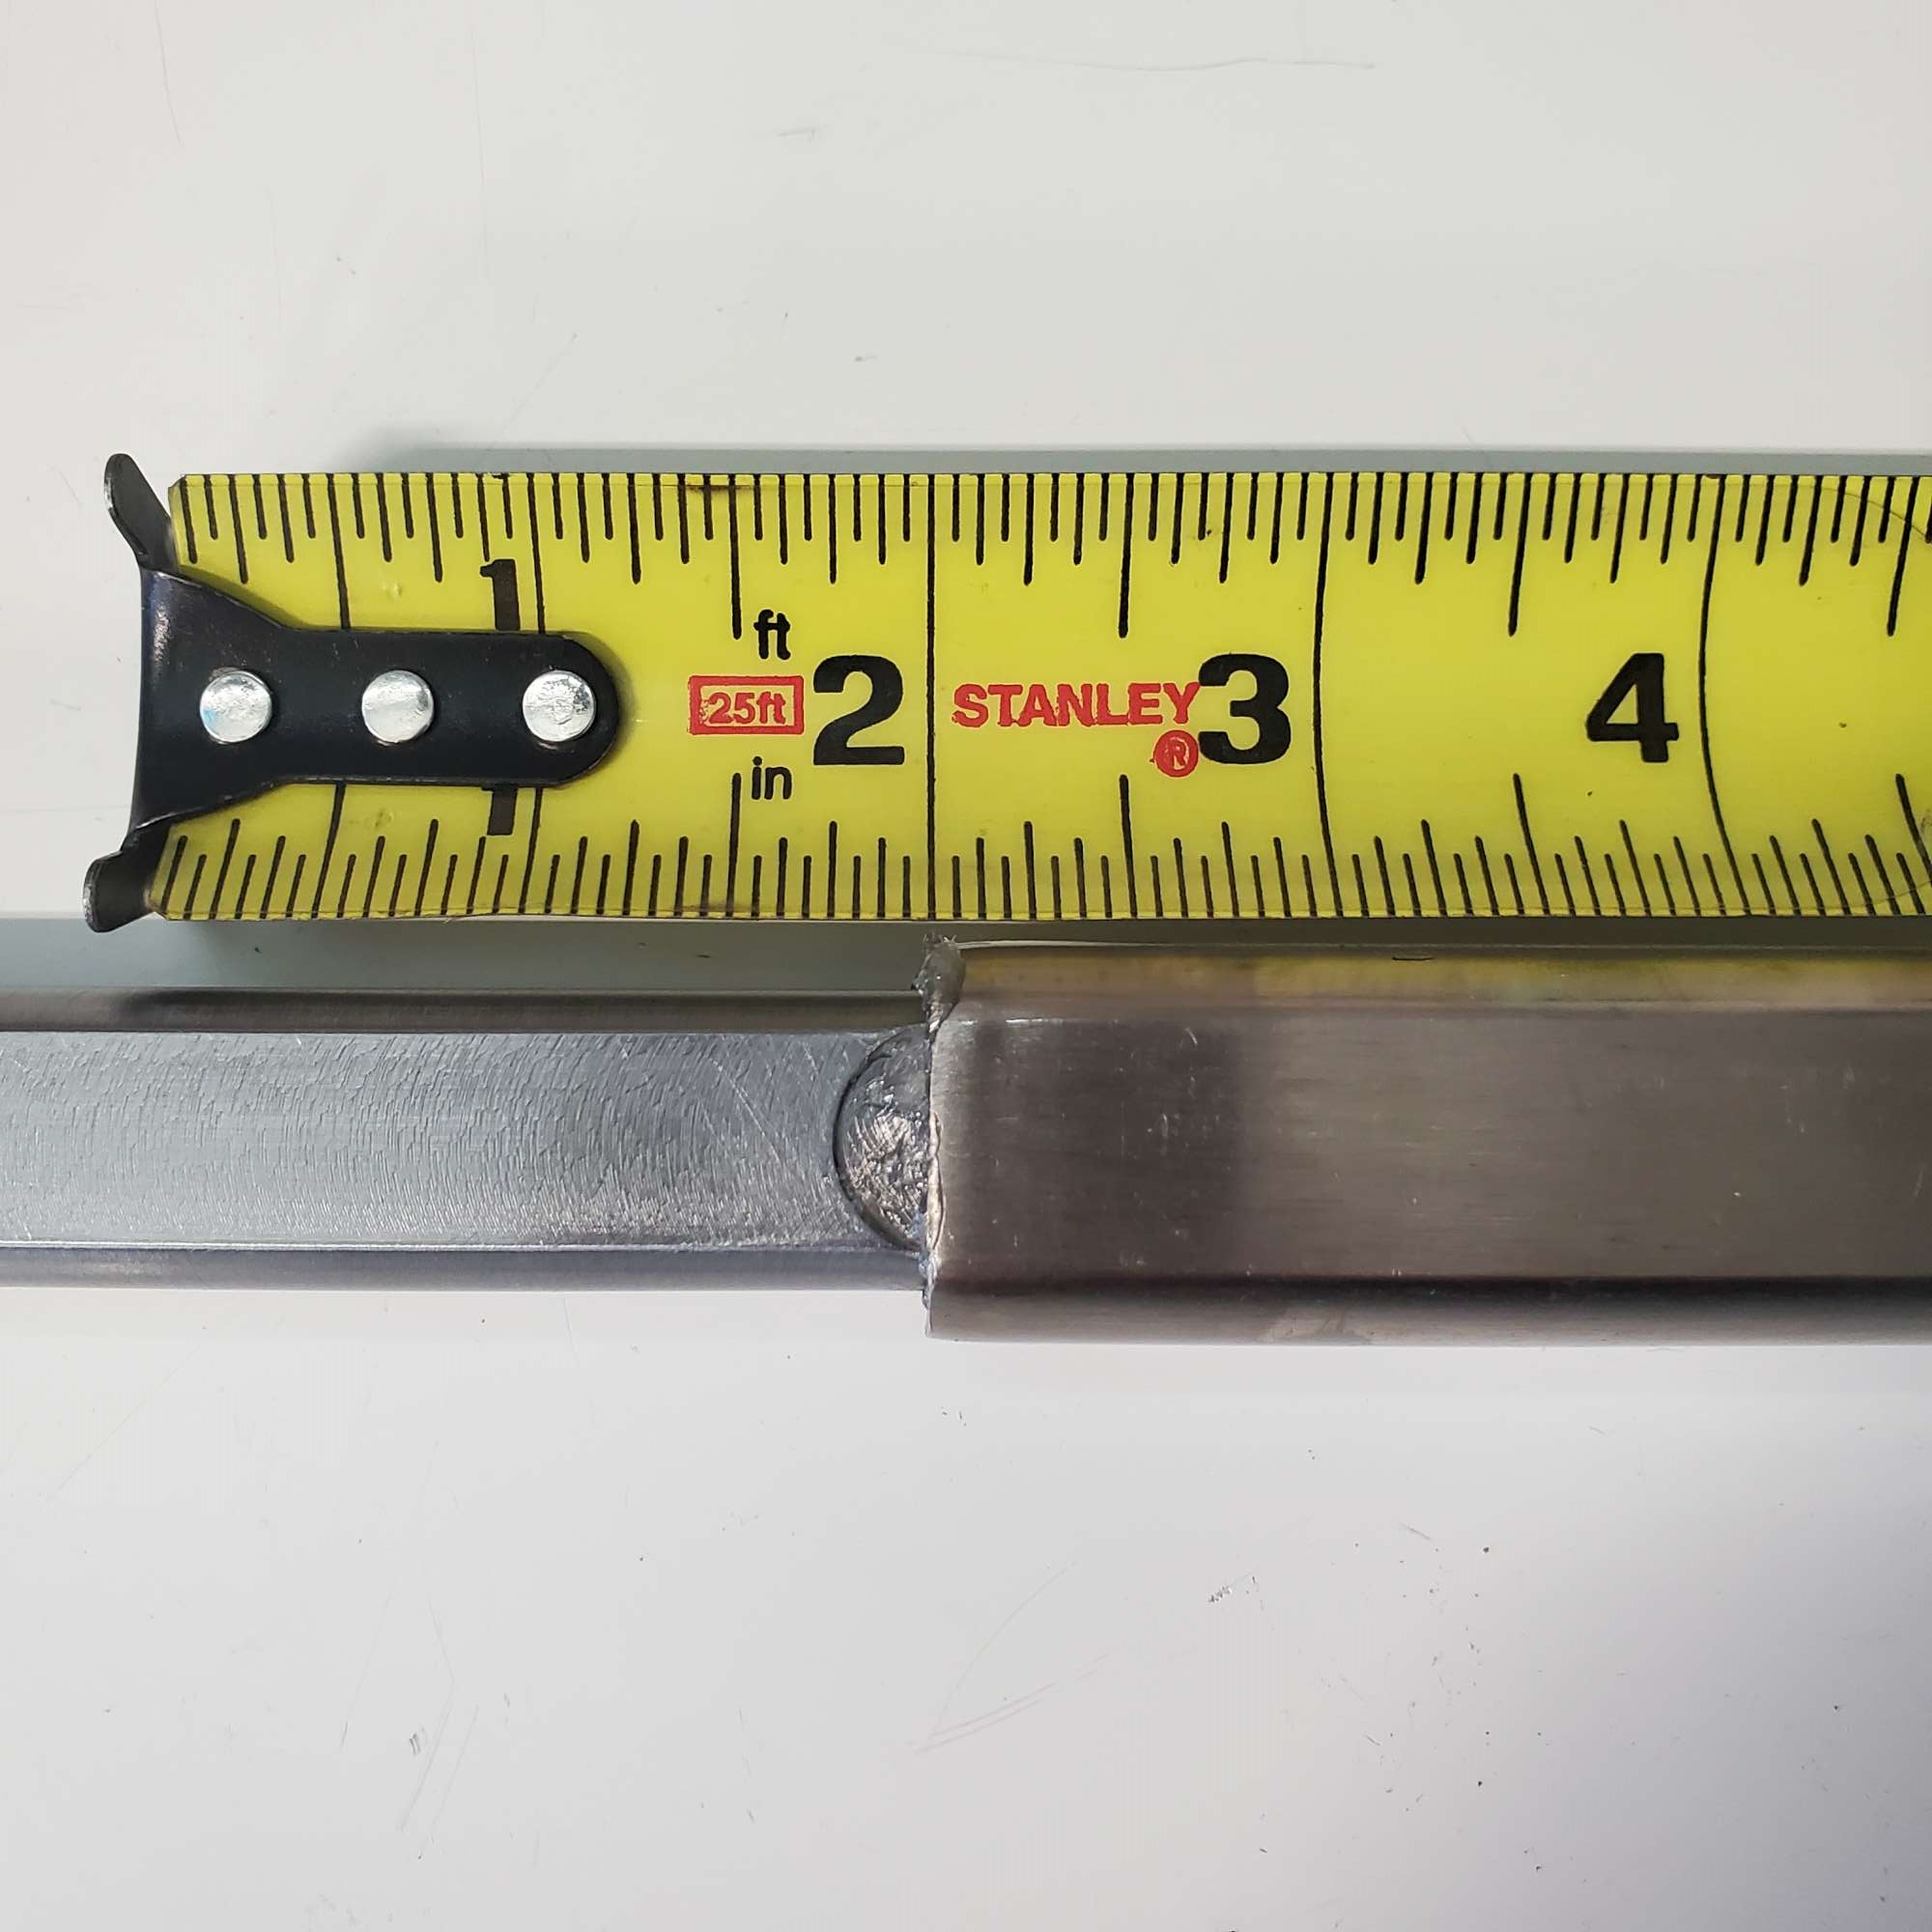
At this point I was now able to slide the upper shaft in this far by hand (without the Belleville washers). This picture shows the mid-shaft halfway over the second recessed circle--almost there! There's no special significance to the tape measure. Other than when the steering shaft fitment was finalized, the mid-shaft slid about 1.25 inches further over the recessed circle shown here.
Next, I slid the shafts apart, put in the washers, and slid back together. With a few light taps from a rubber mallet was able to pretty easily get the upper shaft slid in to achieve the recommended 1/16" gap between the RT turn signal switch and polished hub. Also added a thin layer of grease to the end of the upper shaft where the steering wheel slides on.
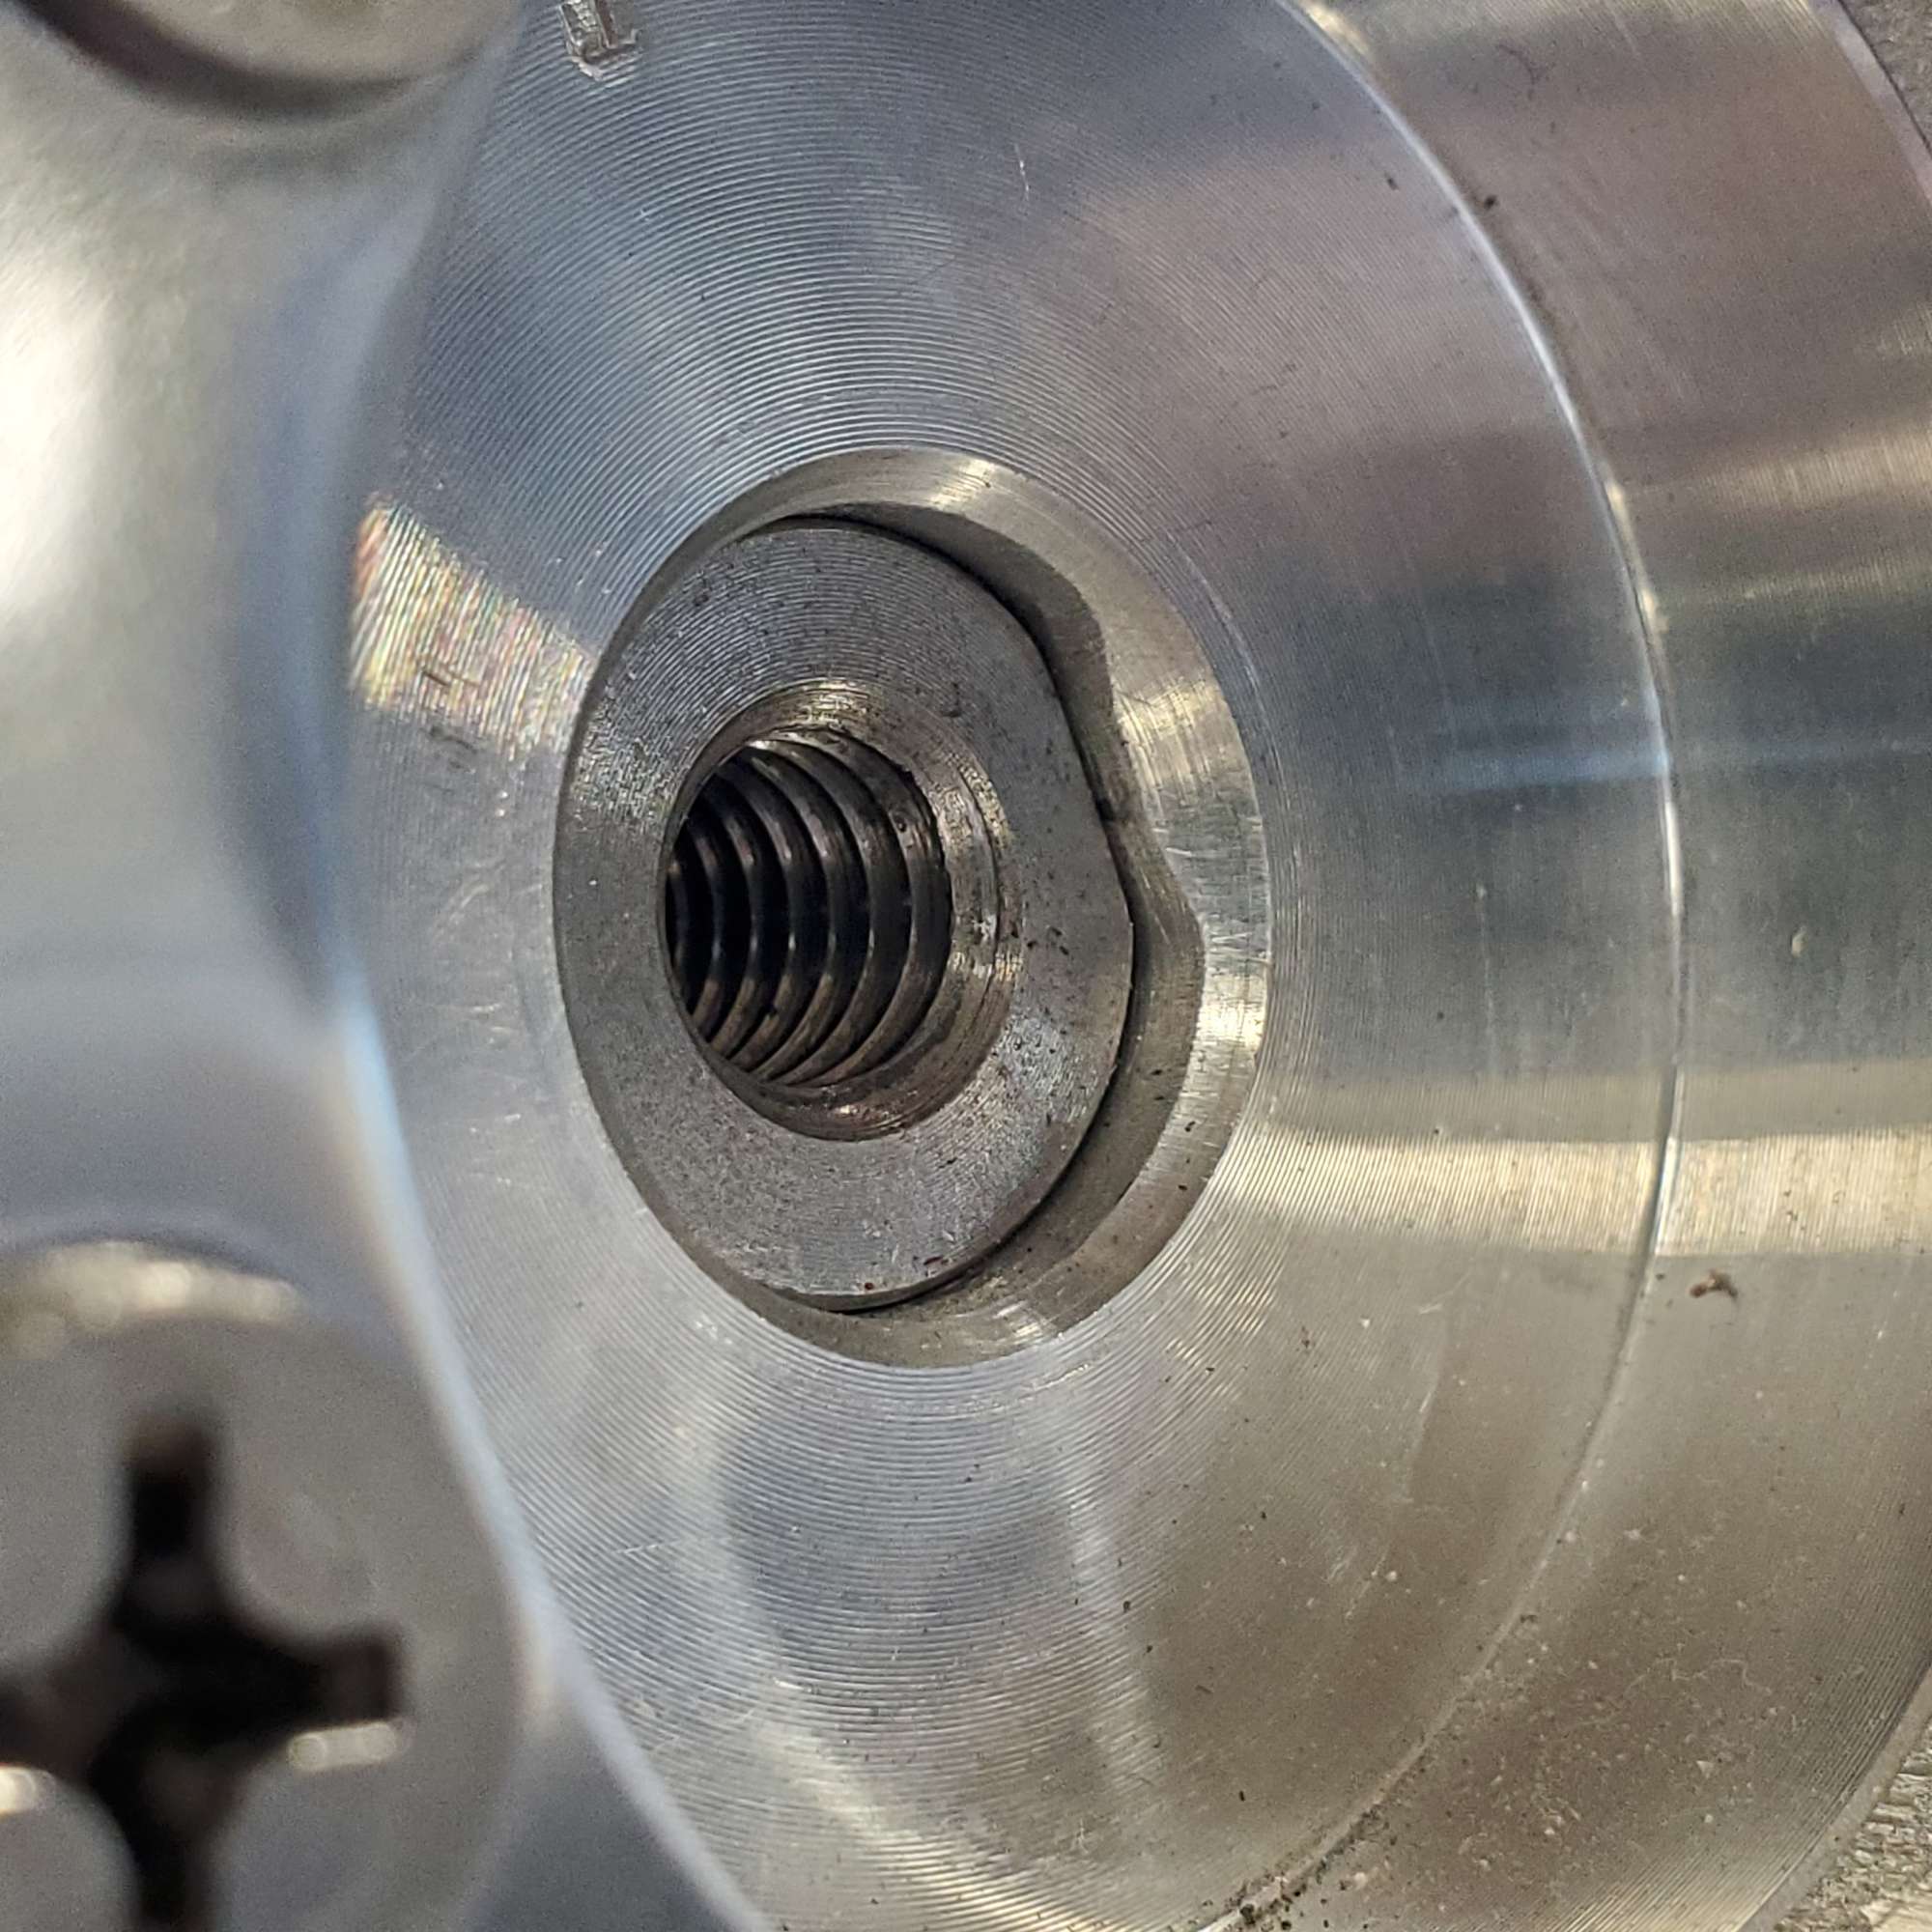
This is where the upper shaft bottoms out in the polished hub. Difficult to tell from the photo, but it's about 1/8" from being flush. To get it all the way flush I would somehow need to extend the flat spots on either side of the shaft. That's beyond my ability, and I don't see any gain in doing it.
From there I figured it was time to "lock" down the upper and lower shafts. So, added a small amount of blue Loctite to the two set screws on the upper shaft, and ditto to the two that secure the mid-shaft where it exits the FB. To access those I had to remove my gas pedal assembly. Difficult to reach in there. I wonder how many hours I spend on those types of tasks. It's not an insignificant sum.
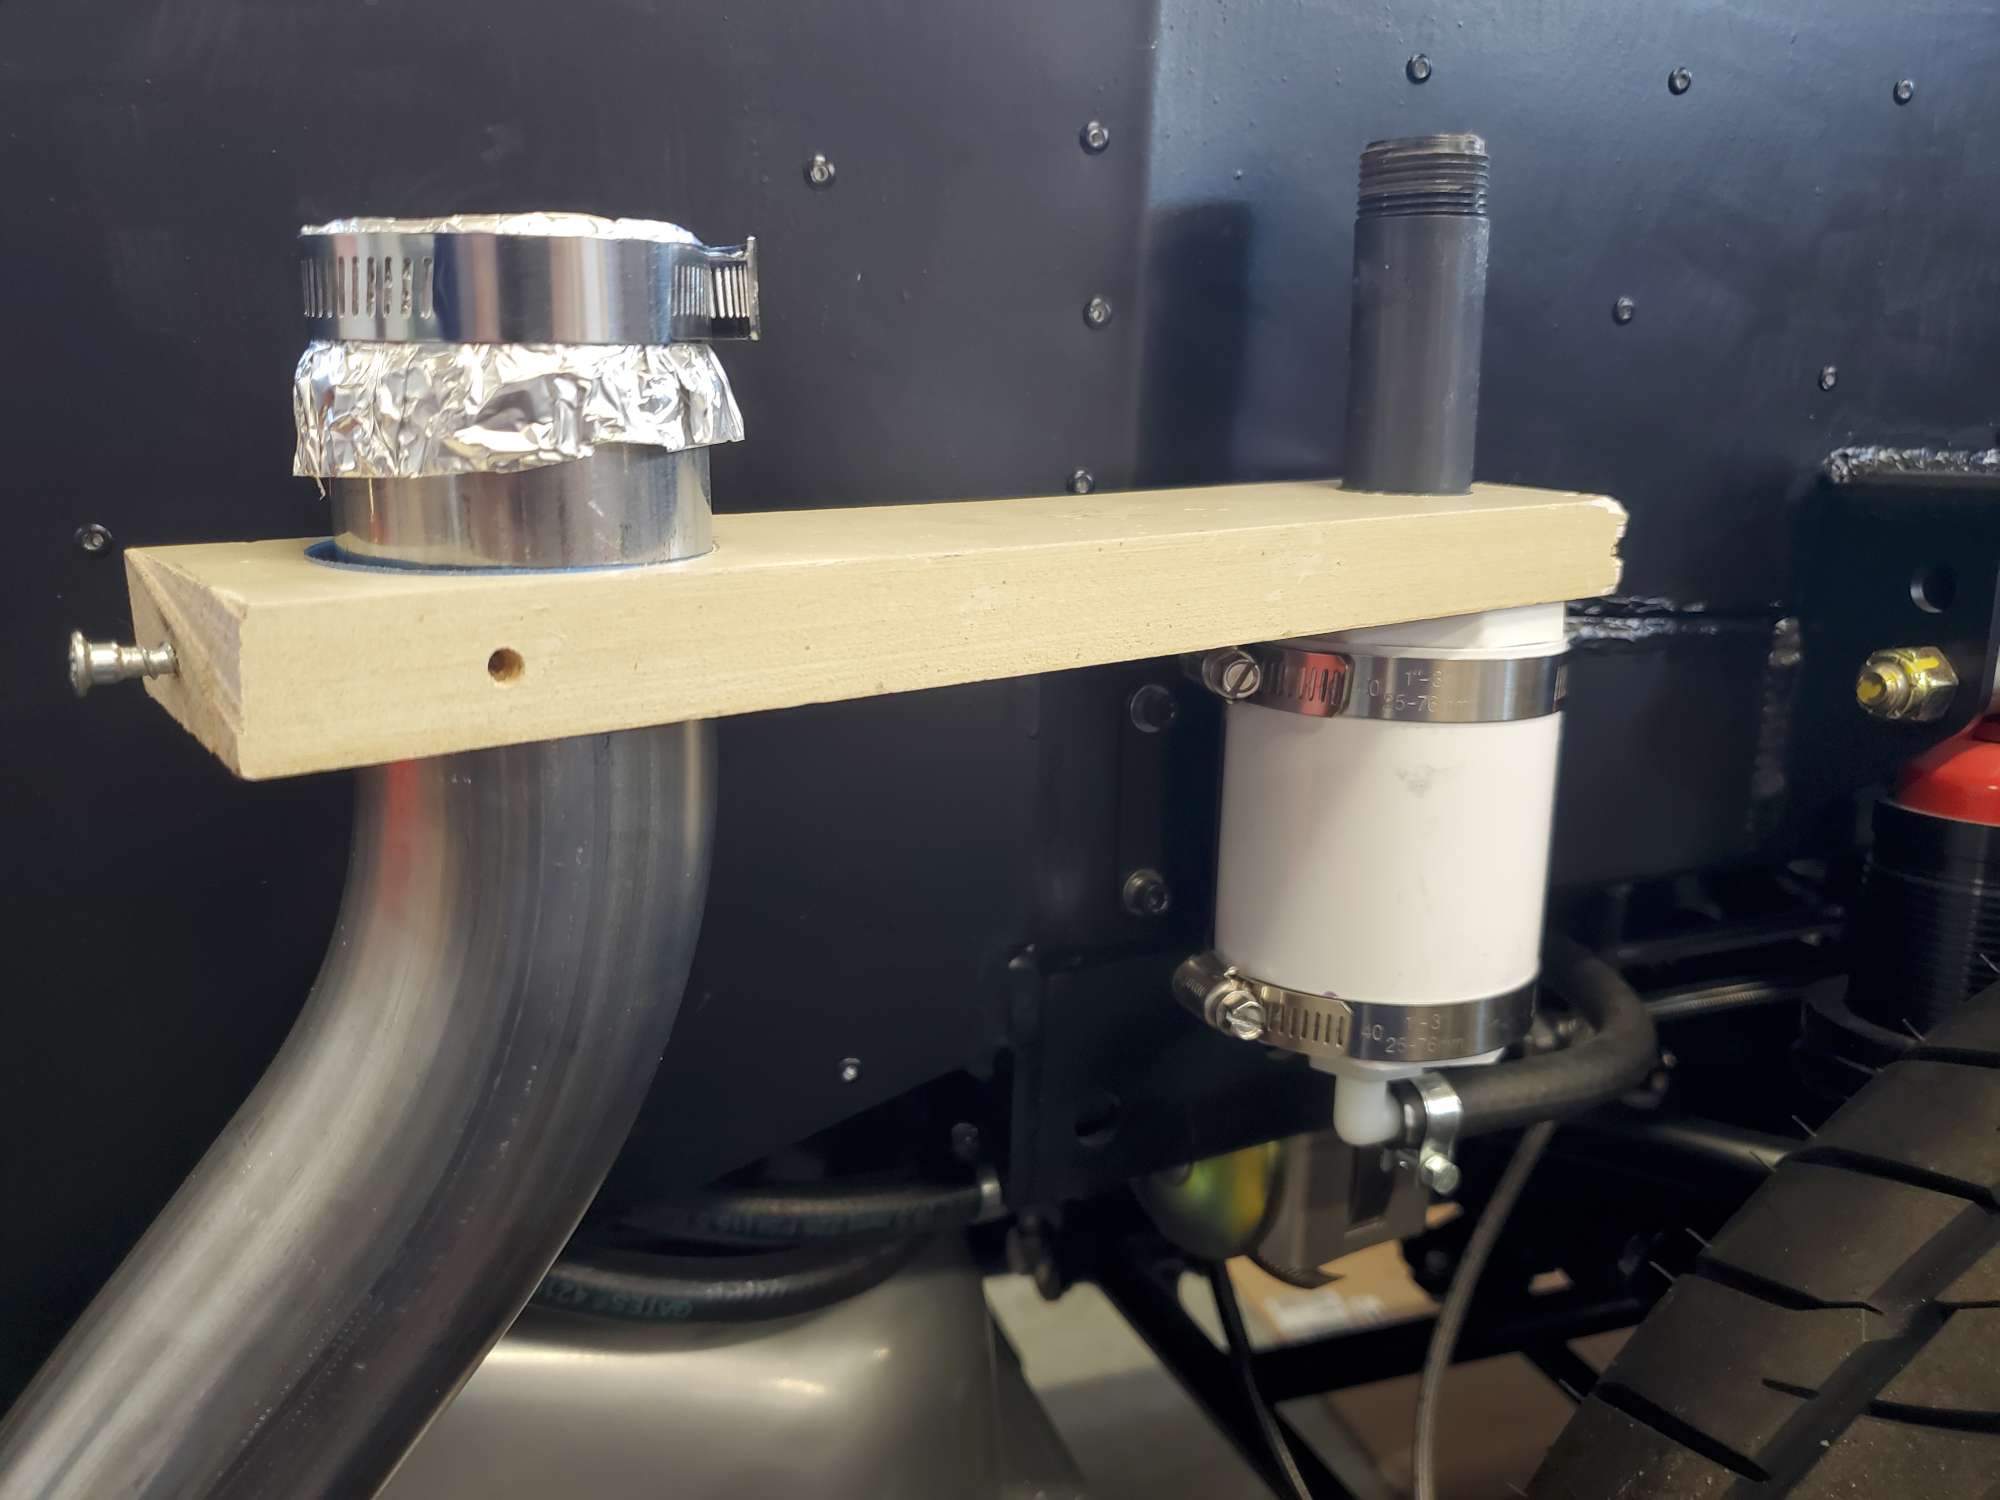
One item percolating in the back of my mind was how I would keep the filler tube vertical during go-kart stage. With the bit of oil I put on the gasket it wants to flop down horizontal, or even lower. Here's my solution: I found a 1" x 4" plastic nipple I had on-hand in my sprinkler parts stash. It matches the 1" threaded hole in the top lid of my homemade fuel vapor canister. Then cut appropriate sized holes for the 1" nipple and the ~2" filler tube in a piece of scrap 1" x 3" wood.
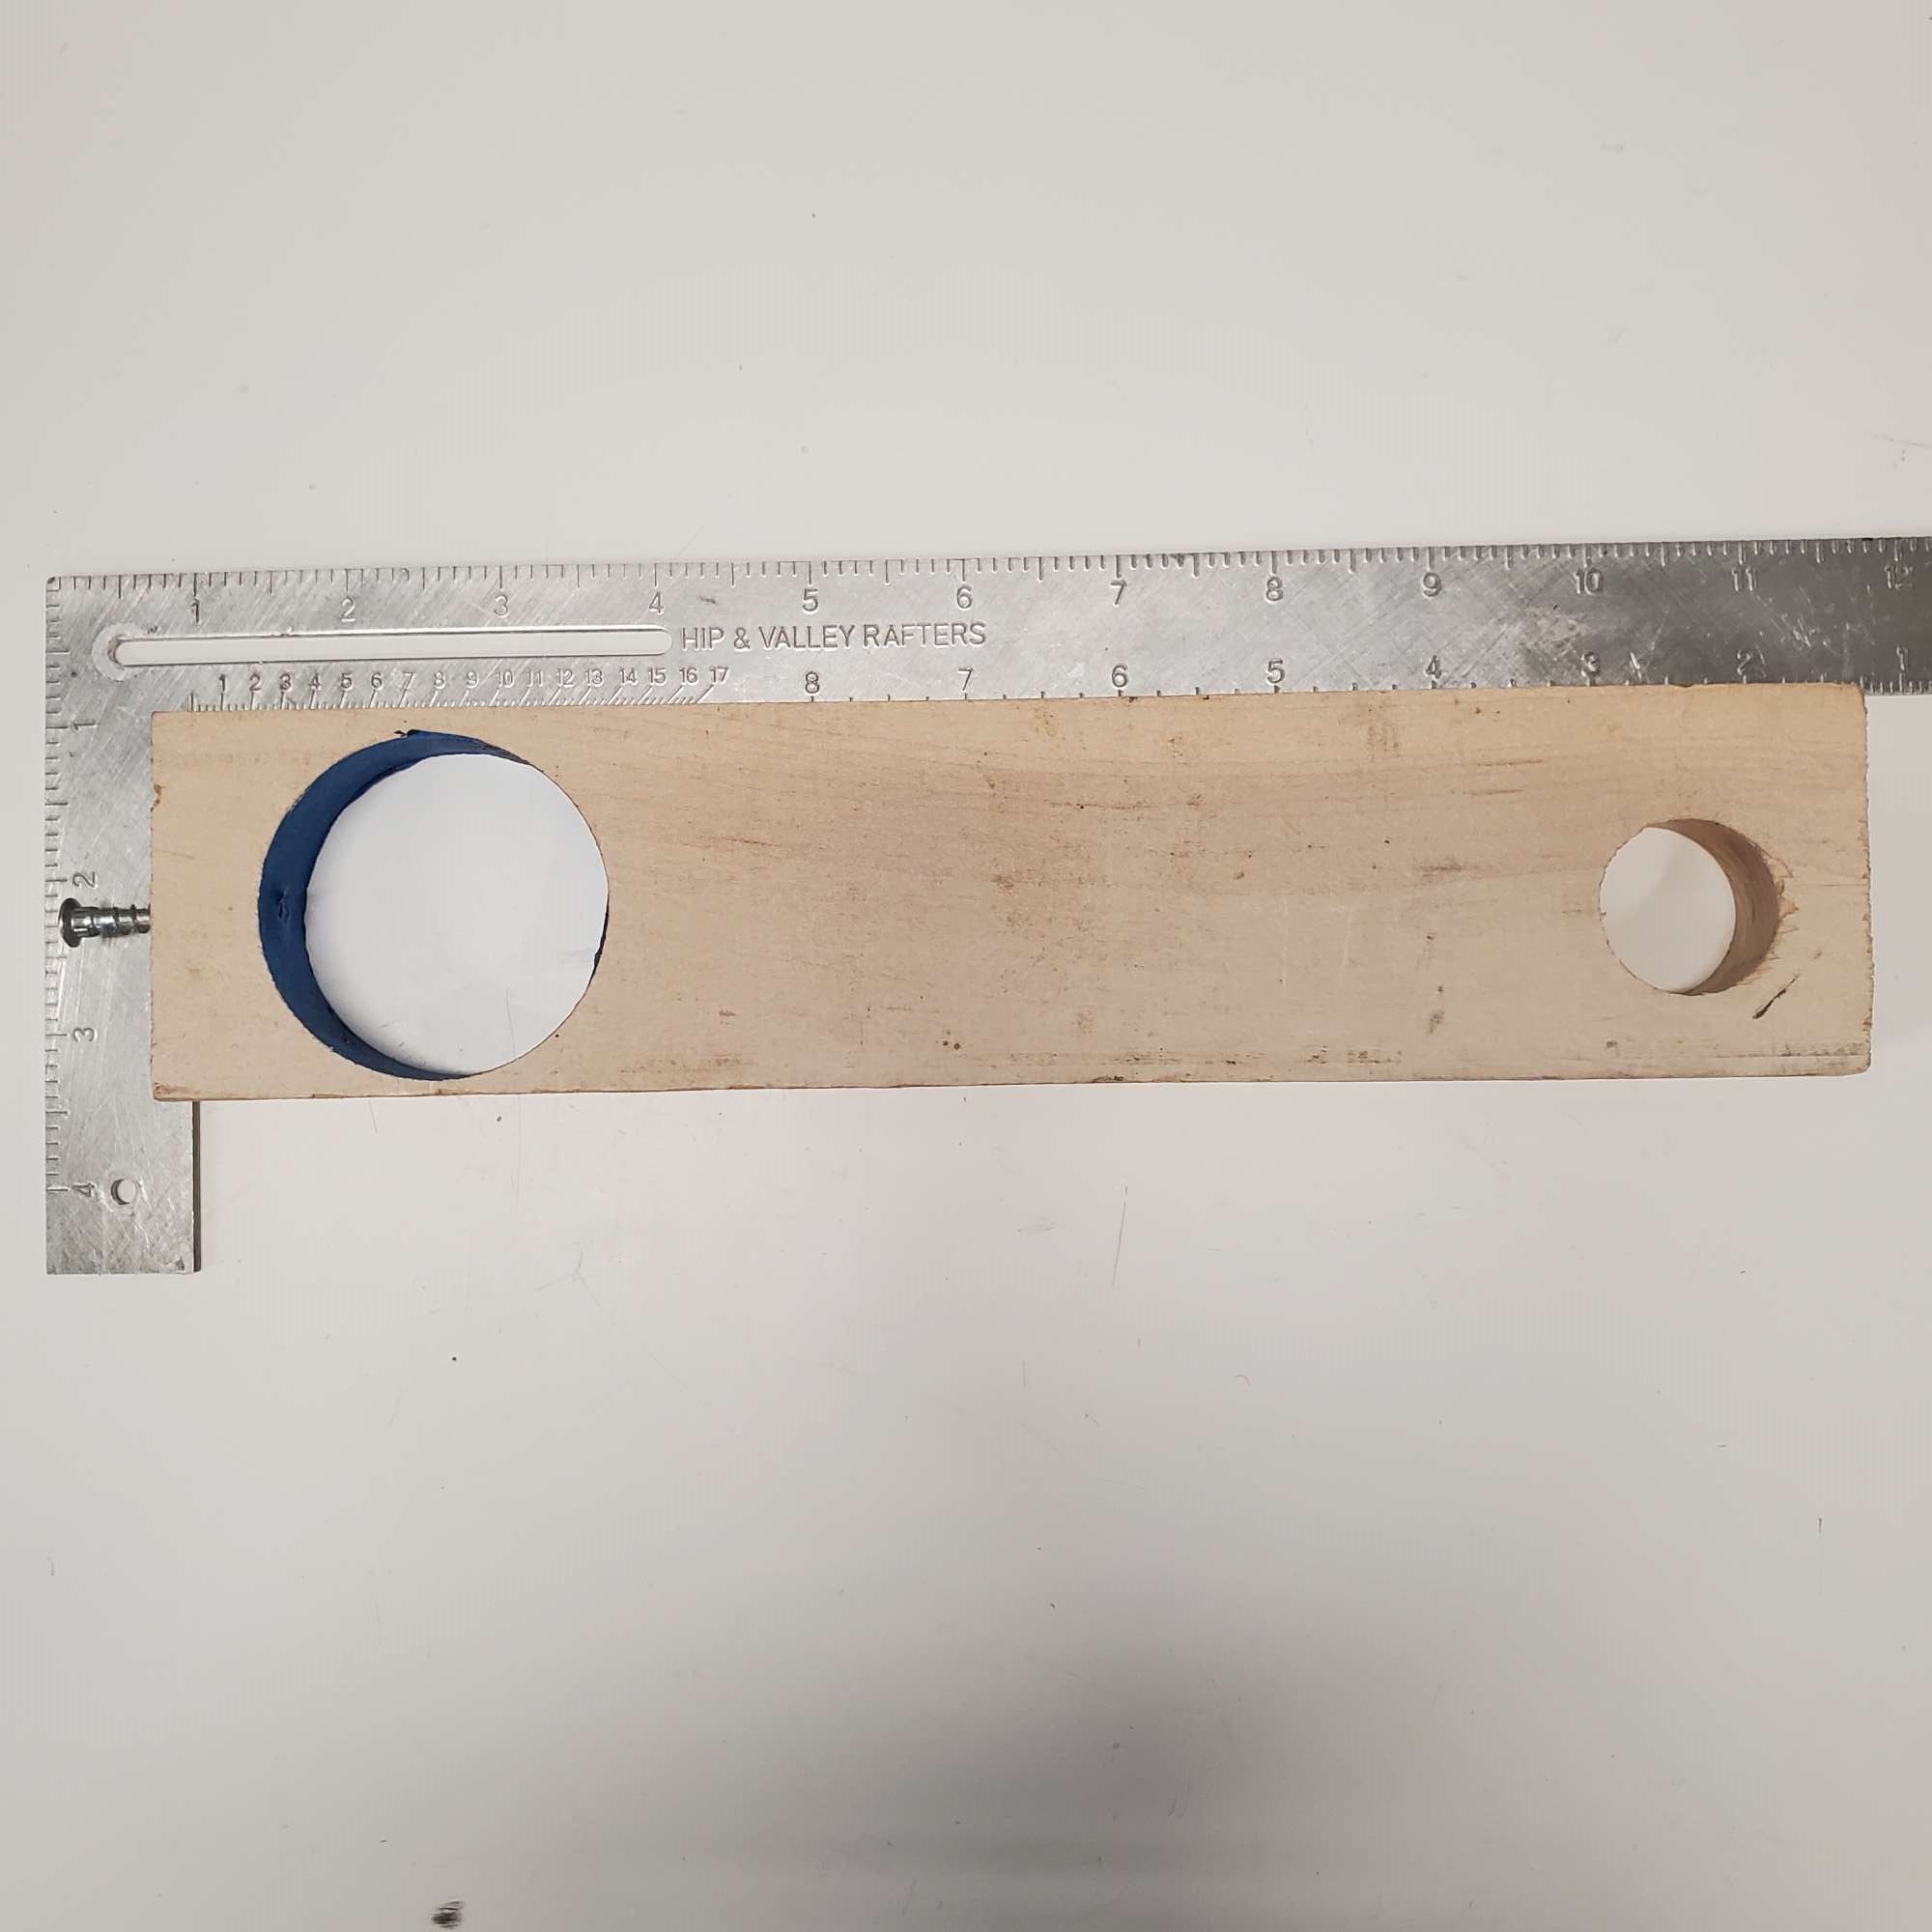
Added a "set screw" to the end to keep it all solid for go-kart. I filed the end of the set screw flat to avoid puncturing/denting the filler tube.
Once in a while it's nice to implement a solution that doesn't involve my wallet.
Next up is alignment and pinion angle. My brain already hurts from studying these two topics. Uff-da!
Last edited by 460.465USMC; 07-25-2022 at 10:46 AM.
Chris
Coupe complete kit. Index. Delivered: 4/22/24.
Build Thread. Coyote Gen 4X. T-56. IRS w/3.55. Wilwoods. PS. HVAC. Side windows.
MK4 Complete kit.
Build Thread Index. Delivered: 10/15/2020. Legal: 7/25/23. Coyote Gen3. TKO600 (0.64 OD). IRS w/3.55. PS. Wilwoods. Sway bars. This build is dedicated to my son, Benjamin.
Build Thread.
-
Post Thanks / Like - 0 Thanks, 2 Likes
-
07-25-2022, 09:31 AM
#450
That's clever, I like it!
-
Post Thanks / Like - 1 Thanks, 0 Likes
-
07-25-2022, 09:47 AM
#451
25th Anniversary #9772

Originally Posted by
460.465USMC
I continue to chip away at the items I want to get done before first go-kart. This week I checked off a few.
Treadstone Perf - Honeycomb Air Straightener: I ordered the 4" version and secured in place with JB Weld. It sits about 1/2" from the air filter side of the 4" Spectre tube, and ~2.5"-3" from the MAF sensor. No trimming required. The fit could have been a little tighter, but I guess it doesn't matter since it's locked in place now. Wanted it in place before I get a custom tune someday.
Here it is installed as viewed from the rear, i.e. air will flow toward you.
I've seen this a few times now, but never ordered - assuming this is the correct part? https://www.treadstoneperformance.co...htener/p103828
just some JB Weld to hold in place?
-
07-25-2022, 10:42 AM
#452
Hi Todd. Yes, that's the piece I ordered (4" size). The shipping and handling was as much or more than the straightener. Ugh.
I was considering using silicone, as the straightener is very light. But ultimately decided to go with JB Weld. I coated a 3/4" ring of JB Weld inside the Spectre tube, about 1/2" in from the edge. Then slid the straightener into the JB Weld ring. It didn't wedge in place because it was slightly too small, but the JB Weld held it in place well enough until it hardened.
Last edited by 460.465USMC; 07-25-2022 at 11:17 PM.
Chris
Coupe complete kit. Index. Delivered: 4/22/24.
Build Thread. Coyote Gen 4X. T-56. IRS w/3.55. Wilwoods. PS. HVAC. Side windows.
MK4 Complete kit.
Build Thread Index. Delivered: 10/15/2020. Legal: 7/25/23. Coyote Gen3. TKO600 (0.64 OD). IRS w/3.55. PS. Wilwoods. Sway bars. This build is dedicated to my son, Benjamin.
Build Thread.
-
Post Thanks / Like - 0 Thanks, 1 Likes
-
07-25-2022, 11:59 AM
#453
Originally Posted by
460.465USMC
Next up is alignment and pinion angle. My brain already hurts from studying these two topics. Uff-da!
Both these items were a reminder for me that the brain pain lessens immediately once you actually pick up a tool and get to it. We've all been there before.
Well, wait. With the driveshaft alignment there was one more step. I had to waste time trying to use the Tremec app on my phone, which only resulted in many phone drops. When I picked up the Klein magnetic angle gauge I started to make real progress. Once you practice a few times just to make sure you get repeatable numbers, you realize you know what you need to do next.
Thanks for the update, Chris - btw, I like the fixture ingenuity (and the price point)!
Last edited by John Ibele; 07-25-2022 at 12:04 PM.
MK4 #7838: IRS 3.55 TrueTrac T5z Dart 347
The drawing is from ~7th grade, mid-1970s
Meandering, leisurely build thread is
here
-
Post Thanks / Like - 1 Thanks, 2 Likes
-
07-25-2022, 02:44 PM
#454
25th Anniversary #9772
Originally Posted by
460.465USMC
Hi Todd. Yes, that's the piece I ordered (4" size). The shipping and handling was as much or more than the straightener. Ugh.
I was considering using silicone, as the straightener is very light. But ultimately decided to go with JB Weld. I coated a 3/4" ring of JB Weld inside the Spectre tube, about 1/2" in from the air inward side. Then slid the straightener into the JB Weld ring. It didn't wedge in place because it was slightly too small, but the JB Weld held it in place well enough until it hardened.
Thanks Chris! I found a similar product from Performance MRP - it's a 4" honeycomb as well, but only $5 to ship 
S-400D 4" Diameter Aluminum Honeycomb Air Straightener Screen
-
Post Thanks / Like - 0 Thanks, 1 Likes
-
07-25-2022, 11:31 PM
#455
Originally Posted by
John Ibele
Both these items were a reminder for me that the brain pain lessens immediately once you actually pick up a tool and get to it. We've all been there before.
Well, wait. With the driveshaft alignment there was one more step. I had to waste time trying to use the Tremec app on my phone, which only resulted in many phone drops. When I picked up the Klein magnetic angle gauge I started to make real progress. Once you practice a few times just to make sure you get repeatable numbers, you realize you know what you need to do next.
So true, John! I've experienced that on many parts of my build. Honestly, even to some degree on the steering shaft process I just described. I should only ponder so long before JUST GETTIN' AFTER IT!
Appreciate you keeping an eye on my build. I continue to welcome your input.
Chris
Coupe complete kit. Index. Delivered: 4/22/24.
Build Thread. Coyote Gen 4X. T-56. IRS w/3.55. Wilwoods. PS. HVAC. Side windows.
MK4 Complete kit.
Build Thread Index. Delivered: 10/15/2020. Legal: 7/25/23. Coyote Gen3. TKO600 (0.64 OD). IRS w/3.55. PS. Wilwoods. Sway bars. This build is dedicated to my son, Benjamin.
Build Thread.
-
08-14-2022, 12:18 PM
#456
Four Wheel Alignment
Caution: what you are about to read is dull. Boring. It contains material known to cause drowsiness. Advisement: proceed only if you've had a good night's sleep, and armed with a steaming cup of coffee.
I completed the four wheel alignment. This is the initial pass. I will go through it again when the body and the rest of the weight are on the chassis. It was a tedious process, and I spent many hours on it. It's one of those tasks where there isn't much to show for your labor. Overall, though it took some patience, it was enjoyable and I'm glad I went for it.
Up front I want to thank the forum all of the helpful alignment threads. So many good tips and tricks. A special thanks to Edwardb who patiently answered a few PMs from me, as I asked (and re-asked!) where to begin, and how to tackle it. Full disclosure: I was intimidated to tackle this one.
Here's my approach:
Set the ride height (Roadster on my four-post lift):
- Adjust front tires to 22 PSI
- Adjust rear tires to 24 PSI
- The rear took just one turn to reach 5"
- The front required four turns to reach 4.5"
Wisdom of the forum says the suspension will continue to settle, so I purposely set both 1/2" high. It was all I could do using a pair of soft nose channel locks to get the four turns on the front. After the fact, I ordered a spanner wrench from Jegs, but the UCA arms interfere. I will return it. Looking for a good recommendation on a spanner wrench that fits our Roadster application.
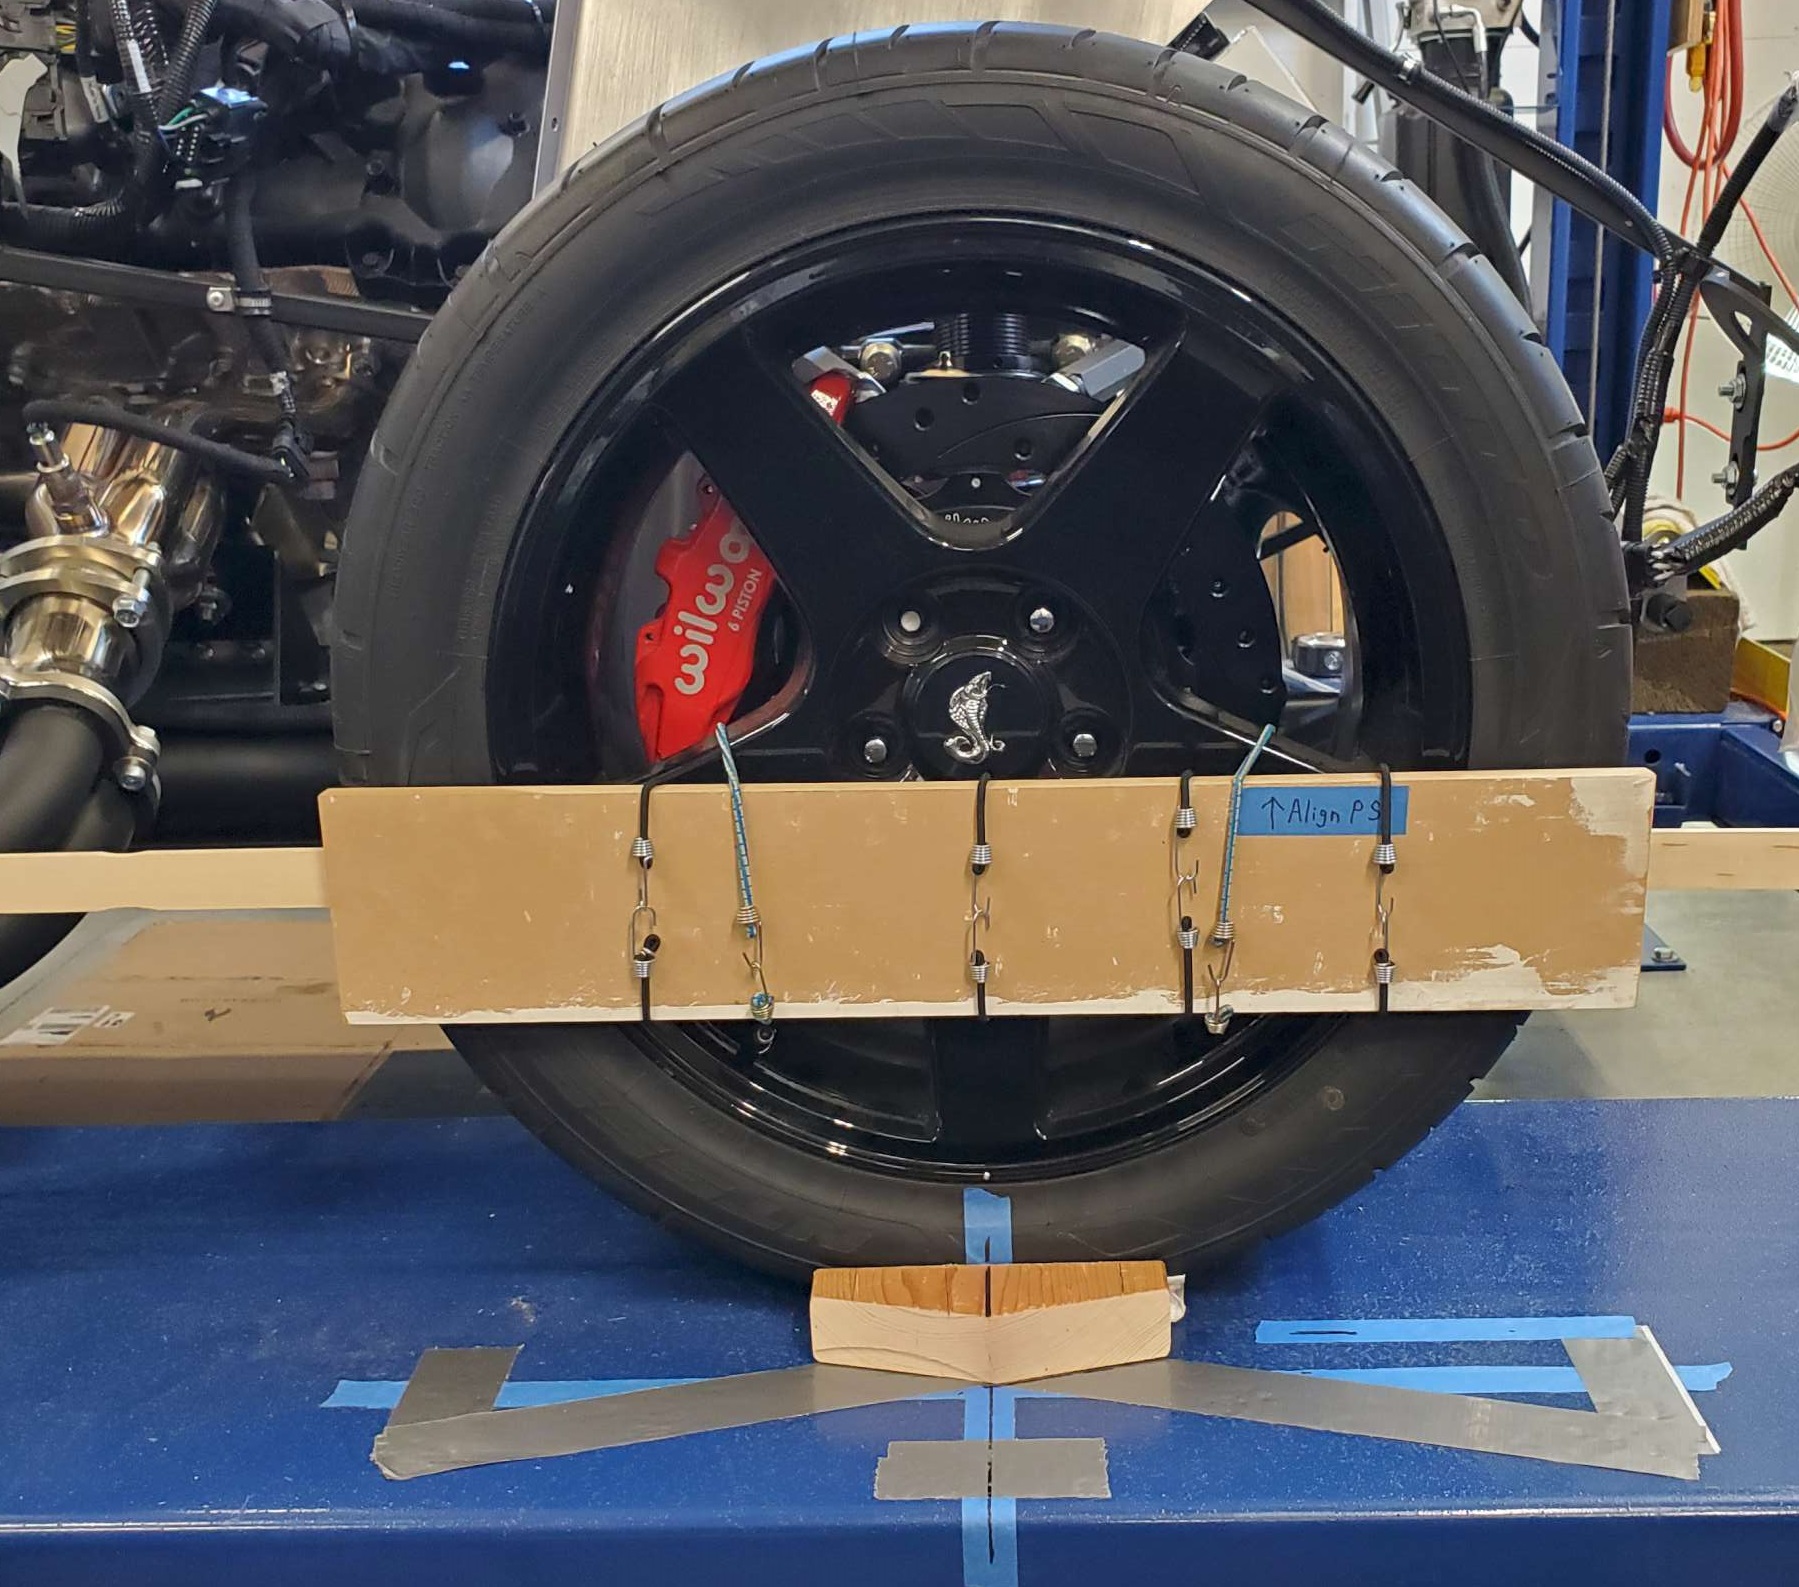
Next up was the Rear IRS alignment:
To prevent the rear wheels from binding, I put down a thin, flexible cutting board my wife had tossed. Then added two kitchen garbage bags un top. The powder coating on the lift runways is infused with sand for traction. The cutting board gripped the runways, and the bags provided the slippery surface needed to allow the wheels to move easily.
I didn't have a wrench large enough to fit the 1 5/8" UCA jam nuts, so off to HF to pick up a 15" adjustable wrench.
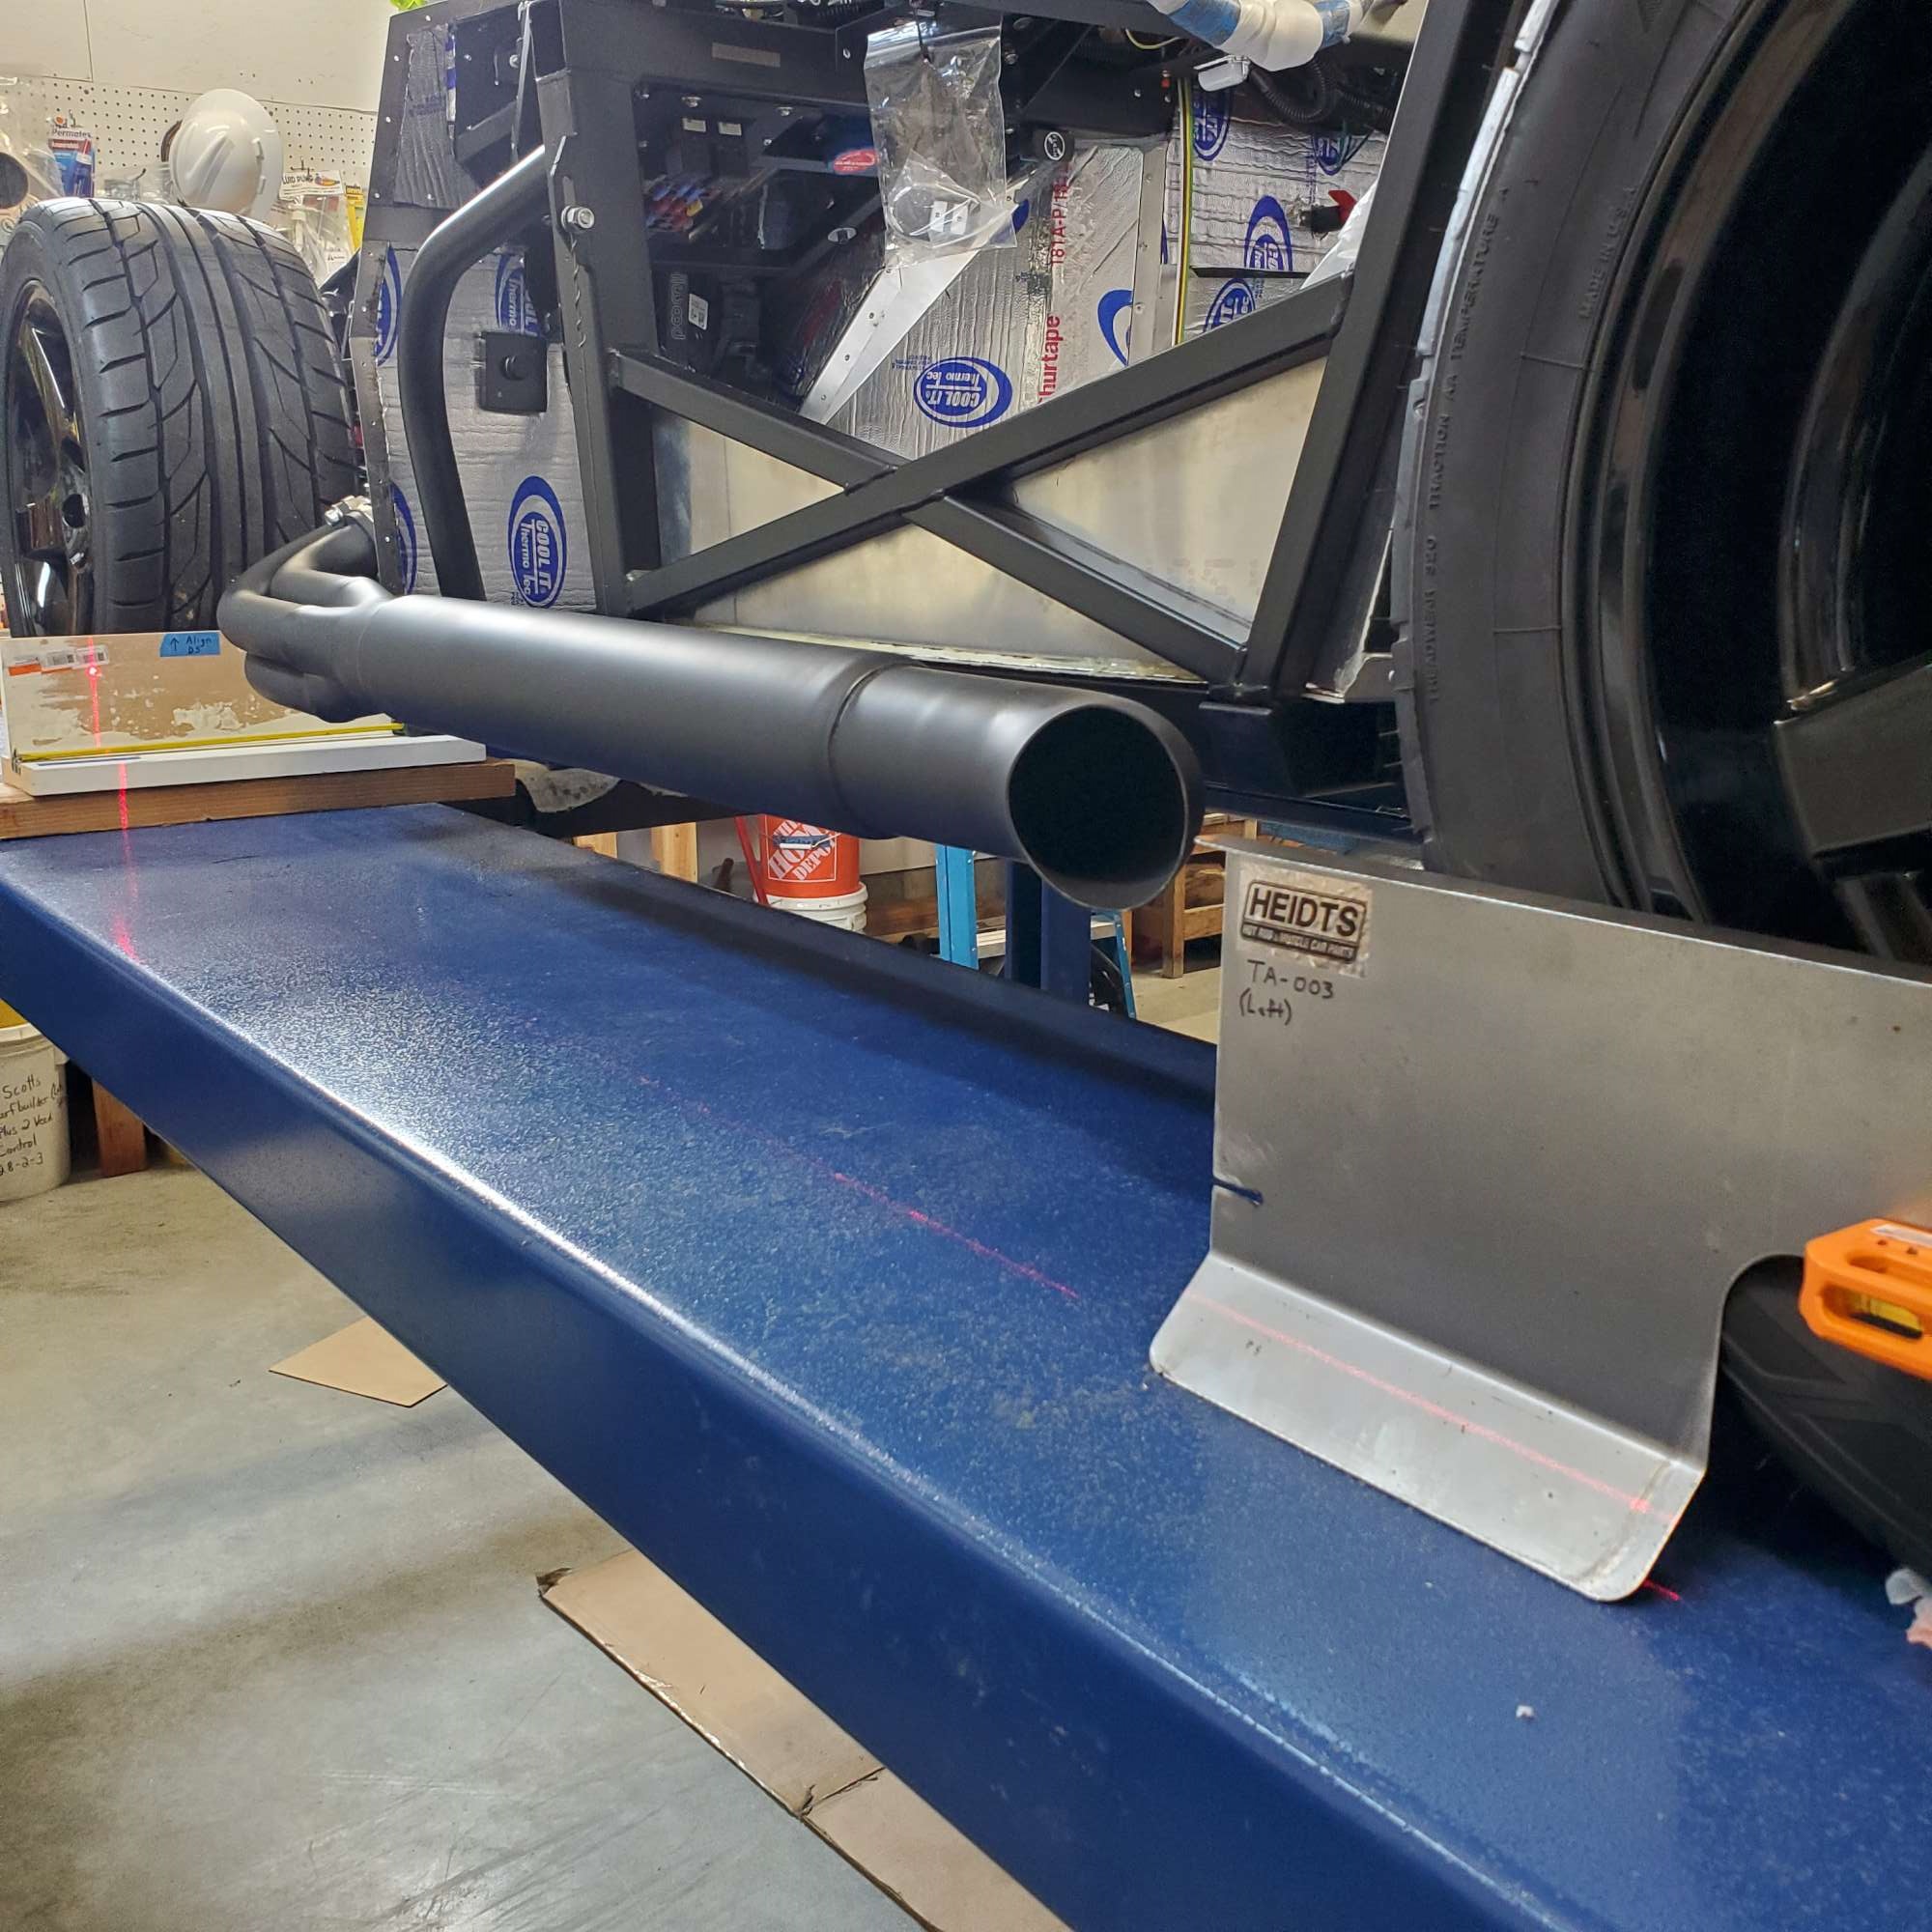
Here I'm getting the rear track parallel with toe plates/laser level. Look closely and you can see the laser line/dot on the board behind the front wheels
IRS Camber/Toe-in
- Set wheel track parallel to the chassis. Bought a magnetic laser level and stuck it to the Heidt's toe plates. Used a piece of scrap MDF trim behind the front wheel as the laser target. Cut two of these to the same length. The inner side is pushed flat against the 4" chassis tube. Then adjusted toe until they hit the board at the same point on both sides.
- Adjusted toe-in/track together while adjusting the camber the appropriate amount each time to keep it near spec.
- Final measurements: was able to meet F5's spec. for camber at -0.75*, and 1/8" total toe-in.
The F5 manual was very helpful. It tells how much camber changes (positive or negative) for each turn of the toe link, and vice versa. After getting them adjusted to spec. I tightened the toe and camber nuts. Will come back after final alignment and apply Loctite on the UCA jam nut threads per F5 instructions
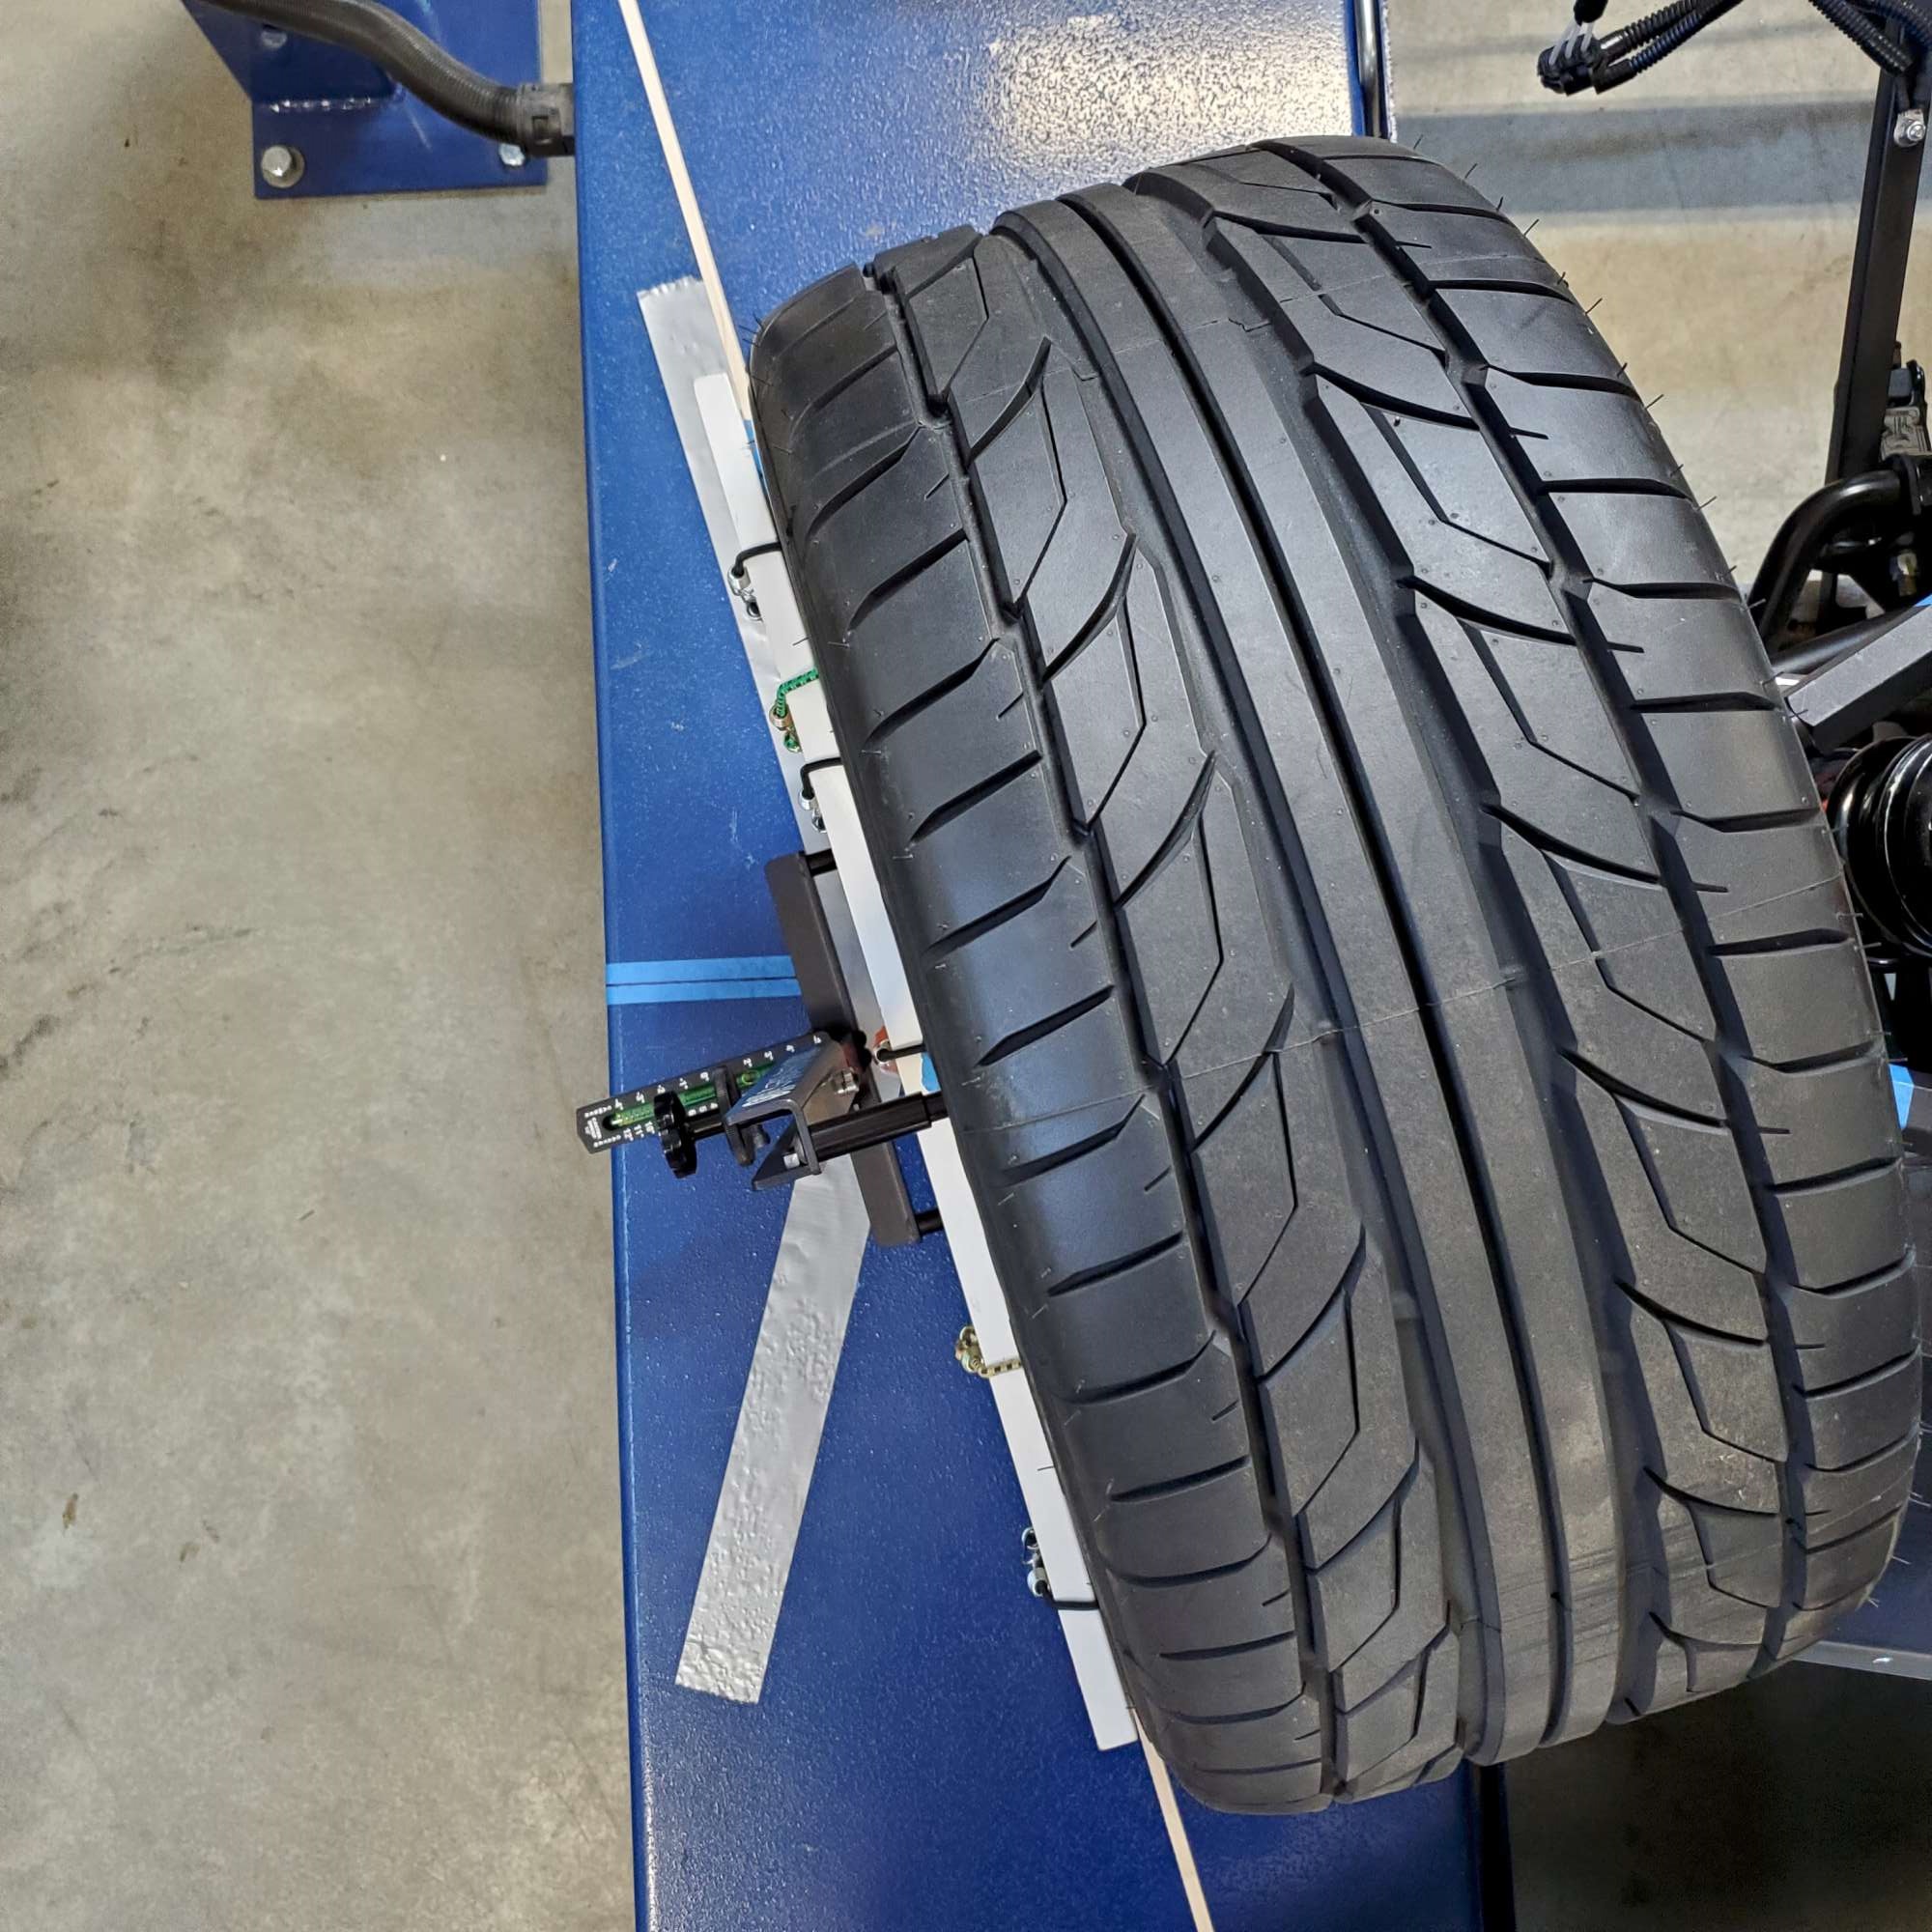
Front IFS alignment: as my starting point, I set the UCA dimensions per F5 instructions. Note: because I've read so many builders having trouble dialing in the caster with stock length UCA sleeves/threaded rods, I had mine trimmed some time ago.
Caster
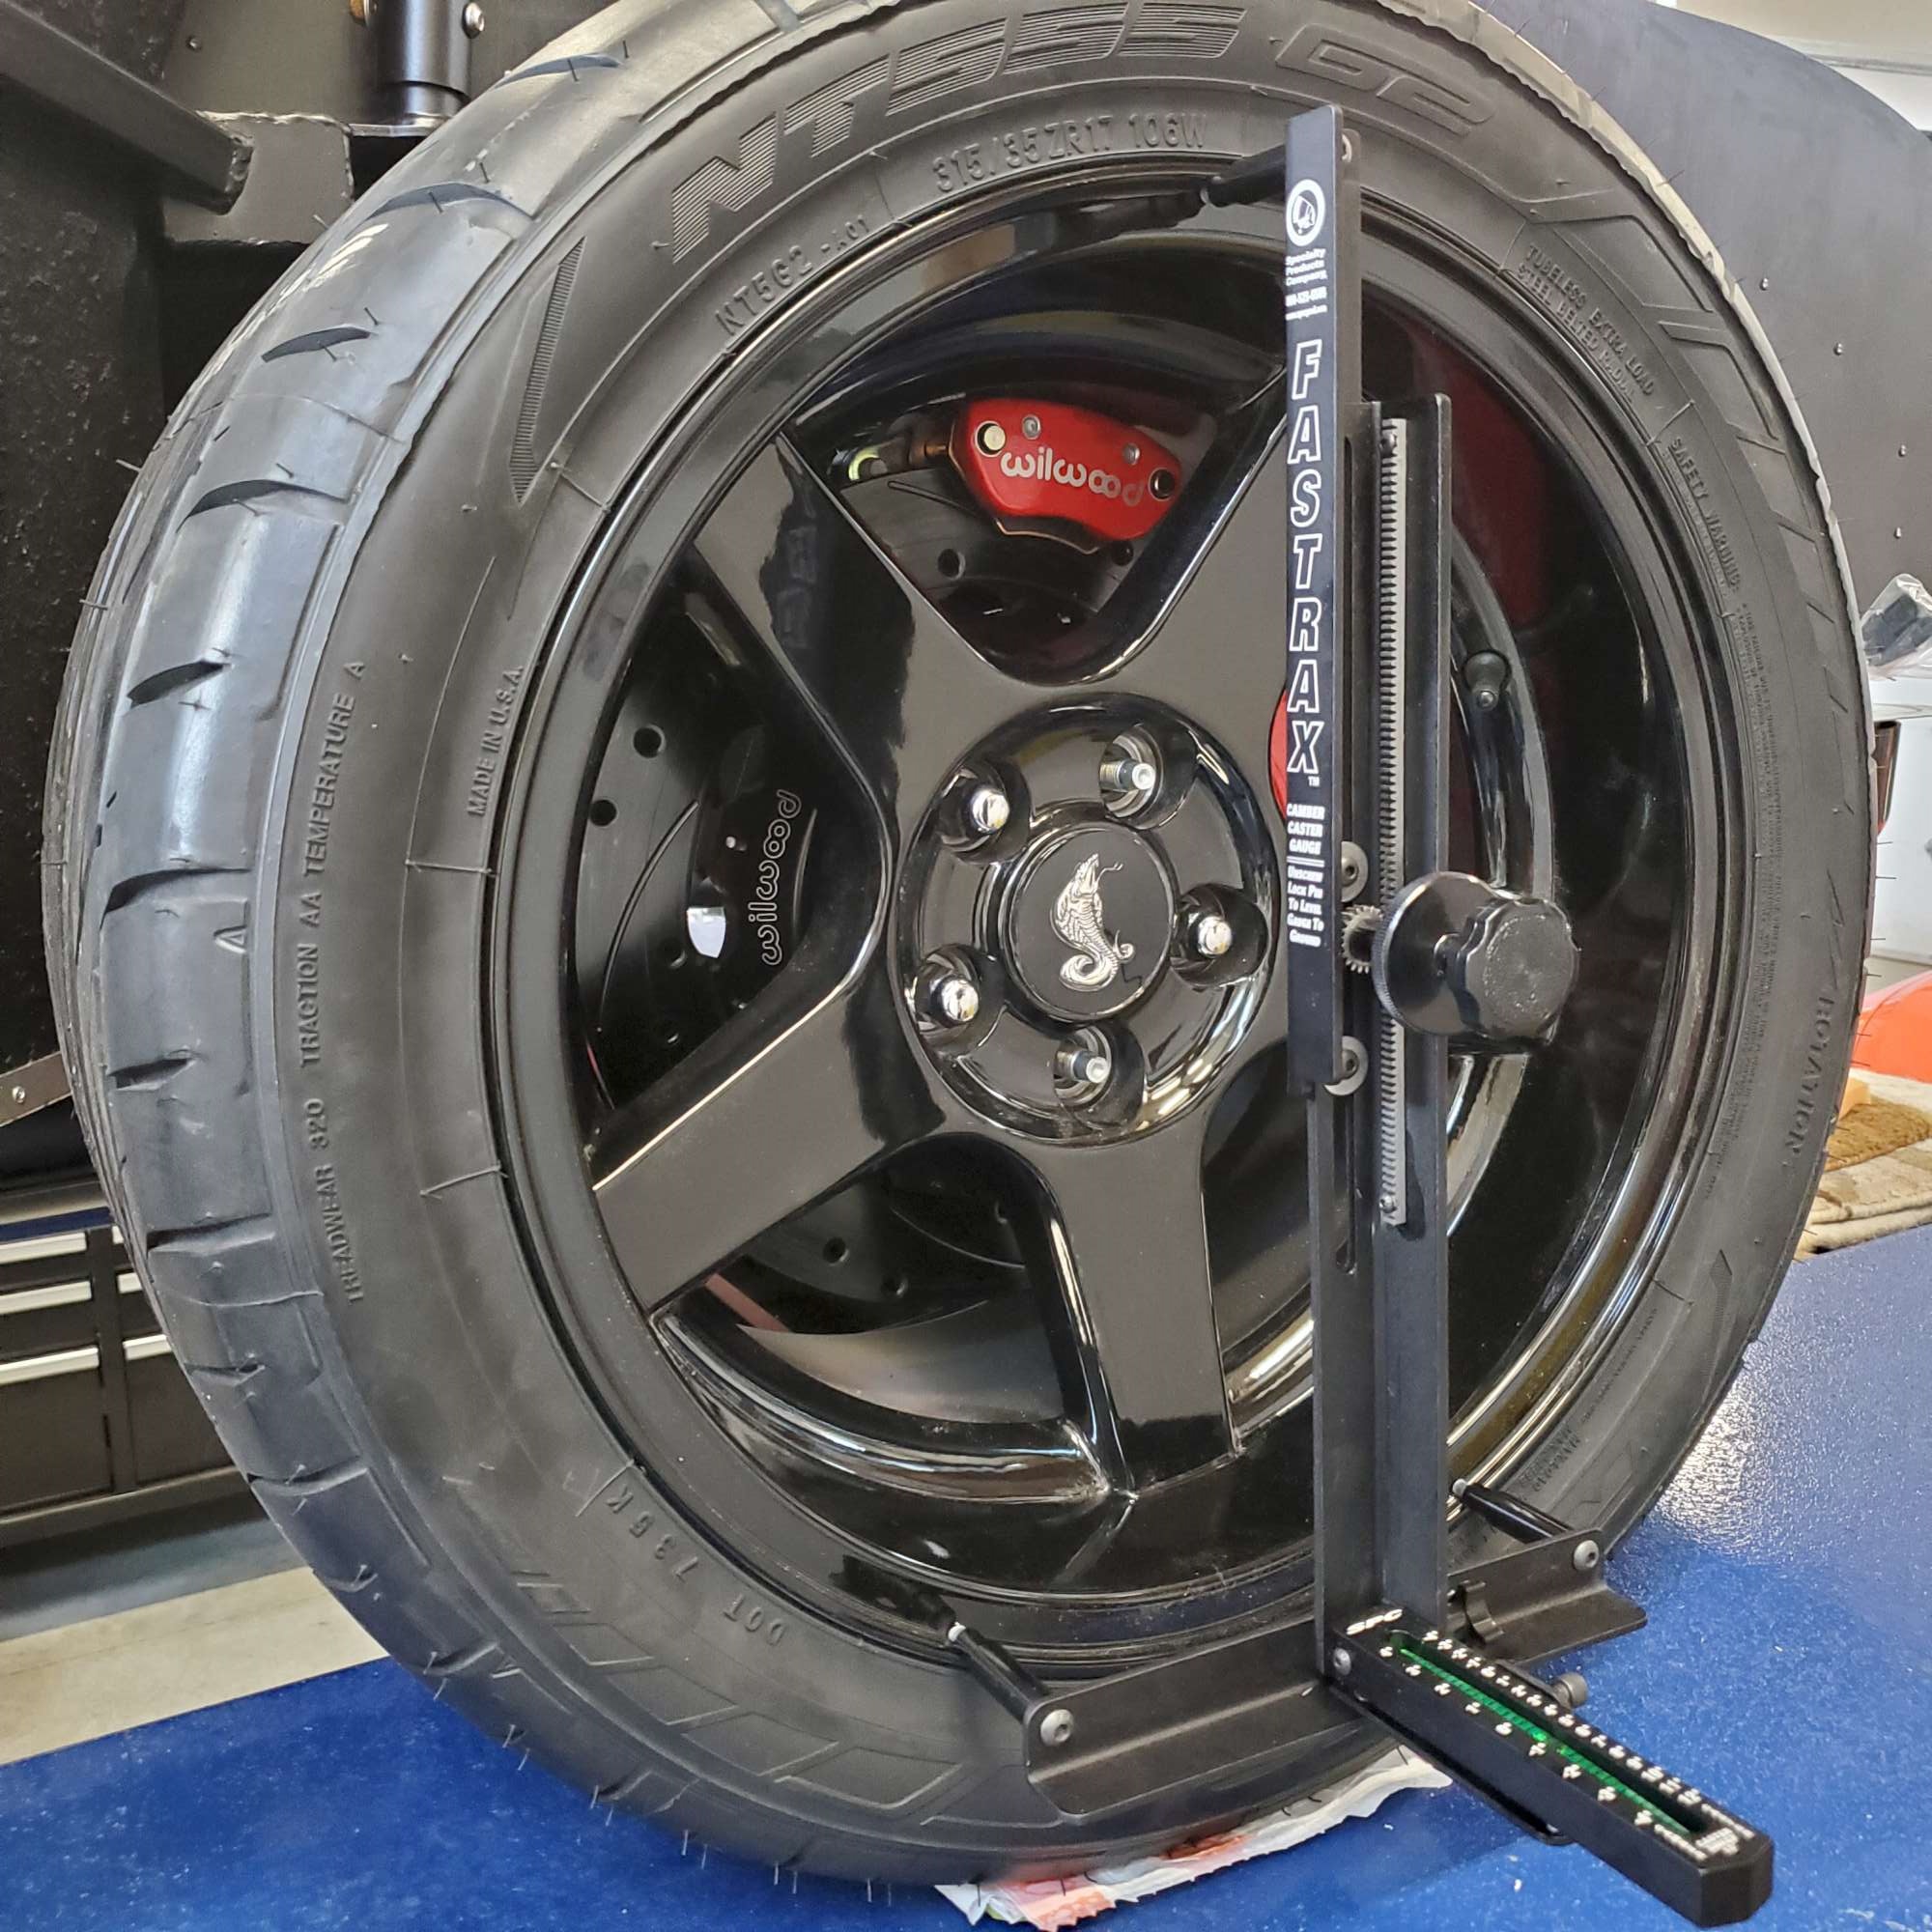
I purchased the SPC Fastrax Camber/Caster gauge. Instructions call for rotating wheel 15* outward, then 15 deg. inward. To give me a target for the 15 deg. outward and inward, I used a scrap piece of 2"x8". I cut one side flush. On the other end I angle cut from center to the edge at 15* with my miter saw. With the flush cut side against the tire (with track parallel), I used this "jig" to put down duct tape at 15* outward and inward angles.
When turning the sleeves I found it easy to lose track of the turns. To help with this, I wrapped each of the sleeves with blue painter's tape and numbered each face. The tape also helps prevent nicks and scratches from my wrench when turning the sleeves.

IFS alignment steps
- Set track parallel. Again, used Heidt's toe plates and laser level.
- Set toe-in to 1/16" total toe.
- PS Camber adjust to -0.5. [Final: -0.6]
- PS Caster adjust to +7.0. [Final: +7.25]
- DS Camber adj to -0.5 [Final: -0.4]
- DS Caster adjust to +7.0 [Final: +6.75]
- Move steering wheel to bring track back to parallel.
- Adjust total toe-in to 1/16" [Final: 3/16"]
- Repeat X6.
Yep. Six times through the steps above. After the final round, I rolled the chassis back and forth a couple feet on the lift. The alignment didn't move. Good.
Measuring/adjusting caster with Fastrax gauge. The paint stir sticks strapped to the wheel aid in eyeballing when the wheel is 15 deg. outward and 15* inward. Here you can see the DS wheel turned 15* outward.
In the interest of finishing this Roadster before my kids have grandkids, I'm calling it close enough for go-kart. Will revisit in the future once the body is on for good. I will say this is not a good strategy for saving cash v. paying for a professional alignment. However, the payoff for me is in the learning. And as a potential bonus, if I Autocross and want to adjust anything, I'll be able to dial in the numbers I want.
Now, about that first go-kart.
Last edited by 460.465USMC; 08-14-2022 at 10:54 PM.
Reason: Spelling and clarity.
Chris
Coupe complete kit. Index. Delivered: 4/22/24.
Build Thread. Coyote Gen 4X. T-56. IRS w/3.55. Wilwoods. PS. HVAC. Side windows.
MK4 Complete kit.
Build Thread Index. Delivered: 10/15/2020. Legal: 7/25/23. Coyote Gen3. TKO600 (0.64 OD). IRS w/3.55. PS. Wilwoods. Sway bars. This build is dedicated to my son, Benjamin.
Build Thread.
-
Post Thanks / Like - 1 Thanks, 5 Likes
-
08-15-2022, 10:11 AM
#457
Originally Posted by
460.465USMC
In the interest of finishing this Roadster before my kids have grandkids, I'm calling it close enough for go-kart.
Chris, I'm doing my best to get on that same plan.
What you detailed was far from boring for anyone who hasn't done alignment before, and has it in their near future. I've read plenty of writeups of this process; yours is clear, easy to understand and accessible, and just what I need. I'll be referring to it when I go through the same process, hopefully in not too many weeks. Thanks a bunch and nice work.
MK4 #7838: IRS 3.55 TrueTrac T5z Dart 347
The drawing is from ~7th grade, mid-1970s
Meandering, leisurely build thread is
here
-
Post Thanks / Like - 2 Thanks, 1 Likes
-
08-15-2022, 06:18 PM
#458
Nice job on the alignment!
Let me know when you’re ready for the first test drive and I’ll come over and watch.
Jim
-
Post Thanks / Like - 1 Thanks, 1 Likes
-
08-15-2022, 08:32 PM
#459
Originally Posted by
John Ibele
Chris, I'm doing my best to get on that same plan.
What you detailed was far from boring for anyone who hasn't done alignment before, and has it in their near future. I've read plenty of writeups of this process; yours is clear, easy to understand and accessible, and just what I need. I'll be referring to it when I go through the same process, hopefully in not too many weeks. Thanks a bunch and nice work.
Appreciate the encouragement, John! I'm really enjoying the build process. So much to learn--even if I occasionally need to bang my head against the wall to jump start my two remaining brain cells.
I look forward to reading about your alignment process. I know there are many approaches to this task, so looking forward to seeing what you come up with.
Originally Posted by
Jim Frahm
Nice job on the alignment!
Let me know when you’re ready for the first test drive and I’ll come over and watch.
Jim
Thanks, Jim!
About the first go-kart...um, sorry, man! I went for it! I hope that doesn't stop you from coming over anyway for a cup of coffee one morning in the near future. I'll give you an in-person demo. 'Cause, you know I'm looking for excuses to make sure I wasn't dreaming about it.
Last edited by 460.465USMC; 08-15-2022 at 09:07 PM.
Chris
Coupe complete kit. Index. Delivered: 4/22/24.
Build Thread. Coyote Gen 4X. T-56. IRS w/3.55. Wilwoods. PS. HVAC. Side windows.
MK4 Complete kit.
Build Thread Index. Delivered: 10/15/2020. Legal: 7/25/23. Coyote Gen3. TKO600 (0.64 OD). IRS w/3.55. PS. Wilwoods. Sway bars. This build is dedicated to my son, Benjamin.
Build Thread.
-
Post Thanks / Like - 0 Thanks, 1 Likes
-
08-15-2022, 09:07 PM
#460
Go-Kart!
Yep! First go-kart in the books!
To heck with going through the pinion angle process before first go-kart. After my lengthy four wheel alignment tour, I checked with one of my go-to builders, and agreed with his opinion my pinion angle should be fine for first go-kart with my Coyote/TKO600/IRS setup.
I made a final check of all fasteners, fluids, and an overall lookover of my Roadster. I've ran it to operating temp. at least four times and no leaks. So, figured it was time to go for it.
My better half shot the video (thanks, Honey!) with my phone. It was pretty long, so I broke it into three short segments, and trimmed out some fluff.
* First go-kart Part 1 (50 sec): https://youtube.com/shorts/RE98PsGE-nc?feature=share (It was slow going down my gravel driveway--tires really grabbed the rocks).
* First go-kart Part 2 (24 sec): https://youtube.com/shorts/UqRFD-lr8j0?feature=share
* First go-kart Part 3 (29 sec): https://youtube.com/shorts/yFmsy8y7YhM?feature=share
* Second pass--modest acceleration (28 sec): https://youtube.com/shorts/cwA8D5BZX-I?feature=share
The day (yesterday) couldn't have been nicer. Unexpectedly, our sons, daughter, sister and her daughter were over for dinner. So, I had a "crowd" cheering me on. Have to admit I was a bit nervous after having it stationary in my garage for 22 months. But all went well. It was a bright point in an extremely difficult 12 months for my family and me. We weren't whole without Ben there. But I know he would have been cheering me on, and first in line to get a ride.
I guess this look on my face says it all. Thankful to have this opportunity.
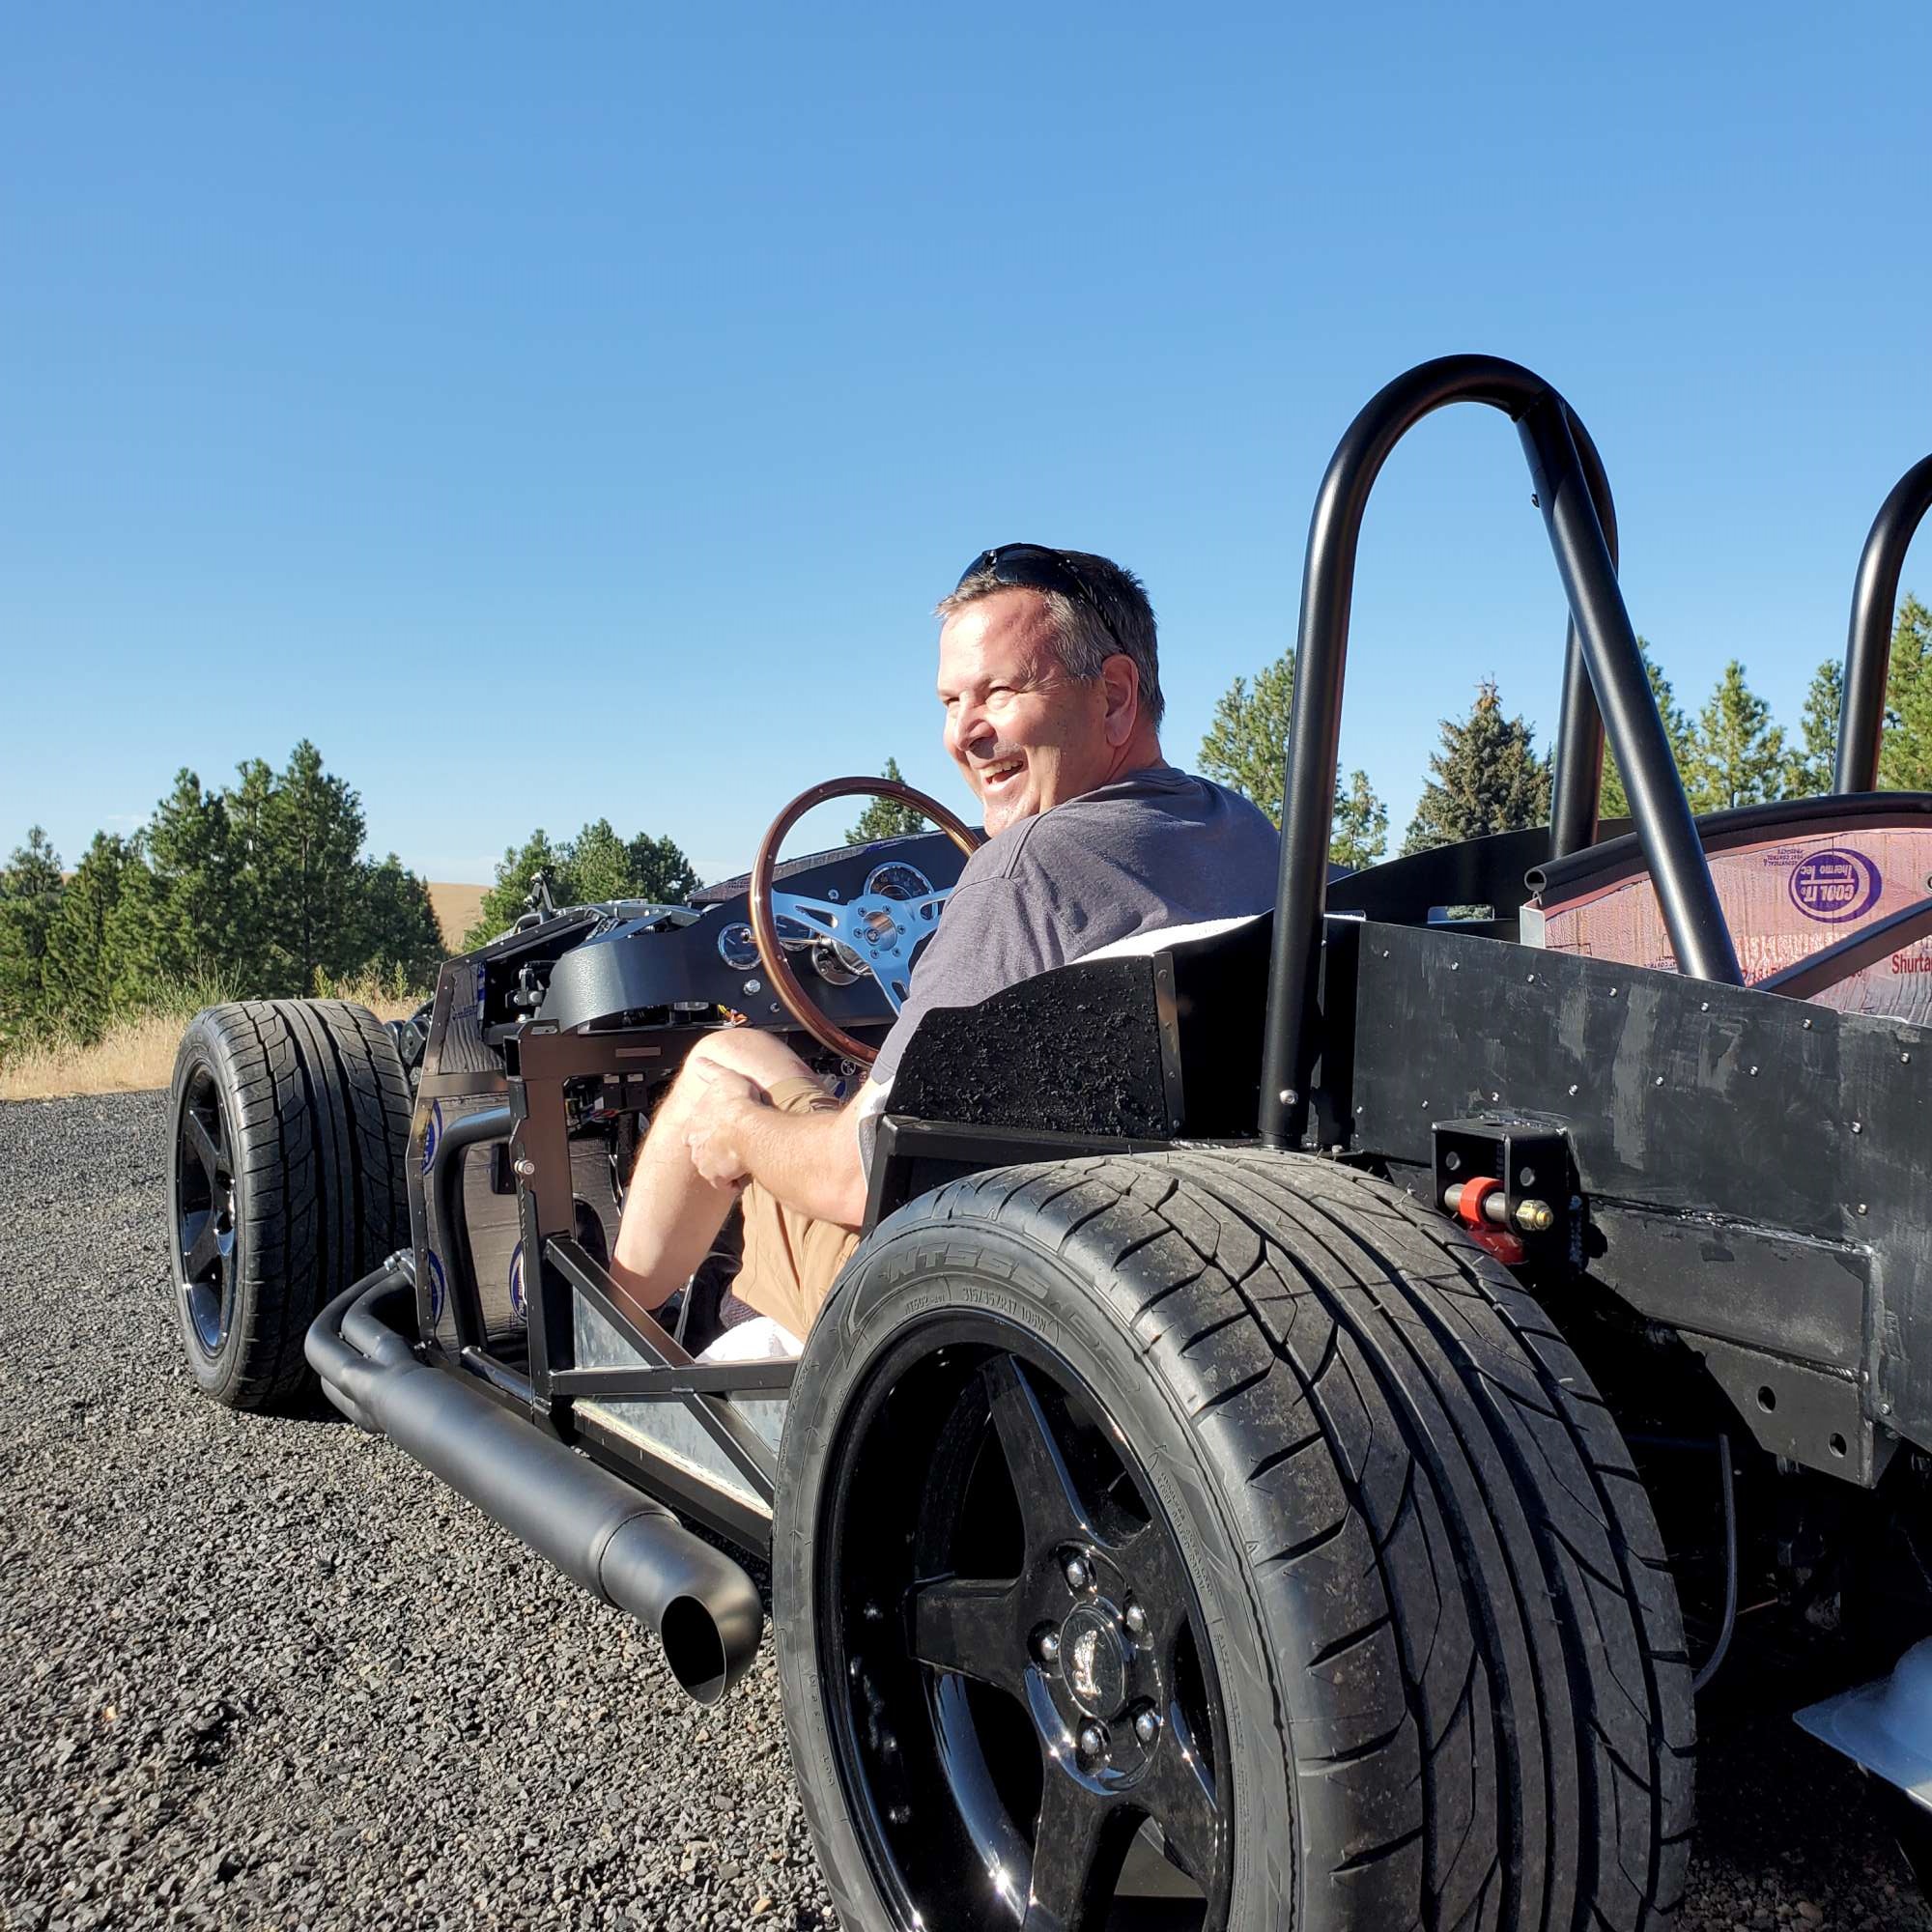
This happens to be my first ride in a Factory Five. And, simultaneously, my first time driving one. So, I didn't really know what to expect. Wow, it is low to the ground! Steering is responsive. It tracked well. My top speed was around 35 MPH, and I proudly clocked a whopping 3+ miles on my odometer.
I made a couple basic brackets out of a piece of 3/16"x3" aluminum I had on-hand so I could temp. mount the tail lights. My front LED turn signal lights are installed and working as well. I guess a little extra visibility doesn't hurt during go-kart--once I remembered I turned them on! As you can see, the dry grass around my go-kart "track" is a tinderbox, so made use of my RT drop trunk by cradling a fire extinguisher between a couple rolled up towels. Just in case.
I'm guessing braking performance is lacking at least in some part (most?) since the pads haven't been bedded? I welcome any input on how this may change once I complete the Wilwood recommended bedding procedure. The pedal still feels pretty firm.
So far no leaks. Good. Will need to vacuum out the small pebbles. Then I think it's back to tackling pinion angle.
A big Thank You to everyone on the forum who's helped me get this far!
Last edited by 460.465USMC; 08-15-2022 at 09:13 PM.
Chris
Coupe complete kit. Index. Delivered: 4/22/24.
Build Thread. Coyote Gen 4X. T-56. IRS w/3.55. Wilwoods. PS. HVAC. Side windows.
MK4 Complete kit.
Build Thread Index. Delivered: 10/15/2020. Legal: 7/25/23. Coyote Gen3. TKO600 (0.64 OD). IRS w/3.55. PS. Wilwoods. Sway bars. This build is dedicated to my son, Benjamin.
Build Thread.
-
Post Thanks / Like - 0 Thanks, 6 Likes
-
08-15-2022, 09:13 PM
#461


Originally Posted by
460.465USMC
Yep! First go-kart in the books!
To heck with going through the pinion angle process before first go-kart. After my lengthy four wheel alignment tour, I checked with one of my go-to builders, and agreed with his opinion my pinion angle should be fine for first go-kart with my Coyote/TKO600/IRS setup.
I made a final check of all fasteners, fluids, and an overall lookover of my Roadster. I've ran it to operating temp. at least four times and no leaks. So, figured it was time to go for it.
My better half shot the video (thanks, Honey!) with my phone. It was pretty long, so I broke it into three short segments, and trimmed out some fluff.
* First go-kart Part 1 (50 sec):
https://youtube.com/shorts/RE98PsGE-nc?feature=share (It was slow going down my gravel driveway--tires really grabbed the rocks).
* First go-kart Part 2 (24 sec):
https://youtube.com/shorts/UqRFD-lr8j0?feature=share
* First go-kart Part 3 (29 sec):
https://youtube.com/shorts/yFmsy8y7YhM?feature=share
* Second pass--modest acceleration (28 sec):
https://youtube.com/shorts/cwA8D5BZX-I?feature=share
The day (yesterday) couldn't have been nicer. Unexpectedly, our sons, daughter, sister and her daughter were over for dinner. So, I had a "crowd" cheering me on. Have to admit I was a bit nervous after having it stationary in my garage for 22 months. But all went well. It was a bright point in an extremely difficult 12 months for my family and me. We weren't whole without Ben there. But I know he would have been cheering me on, and first in line to get a ride.
I guess this look on my face says it all. Thankful to have this opportunity.
This happens to be my first ride in a Factory Five. And, simultaneously, my first time driving one. So, I didn't really know what to expect. Wow, is it low to the ground! Steering is responsive. It tracked well. My top speed was around 35 MPH, and I proudly clocked a whopping 3+ miles on my odometer.
I made a couple basic brackets out of a piece of 3/16"x3" aluminum I had on-hand so I could temp. mount the tail lights. My front LED turn signal lights are installed and working as well. I guess a little extra visibility doesn't hurt during go-kart--once I remembered I turned them on! As you can see, the dry grass around my go-kart "track" is a tinderbox, so made use of my RT drop trunk by cradling a fire extinguisher between a couple rolled up towels. Just in case.
I'm guessing braking performance is lacking at least in some part (most?) since the pads haven't been bedded? I welcome any input on how this may change once I complete the Wilwood recommended bedding procedure. The pedal still feels pretty firm.
So far no leaks. Good. Will need to vacuum out the small pebbles. Then I think it's back to tackling pinion angle.
A big Thank You to everyone on the forum who's helped me get this far!
Chris,
The smile is priceless! Congratulations on a very nicely done build. You're almost to the finish line now and I can't wait to see it done and on the road.
Dave
-
Post Thanks / Like - 1 Thanks, 2 Likes
-
08-15-2022, 09:53 PM
#462
Way to go Chris!!! Sounds fantastic!
Like you my car was the first cobra I really drove. I found the brakes lacking as well. I have the same setup as you, my experience in three parts.
1. I needed to bleed my brakes a couple times. The power bleeder just doesn’t get everything until you exercise the system. The pedal should be close to rock hard.
2. I needed to bias them to the front quite a bit to get the grab I was expecting.
3. The brakes improved quite a bit after getting hot and bedding them in.
I can get the car to stop on a dime now but it is still a hard pedal. It will never feel like boosted brakes. I’ve come to appreciate them and they have a great feel but a panic stop takes more effort than I was used to.
Last edited by Blitzboy54; 08-16-2022 at 10:11 AM.
-
Post Thanks / Like - 1 Thanks, 1 Likes
-
08-15-2022, 10:12 PM
#463
So happy for you Chris! What a great accomplishment, and a huge milestone in the build process. Congratulations.
MkIV Roadster build: Gen 2 Coyote, IRS, TKO600. Ordered 10/24/18. Delivered 1/29/19. Engine installed 8/8/21. First start 9/12/21. First go-kart 9/17/21. Off to paint 4/11/22. Back from paint 12/30/22.
Build thread here.
-
Post Thanks / Like - 1 Thanks, 0 Likes
-
08-15-2022, 10:15 PM
#464
Car sounds great and it only gets better from here. Congratulations!!!
Mind as well take it to Cars and Coffee this weekend that would be a very cool way to pull in!
Last edited by Fman; 08-15-2022 at 10:17 PM.
-
Post Thanks / Like - 1 Thanks, 0 Likes
-
08-16-2022, 02:06 PM
#465
Fantastic!
I’m still waiting on my ECU to be repaired or replaced and shipped back to me. In the mean time, I’m working on the water hoses/cooling system. On the upside, my rear springs should be here this week and that means all my POL and MIK items have arrived. I’m still waiting on wheels (my fault for ordering late) and side pipes (at the ceramic coating shop). I ordered the same side pipes as you.
I’ll plan a trip in the near future, maybe this weekend.
-
Post Thanks / Like - 0 Thanks, 1 Likes
-
08-16-2022, 03:17 PM
#466
Originally Posted by
Blitzboy54
Way to go Chris!!! Sounds fantastic!
Like you my car was the first cobra I really drove. I found the brakes lacking as well. I have the same setup as you, my experience in three parts.
1. I needed to bleed my brakes a couple times. The power bleeder just doesn’t get everything until you exercise the system. The pedal should be close to rock hard.
2. I needed to bias them to the front quite a bit to get the grab I was expecting.
3. The brakes improved quite a bit after getting hot and bedding them in.
I can get the car to stop on a dime now but it is still a hard pedal. It will never feel like boosted brakes. I’ve come to appreciate them and they have a great feel but a panic stop takes more effort than I was used to.
Thanks, Jesse! The rumble is music to my ears.
Really appreciate you passing along your experience. Very helpful. I'll keep my expectations low until I can properly bed in the brakes. I may play with the remote bias a bit, but not get carried away until after they're bedded.
Chris
Coupe complete kit. Index. Delivered: 4/22/24.
Build Thread. Coyote Gen 4X. T-56. IRS w/3.55. Wilwoods. PS. HVAC. Side windows.
MK4 Complete kit.
Build Thread Index. Delivered: 10/15/2020. Legal: 7/25/23. Coyote Gen3. TKO600 (0.64 OD). IRS w/3.55. PS. Wilwoods. Sway bars. This build is dedicated to my son, Benjamin.
Build Thread.
-
08-16-2022, 03:22 PM
#467
Originally Posted by
JohnK
So happy for you Chris! What a great accomplishment, and a huge milestone in the build process. Congratulations.
Thanks, John! What a blast! Any word on the paint/body progress on yours?
Originally Posted by
Fman
Car sounds great and it only gets better from here. Congratulations!!!
Mind as well take it to Cars and Coffee this weekend that would be a very cool way to pull in!
Thanks, Travis! Hard to believe it gets better since I'm enjoying it so much already.
Originally Posted by
Jim Frahm
Fantastic!
I’m still waiting on my ECU to be repaired or replaced and shipped back to me. In the mean time, I’m working on the water hoses/cooling system. On the upside, my rear springs should be here this week and that means all my POL and MIK items have arrived. I’m still waiting on wheels (my fault for ordering late) and side pipes (at the ceramic coating shop). I ordered the same side pipes as you.
I’ll plan a trip in the near future, maybe this weekend.
Hi Jim. Glad to hear you're almost there on POL. Phew! So far I really like the sound of these Gas N pipes.
Chris
Coupe complete kit. Index. Delivered: 4/22/24.
Build Thread. Coyote Gen 4X. T-56. IRS w/3.55. Wilwoods. PS. HVAC. Side windows.
MK4 Complete kit.
Build Thread Index. Delivered: 10/15/2020. Legal: 7/25/23. Coyote Gen3. TKO600 (0.64 OD). IRS w/3.55. PS. Wilwoods. Sway bars. This build is dedicated to my son, Benjamin.
Build Thread.
-
08-16-2022, 03:41 PM
#468
Chris that is amazing! It sounds beautiful doesn't it? Hope you're able to rest up and enjoy time with the family. It's a big milestone you've crossed, have a few beers!
What's the next big milestone now that you've achieved go-kart? Body on? Paint? Registration? DRIVING TO CAR SHOWS IN YOUR COBRA?
-
Post Thanks / Like - 1 Thanks, 0 Likes
-
08-16-2022, 04:49 PM
#469
Chris,
It has been really fun to follow your thread, and the journey you have been on with this build. On your first post you described yourself as a "novice" in regards to building a car. You have come a very long way from being a novice and should be very proud of your build. Congratulations on your progress!
-
08-16-2022, 04:50 PM
#470
Originally Posted by
facultyofmusic
Chris that is amazing! It sounds beautiful doesn't it? Hope you're able to rest up and enjoy time with the family. It's a big milestone you've crossed, have a few beers!
What's the next big milestone now that you've achieved go-kart? Body on? Paint? Registration? DRIVING TO CAR SHOWS IN YOUR COBRA?
Thanks, Dan! I'm still pretty giddy about the whole thing.
Good question about what's next. Honestly, I've been so focused on first start/go-kart that I don't have a solid plan. A few things on my immediate radar include pinion angle (any chance it will be good as is? ). Mock up the FFMetal transmission tunnel cover (with cupholders) and then get it powder coated to match the dash. Coat the underside of the body with bedliner. After that I'll need to review the F5 manual to hatch my long-term plan.
Thanks for checking in!
Last edited by 460.465USMC; 08-16-2022 at 04:58 PM.
Chris
Coupe complete kit. Index. Delivered: 4/22/24.
Build Thread. Coyote Gen 4X. T-56. IRS w/3.55. Wilwoods. PS. HVAC. Side windows.
MK4 Complete kit.
Build Thread Index. Delivered: 10/15/2020. Legal: 7/25/23. Coyote Gen3. TKO600 (0.64 OD). IRS w/3.55. PS. Wilwoods. Sway bars. This build is dedicated to my son, Benjamin.
Build Thread.
-
08-16-2022, 04:57 PM
#471
Originally Posted by
Tim B
Chris,
It has been really fun to follow your thread, and the journey you have been on with this build. On your first post you described yourself as a "novice" in regards to building a car. You have come a very long way from being a novice and should be very proud of your build. Congratulations on your progress!
Thanks for the kind words, Tim. I have learned so much along the way. The guys on this forum are quite generous in sharing their knowledge. I'm working in the shadows of some real craftsman on this forum. For me, school is in session every time I go out to my garage. If you are considering building one, you'll be in good hands on this forum. In the meantime, lots of great builds to follow along.
Chris
Coupe complete kit. Index. Delivered: 4/22/24.
Build Thread. Coyote Gen 4X. T-56. IRS w/3.55. Wilwoods. PS. HVAC. Side windows.
MK4 Complete kit.
Build Thread Index. Delivered: 10/15/2020. Legal: 7/25/23. Coyote Gen3. TKO600 (0.64 OD). IRS w/3.55. PS. Wilwoods. Sway bars. This build is dedicated to my son, Benjamin.
Build Thread.
-
08-24-2022, 08:34 PM
#472
Pinion Angle is Set
The next key item I wanted to complete is to verify the pinion angle, and adjust if needed. In preparation, I read some good threads. My head hurt for a while. But, the content eventually made sense. Here are a couple that really helped:
I used a digital angle finder to measure the transmission output shaft angle, driveshaft angle, and pinion angle of the IRS. Before installing the transmission, I installed three 1/4" aluminum spacers that I bought from Forte in his TKO spacer kit. This raised my transmission 3/4", and from what I had read seemed to be a good starting point. It turned out to be a great starting point:
- OA-1 = -1.2*. Operating angle between transmission output shaft and driveshaft.
- OA-2 = -0.7*. Operating angle between driveshaft and pinion gear.
- PA = 0.5*. Pinion angle.
As I understand the rules and goals for pinion angle, I believe I'm good-to-go:
- OA-1 and OA-2 should be within 1* of each other. Check.
- OA-1 and OA-2 should be <3*. Check.
- PA should be less than 1*. Check.
- Slope is measured front to rear, so it is sloping down if lower in the rear.
- Add the OAs if the slopes are in opposite direction. Subtract the smaller from the larger if slopes are in the same direction. Mine were in the same (neg.) direction, so I subtracted OA-2 from OA-1.
Knowing I very well may have a blind spot in my approach, I welcome any input. If there are no comments, then I'm going to install the lock nuts on the trans A-frame mount bolts and move on to next items.
In the meantime, another go-kart in the books...my odometer now reads 6+ miles. More smiles. Though I'm limiting max speed to around 30-35 MPH (fast enough for go-kart IMHO), no vibration detected so far from the driveshaft. The ultimate proof that my pinion angle is good, at least from a vibration perspective, will have to wait until it's licensed and on the road for at-speed testing.
Last edited by 460.465USMC; 08-24-2022 at 08:36 PM.
Chris
Coupe complete kit. Index. Delivered: 4/22/24.
Build Thread. Coyote Gen 4X. T-56. IRS w/3.55. Wilwoods. PS. HVAC. Side windows.
MK4 Complete kit.
Build Thread Index. Delivered: 10/15/2020. Legal: 7/25/23. Coyote Gen3. TKO600 (0.64 OD). IRS w/3.55. PS. Wilwoods. Sway bars. This build is dedicated to my son, Benjamin.
Build Thread.
-
Post Thanks / Like - 0 Thanks, 1 Likes
 Fman
Fman liked this post
-
09-10-2022, 05:42 PM
#473
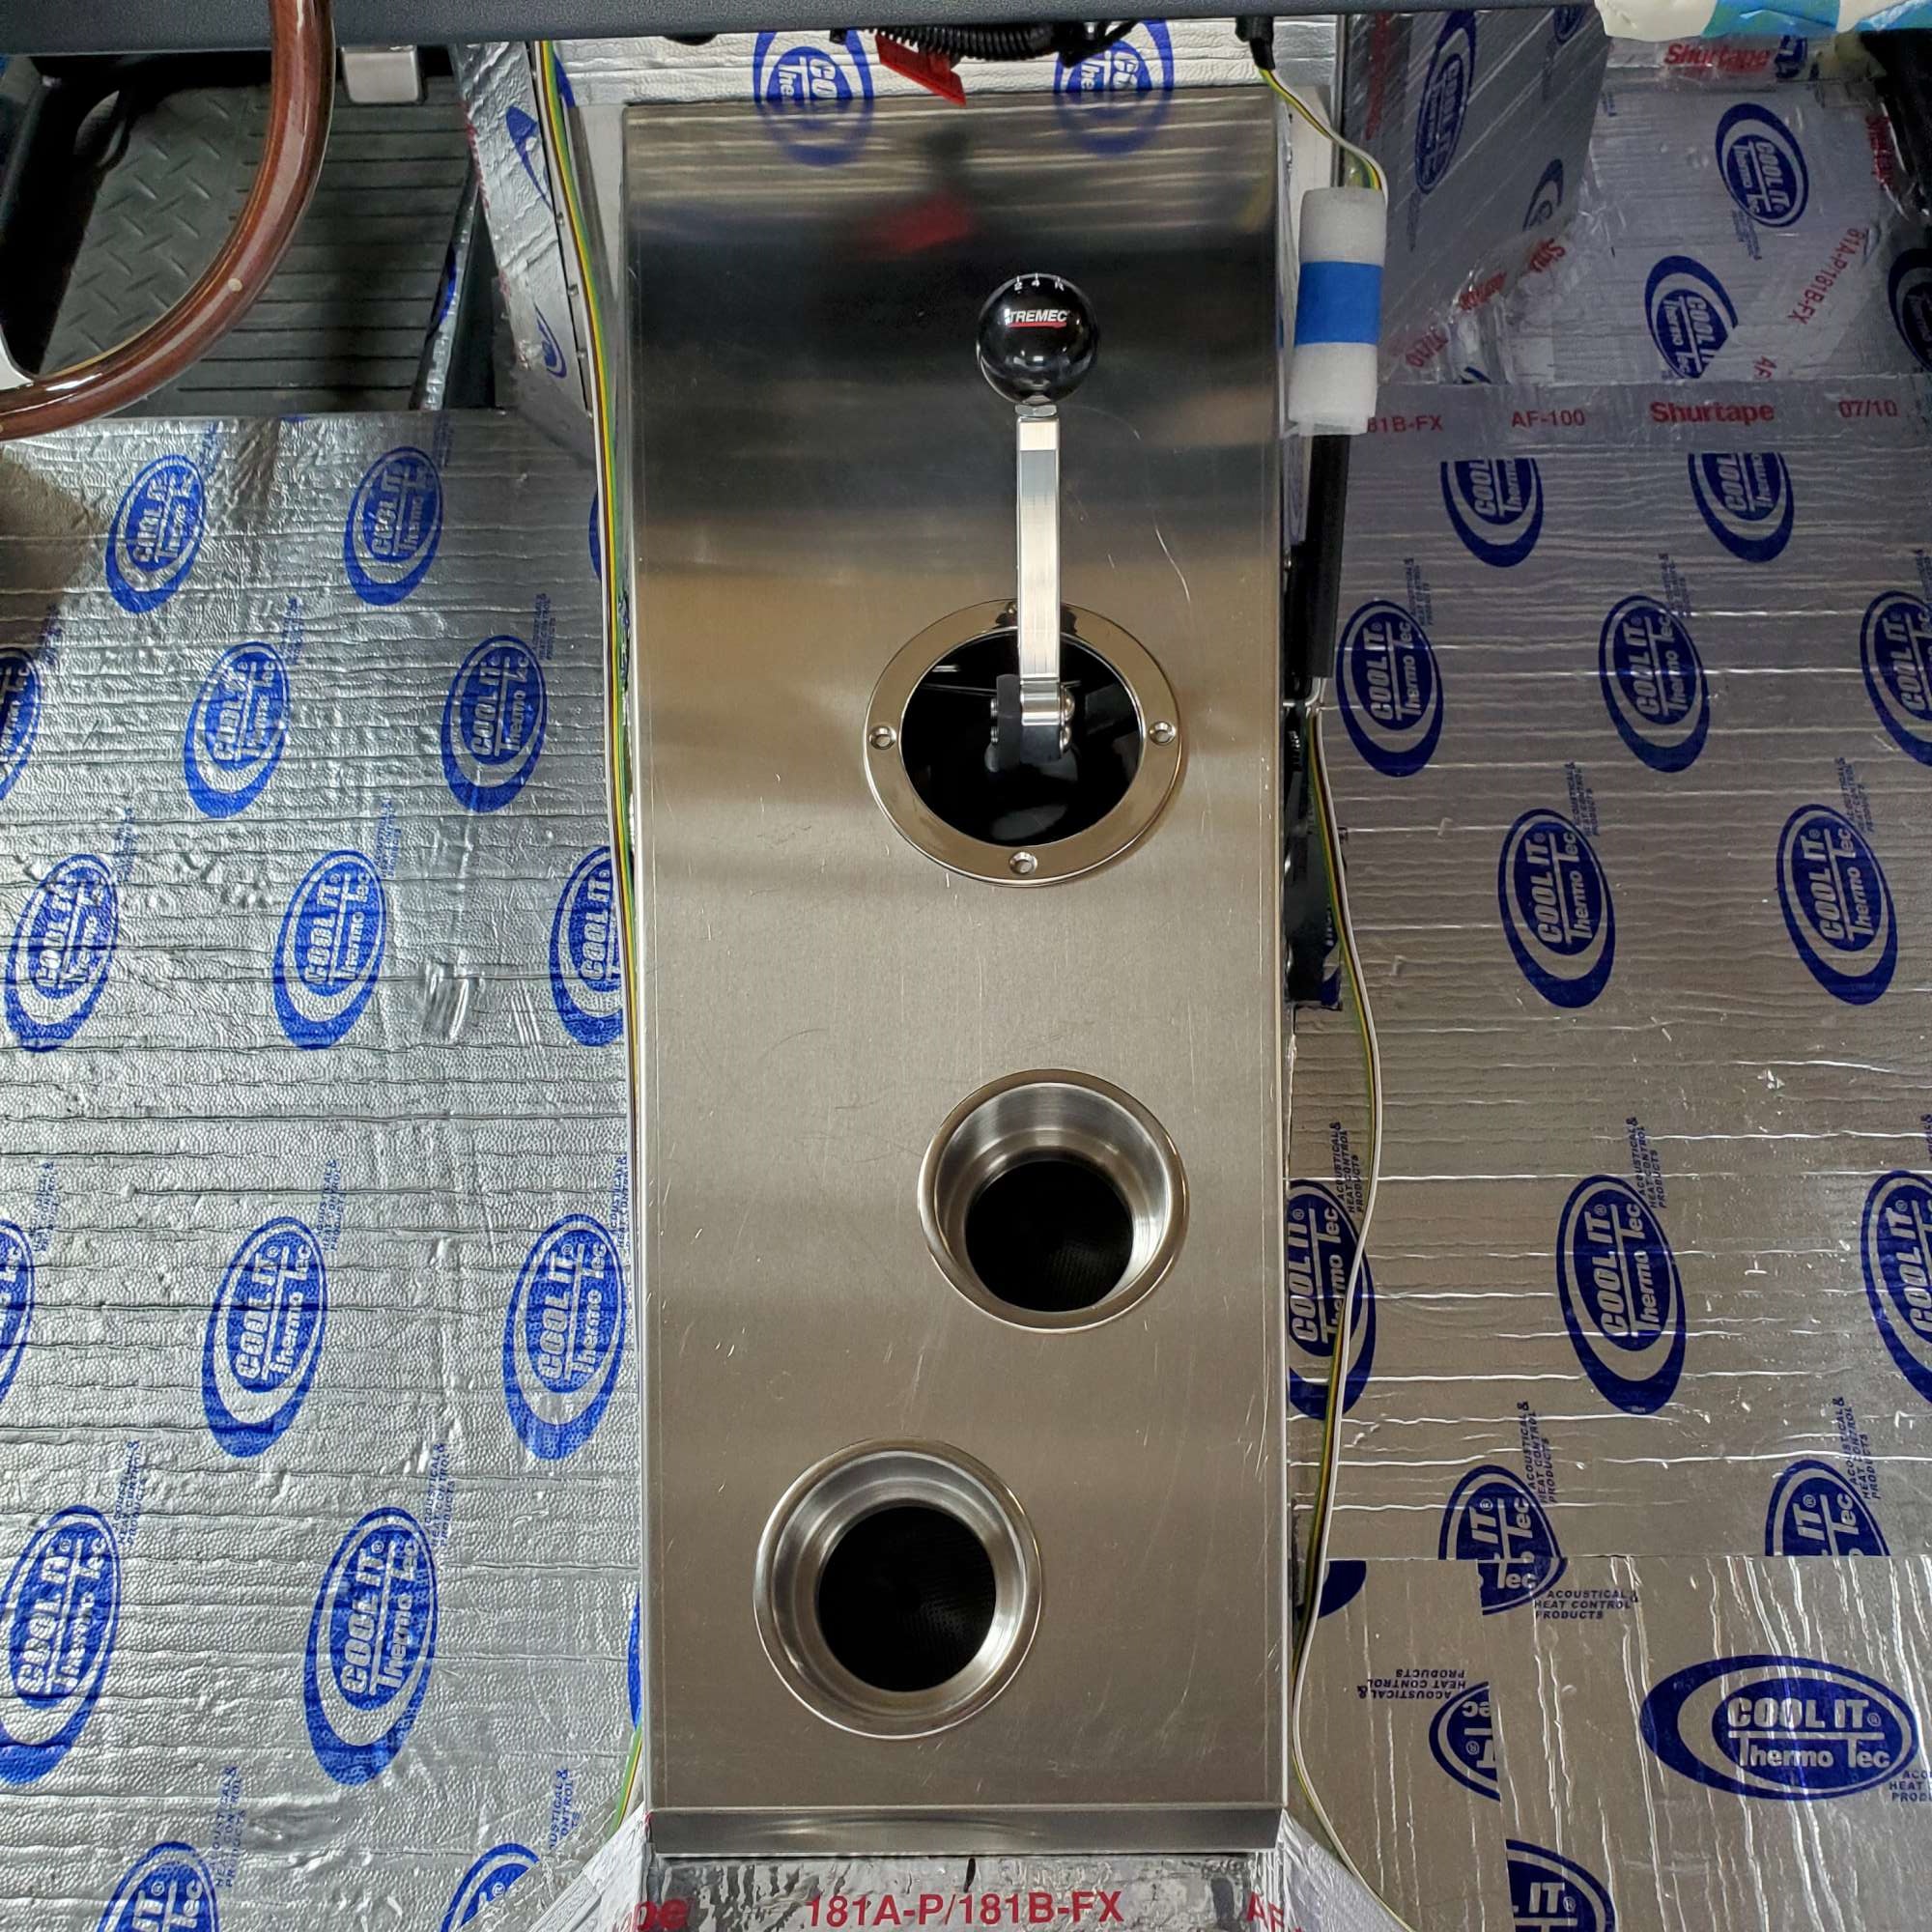
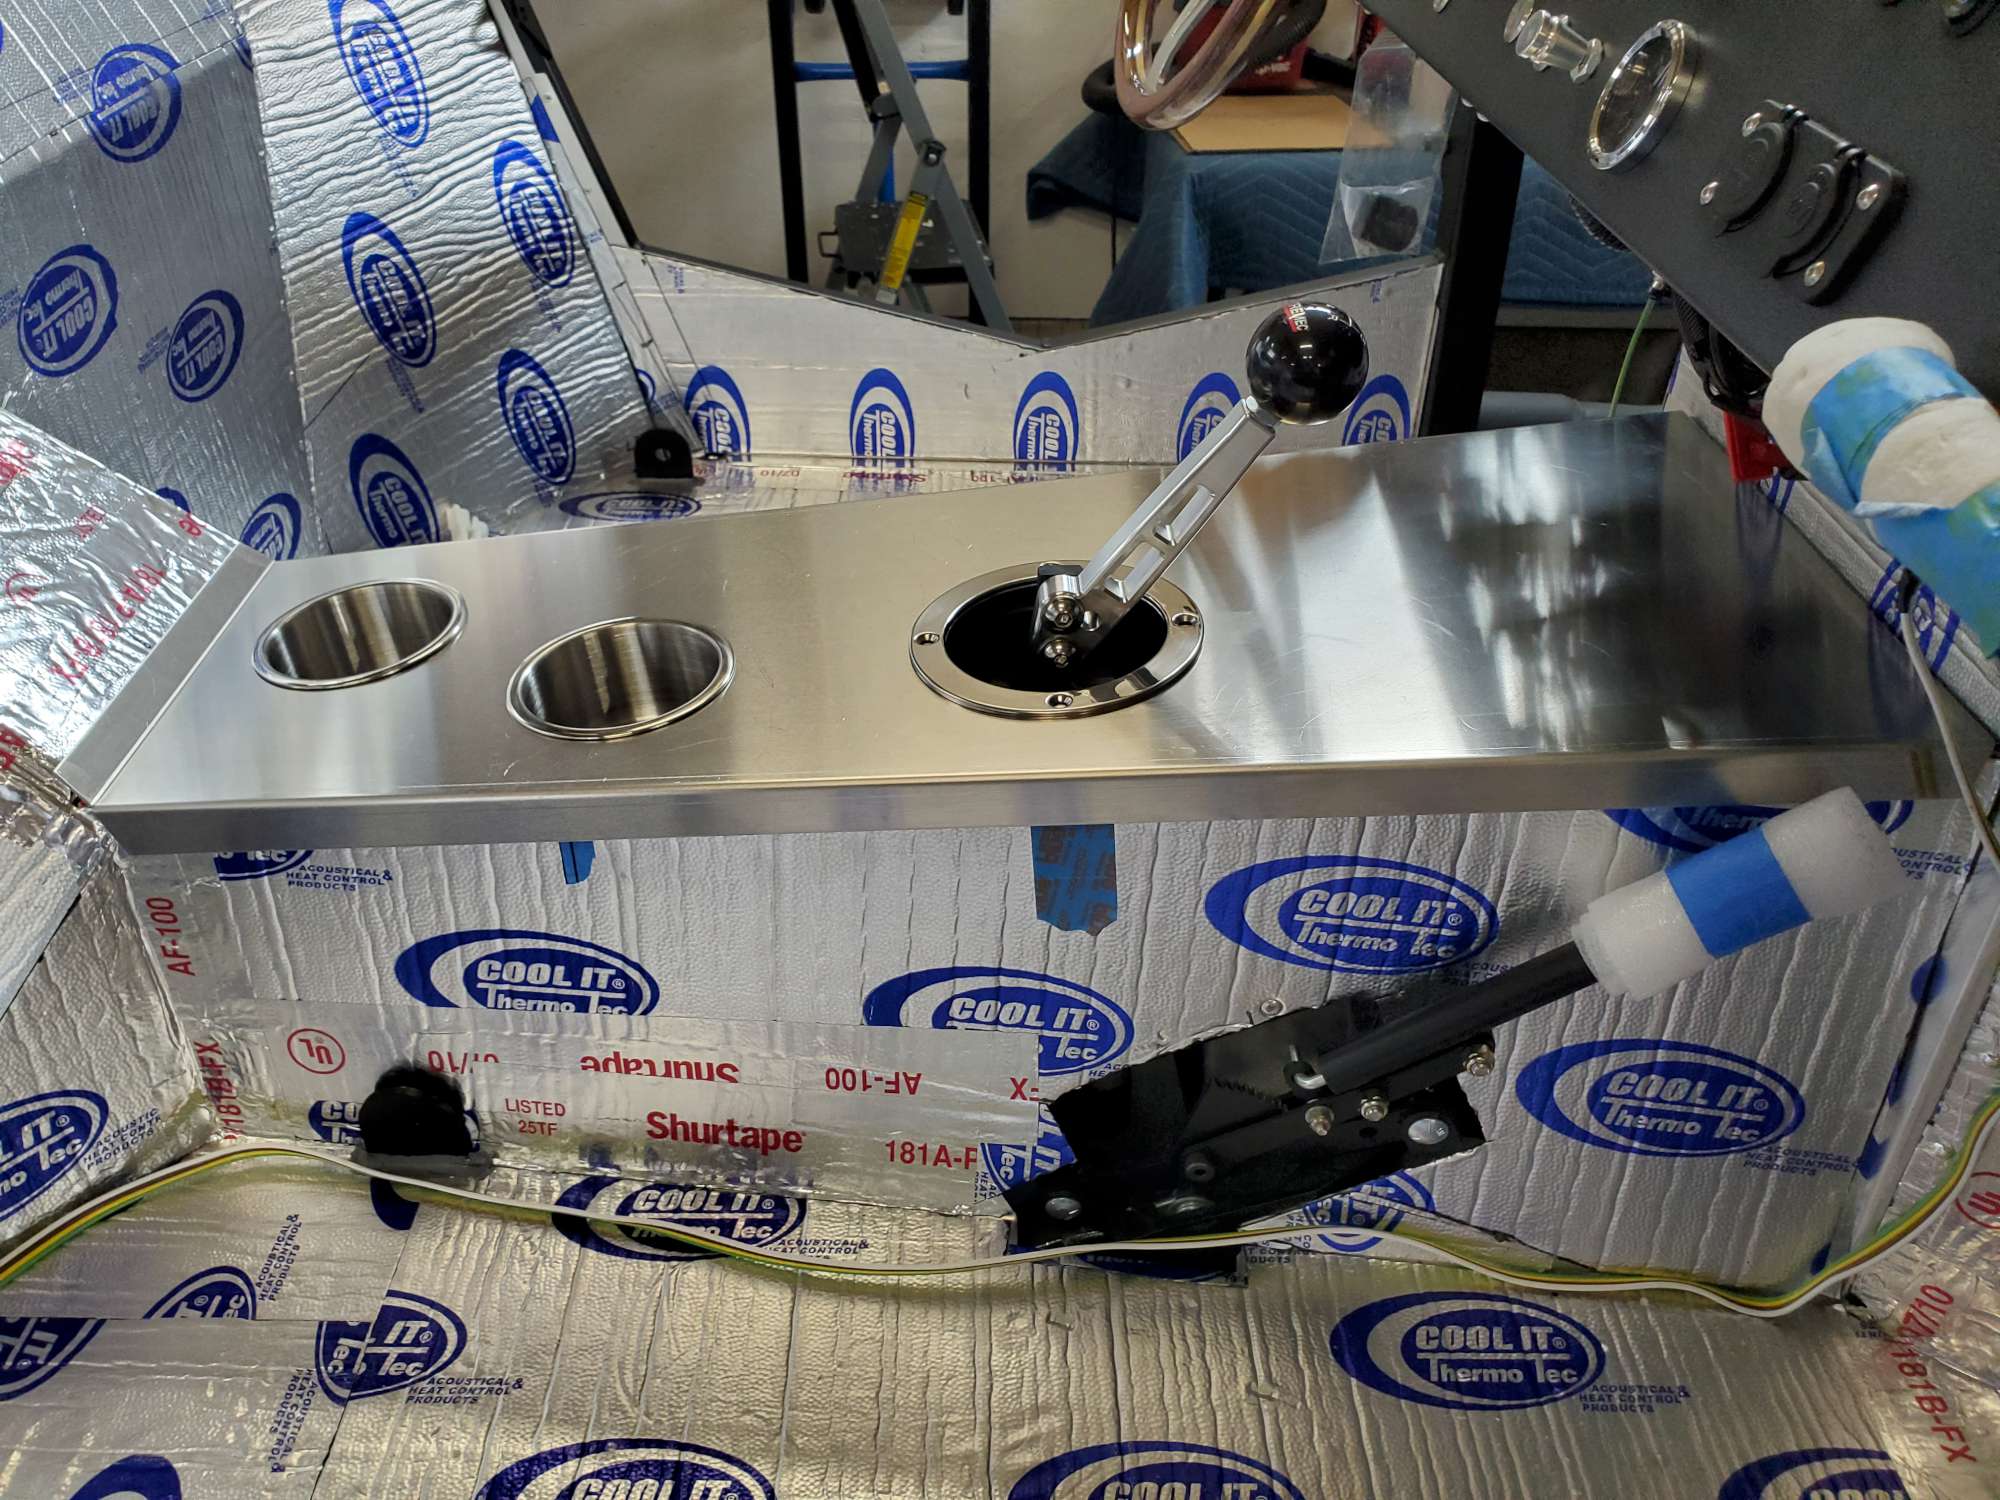
Trans Tunnel Cover | Carpet
Over the last couple weeks I've been chipping away on next steps: transmission tunnel cover and carpet install.
Transmission Tunnel Cover
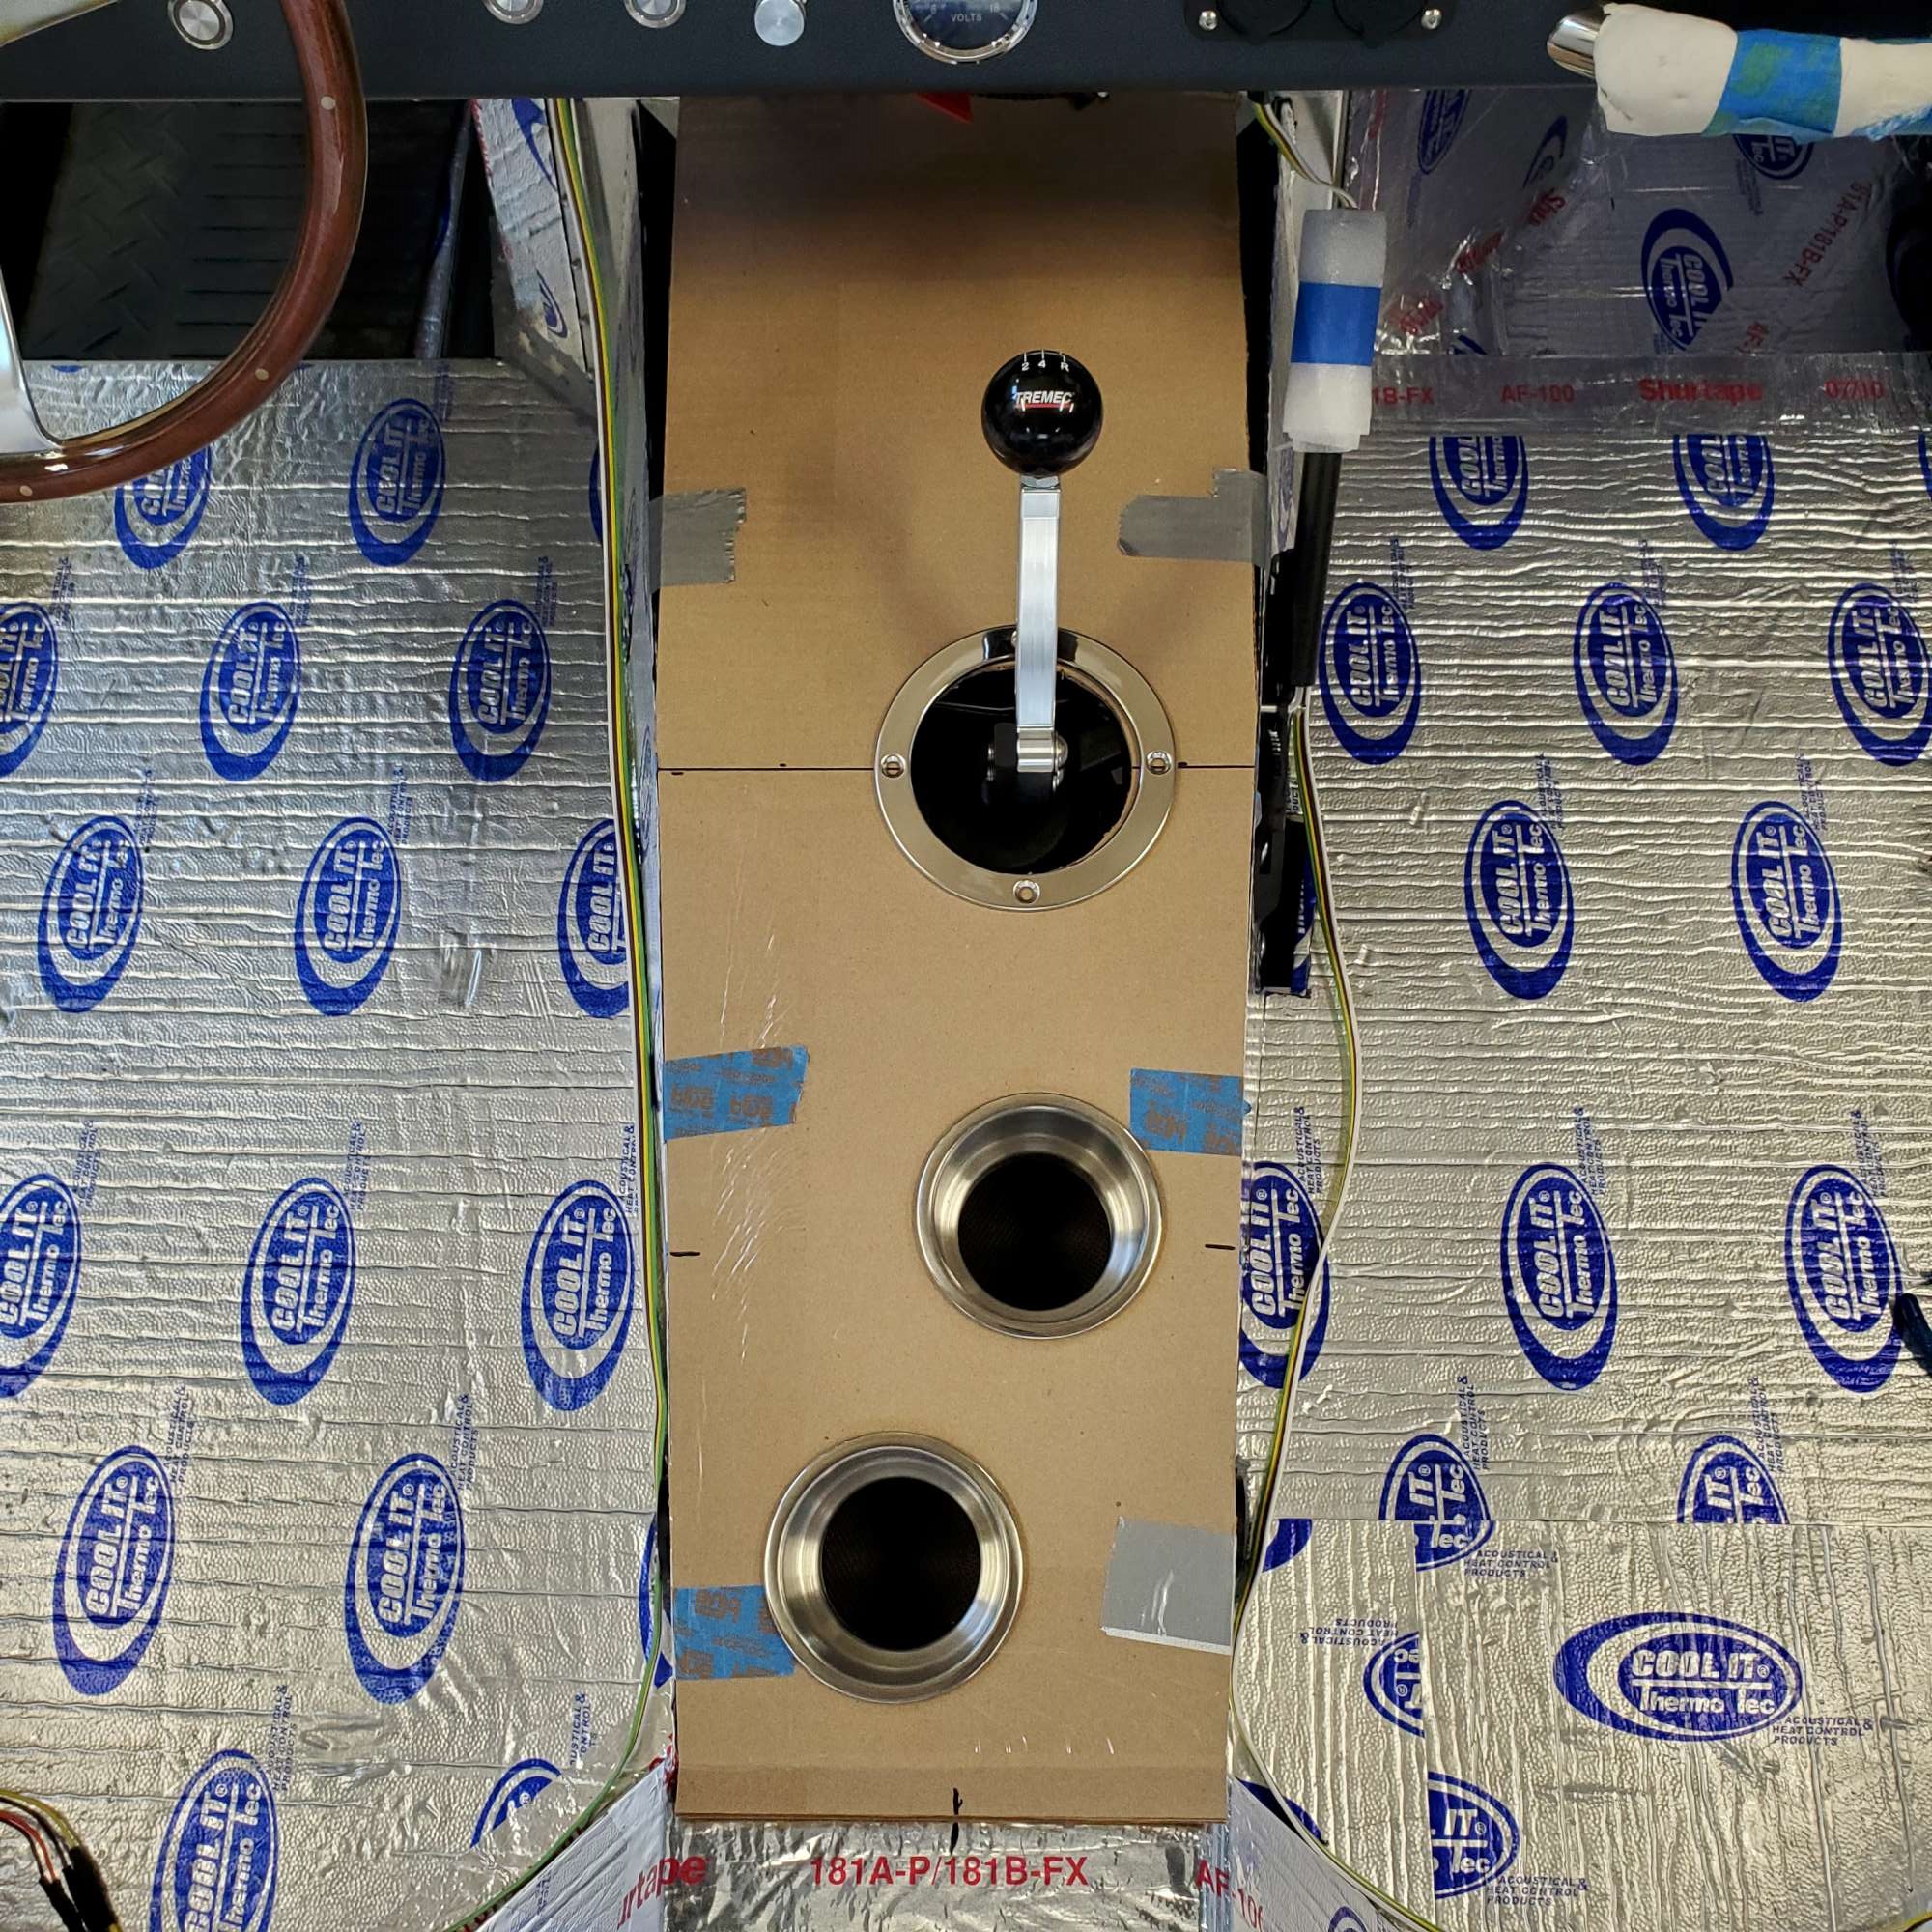
As I previously showed, I rotated the shifter position on my TKO600 180 degrees forward. Consequently, the hole in the kit supplied trans cover is not centered over the shifter. Instead of trying to patch on a cover and cut a new hole I ordered the FFMetal trans cover. Their cover is thicker (0.060") and a little wider to accommodate the insulation on the sides of the tunnel and carpet. This was a much better option for me, since it will be powder coated to match my dash. Powder coat doesn't hide surface imperfections very well.
I made a template out of cardboard before I started any drilling/cutting. Thanks for the template reminder, JohnK! Cut out the shifter hole and two more for stainless cupholders. With the template in place, I verified ample clearance between the bottom of the cupholders and the driveshaft. All good.
Cardboard template
Then it was on to cutting the holes for real in the FFMetal cover. I picked up a better quality circle cutter (General Tools) than the one I had previously bought from HF. What a difference! It cut precise holes. I also drilled the 1/4" holes for the shifter trim ring. Then off to the professional powder coater--too big to fit in my little toaster oven.
FFMetal trans cover ready to powder coat
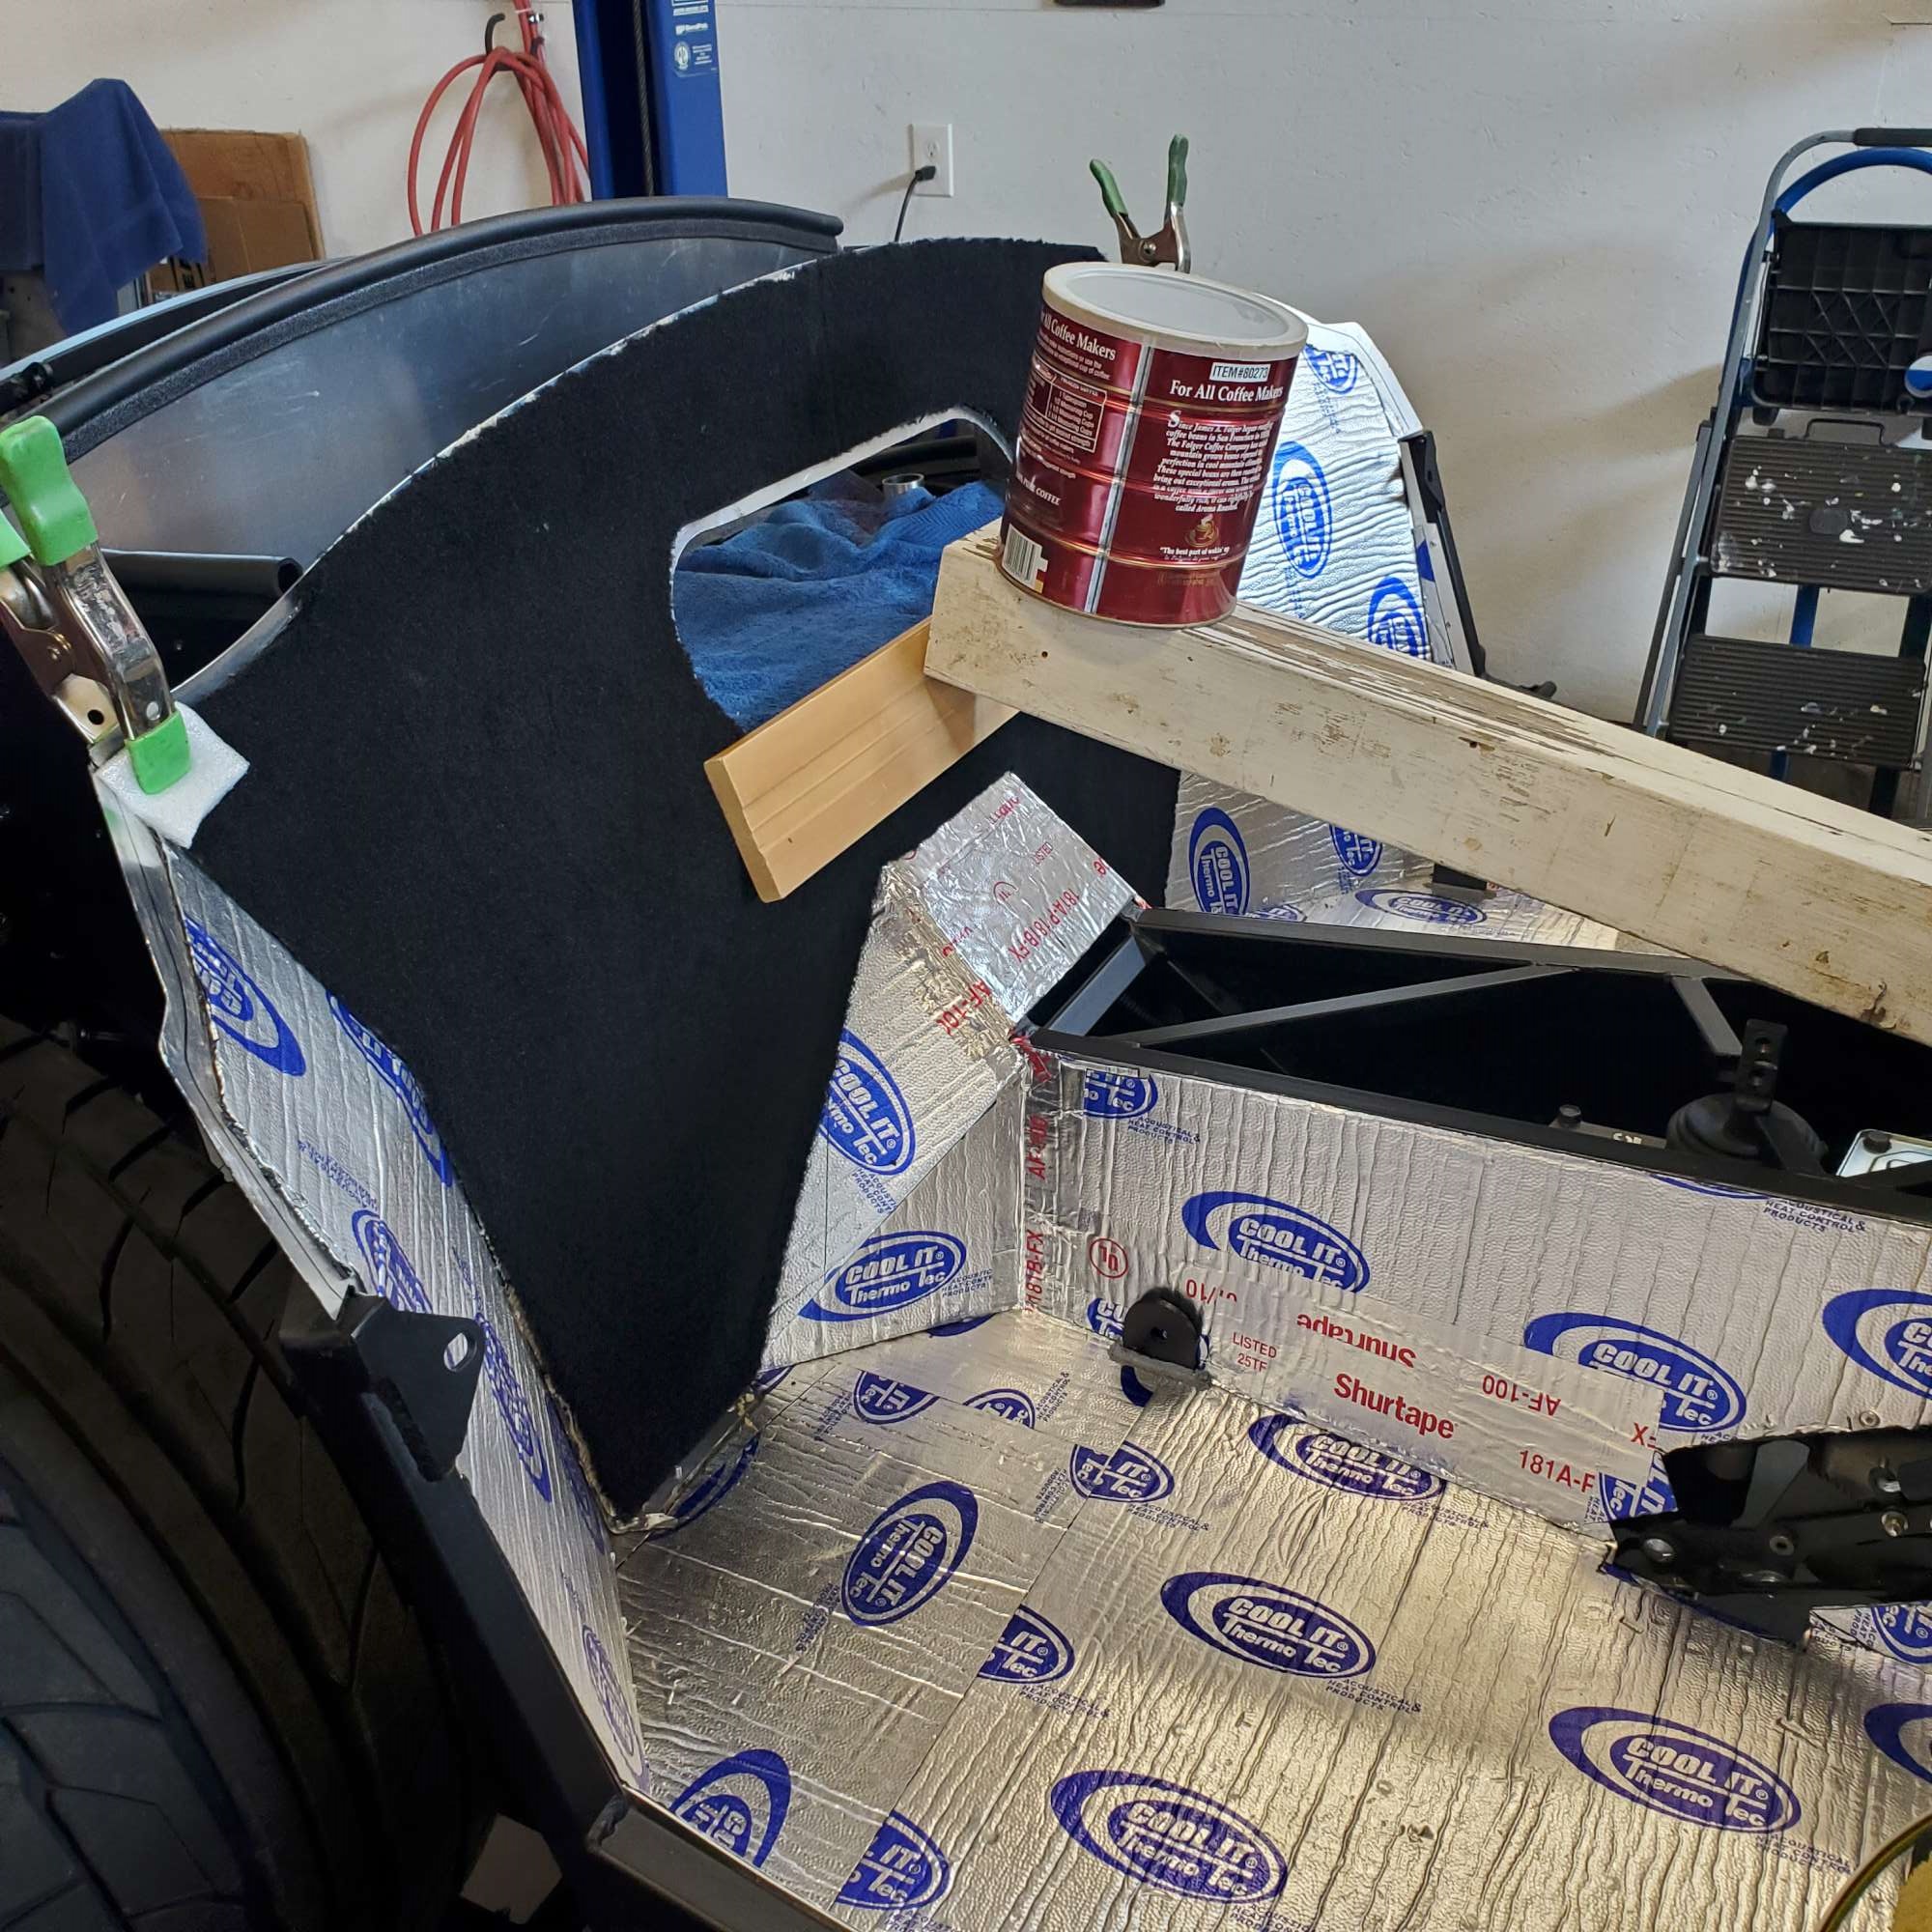
Carpet installation starts
I finished laying down ThermoTec on all of the trunk surfaces. Put aluminum foil tape over the seams to smooth the transiitions for the carpet.
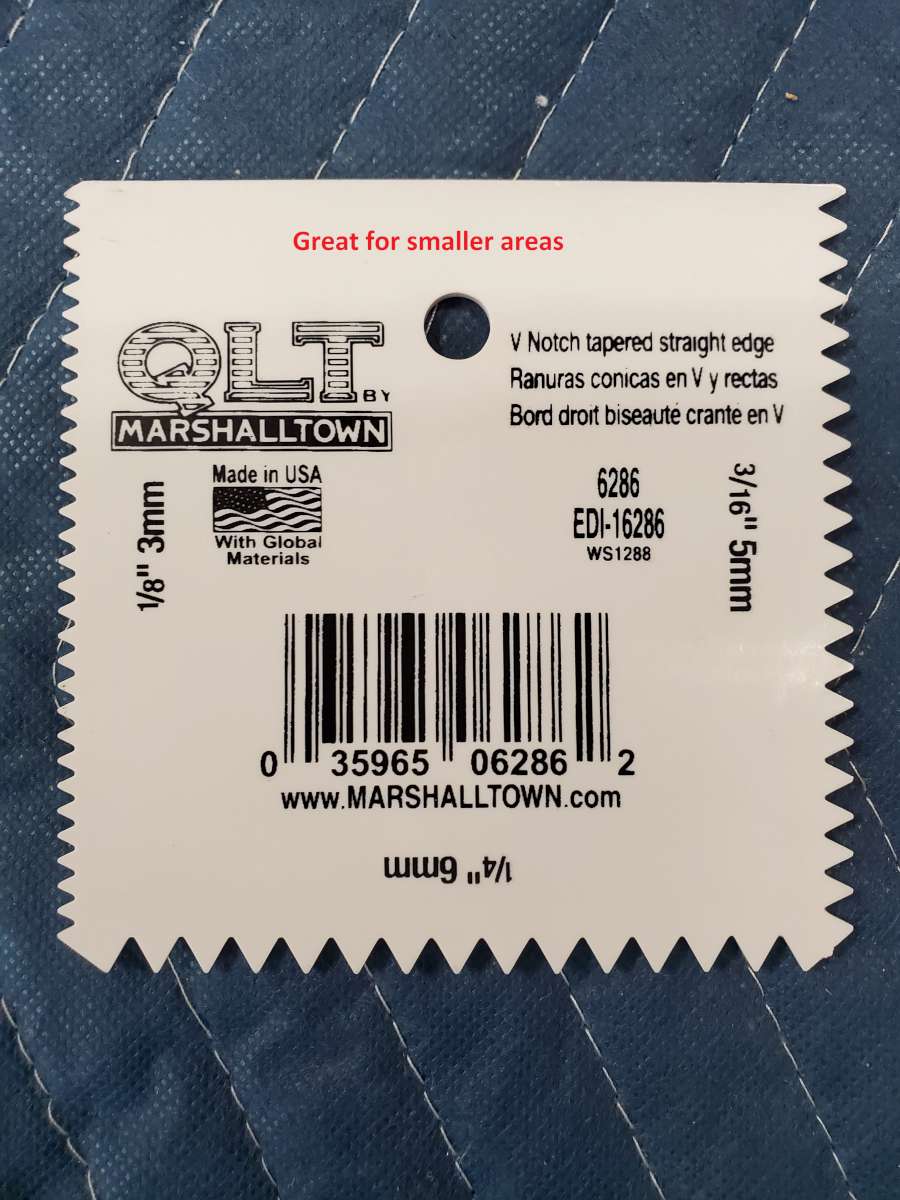
I decided to go with carpet glue (Roberts 6700) instead of the 3M Super 77 because I like the idea of a little time to position the carpet v. near instant grab of the spray. So, I picked up one gallon from HD. I also picked up a couple trowels from Ace.
Figured starting in the trunk was a safer place to work out any major mistakes (hopefully!). After putting in the first couple of trunk pieces I settled on the 1/8" V-groove. The 1/8" square notch groove puts down too much glue, making areas squishy and takes too long before it grips. Especially for vertical pieces.
Picked up this trowel from Ace (<$5)

Also picked up this small (4") trowel from Ace ($3). It's great for tighter spots.
The trunk carpet piece is large, making it difficult to handle and put down without getting glue on the finished side. So, I cut it down into three pieces: (1) area in front of the Breeze cubby, (2) behind the cubby and first drop down, and (3) final horizontal section of trunk over the RT drop trunk and final step down and kick out. If I were to do it over again, I would break up piece number (3) as well. Just too risky to get glue on the finished side.
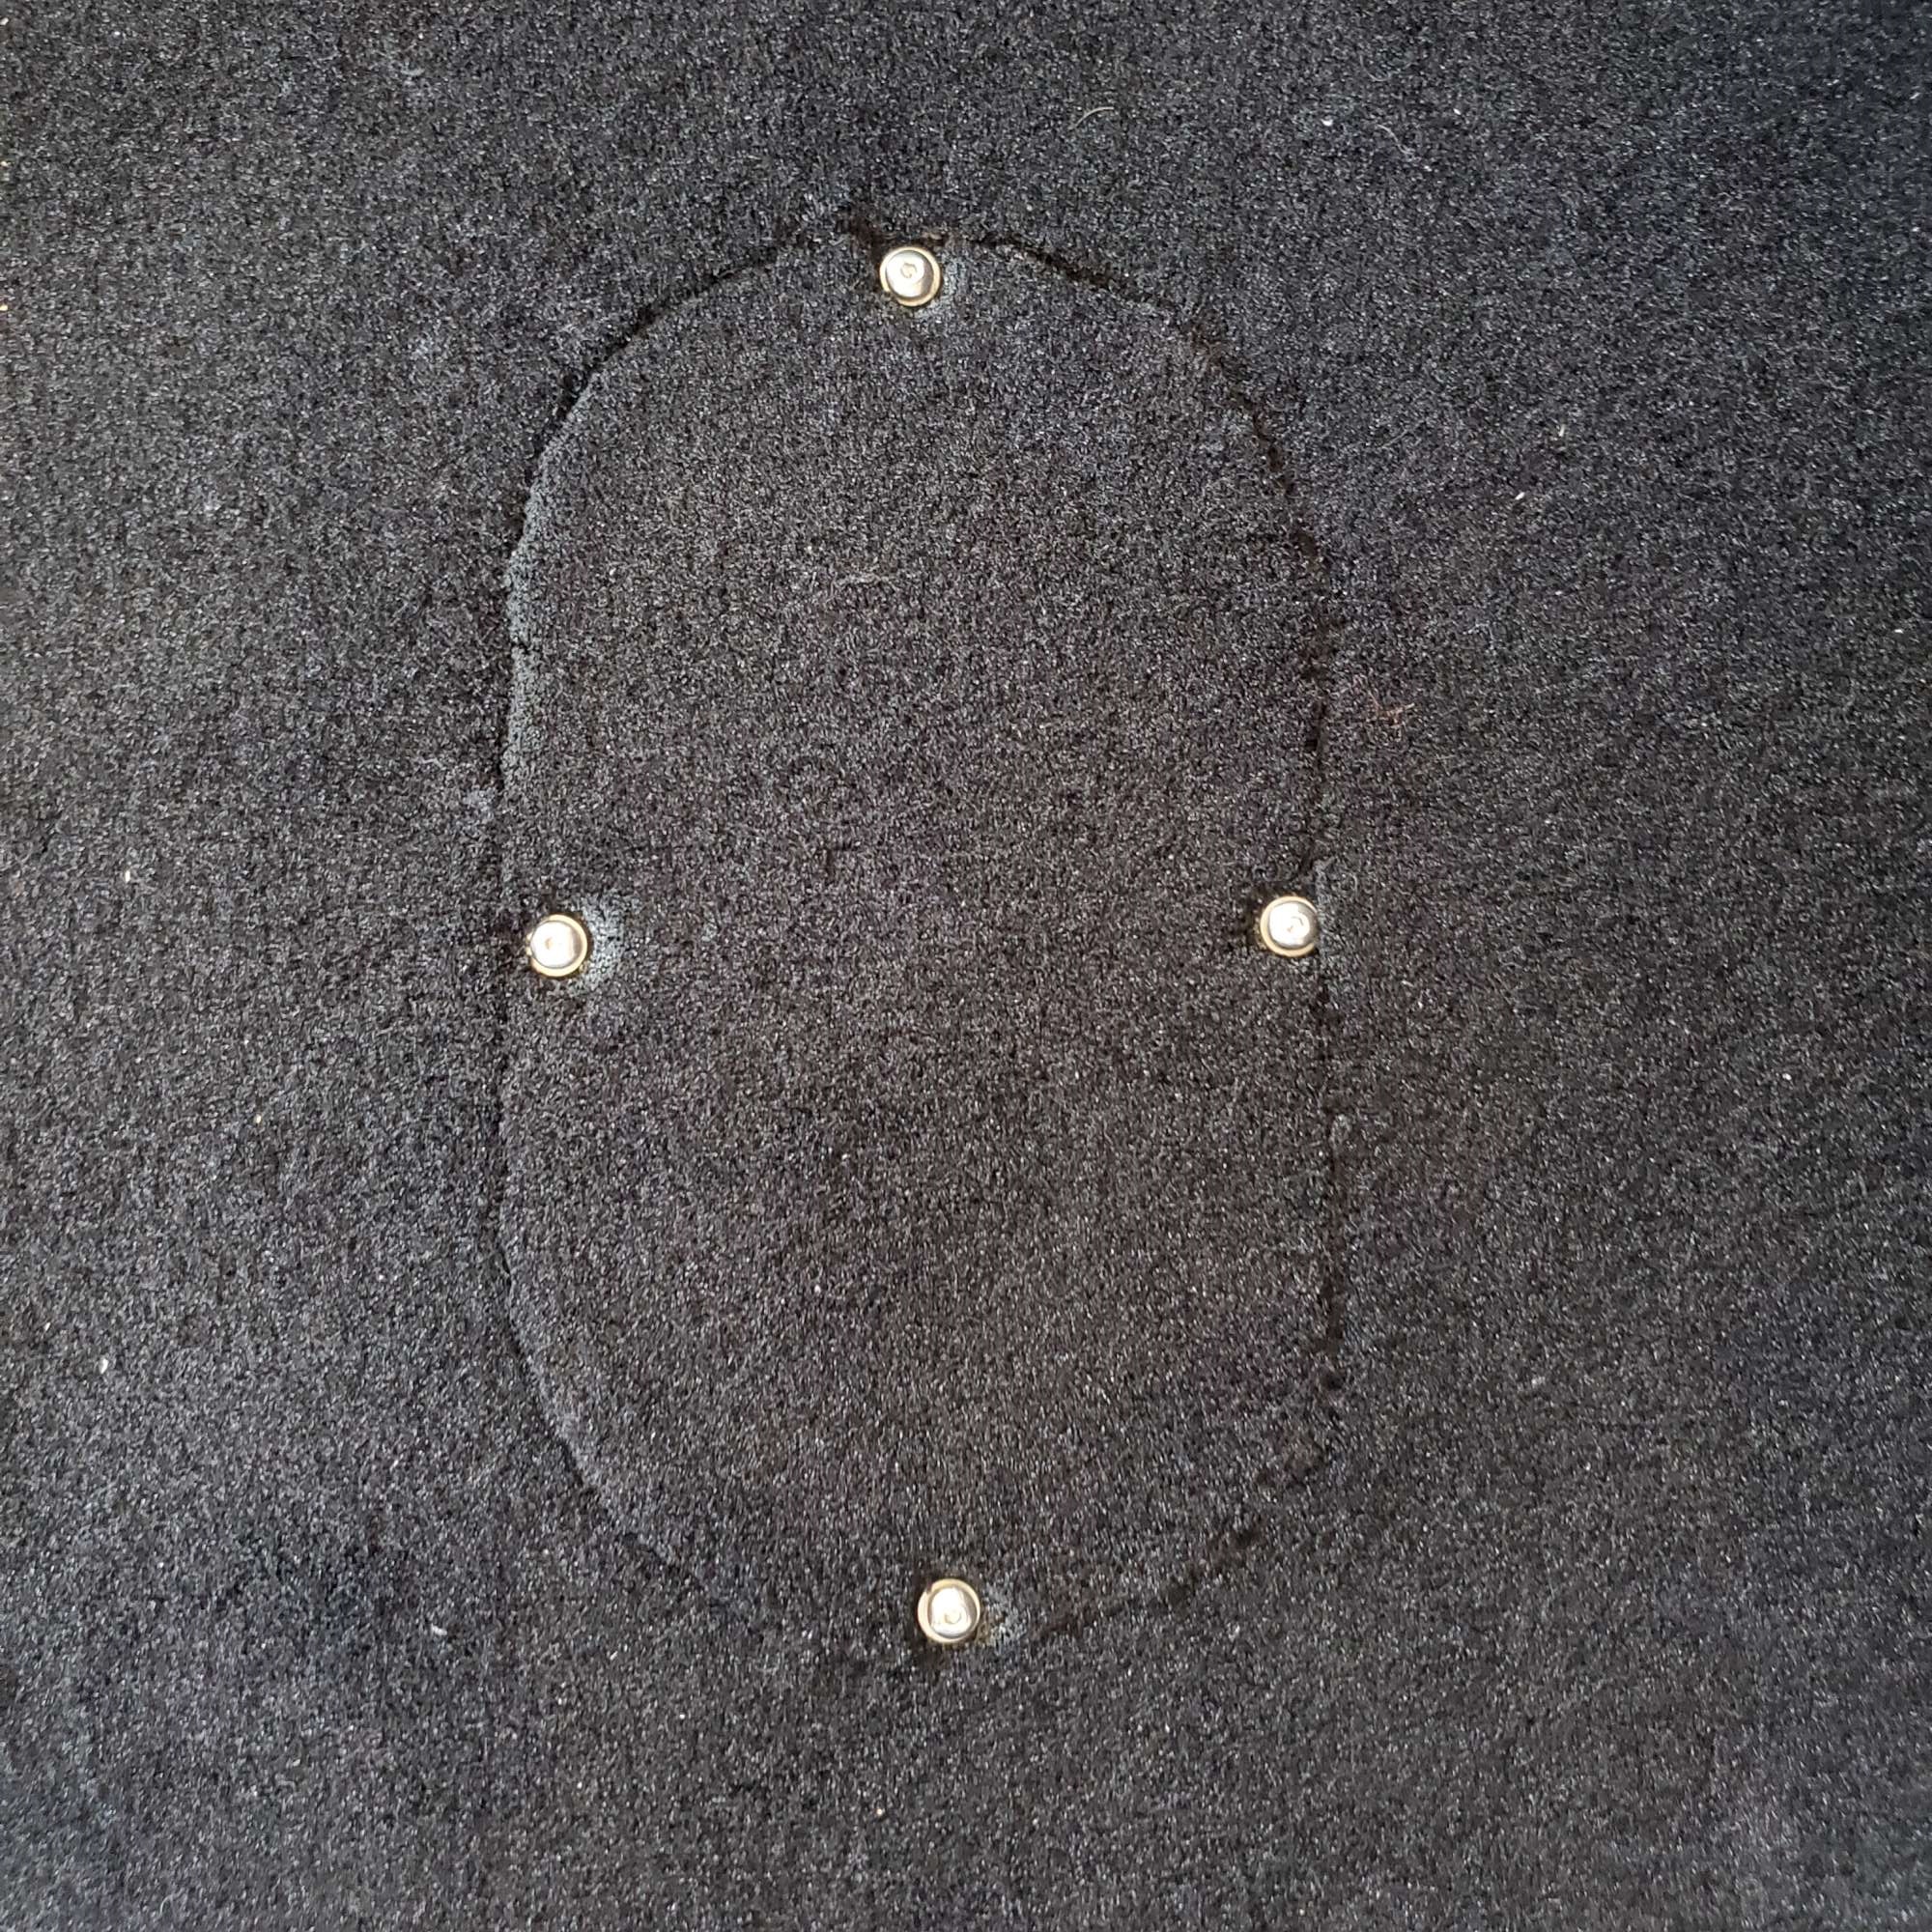
What to do with the fuel pump and fuel sender covers? Decided to carpet over. The four button head #8 screws are visible, but that's okay. I like the look of some exposed stainless hardware anyway (hence my powder coated dash and transmission tunnel cover).
Fuel pump cover
I guess the trade off of using glue is in certain transitions I've had to rig up ways to apply constant pressure to the carpet until the glue cures. For example, the transition just below the Breeze cubby opening doesn't have much surface area above the bend for the carpet to bond. In transitions like this the carpet wants to keep straight. The glue takes some time to grip to the point it won't release.
P.S. odometer now reads 10 miles. Still smiling!
Last edited by 460.465USMC; 09-10-2022 at 06:06 PM.
Chris
Coupe complete kit. Index. Delivered: 4/22/24.
Build Thread. Coyote Gen 4X. T-56. IRS w/3.55. Wilwoods. PS. HVAC. Side windows.
MK4 Complete kit.
Build Thread Index. Delivered: 10/15/2020. Legal: 7/25/23. Coyote Gen3. TKO600 (0.64 OD). IRS w/3.55. PS. Wilwoods. Sway bars. This build is dedicated to my son, Benjamin.
Build Thread.
-
Post Thanks / Like - 0 Thanks, 1 Likes
-
09-10-2022, 05:57 PM
#474
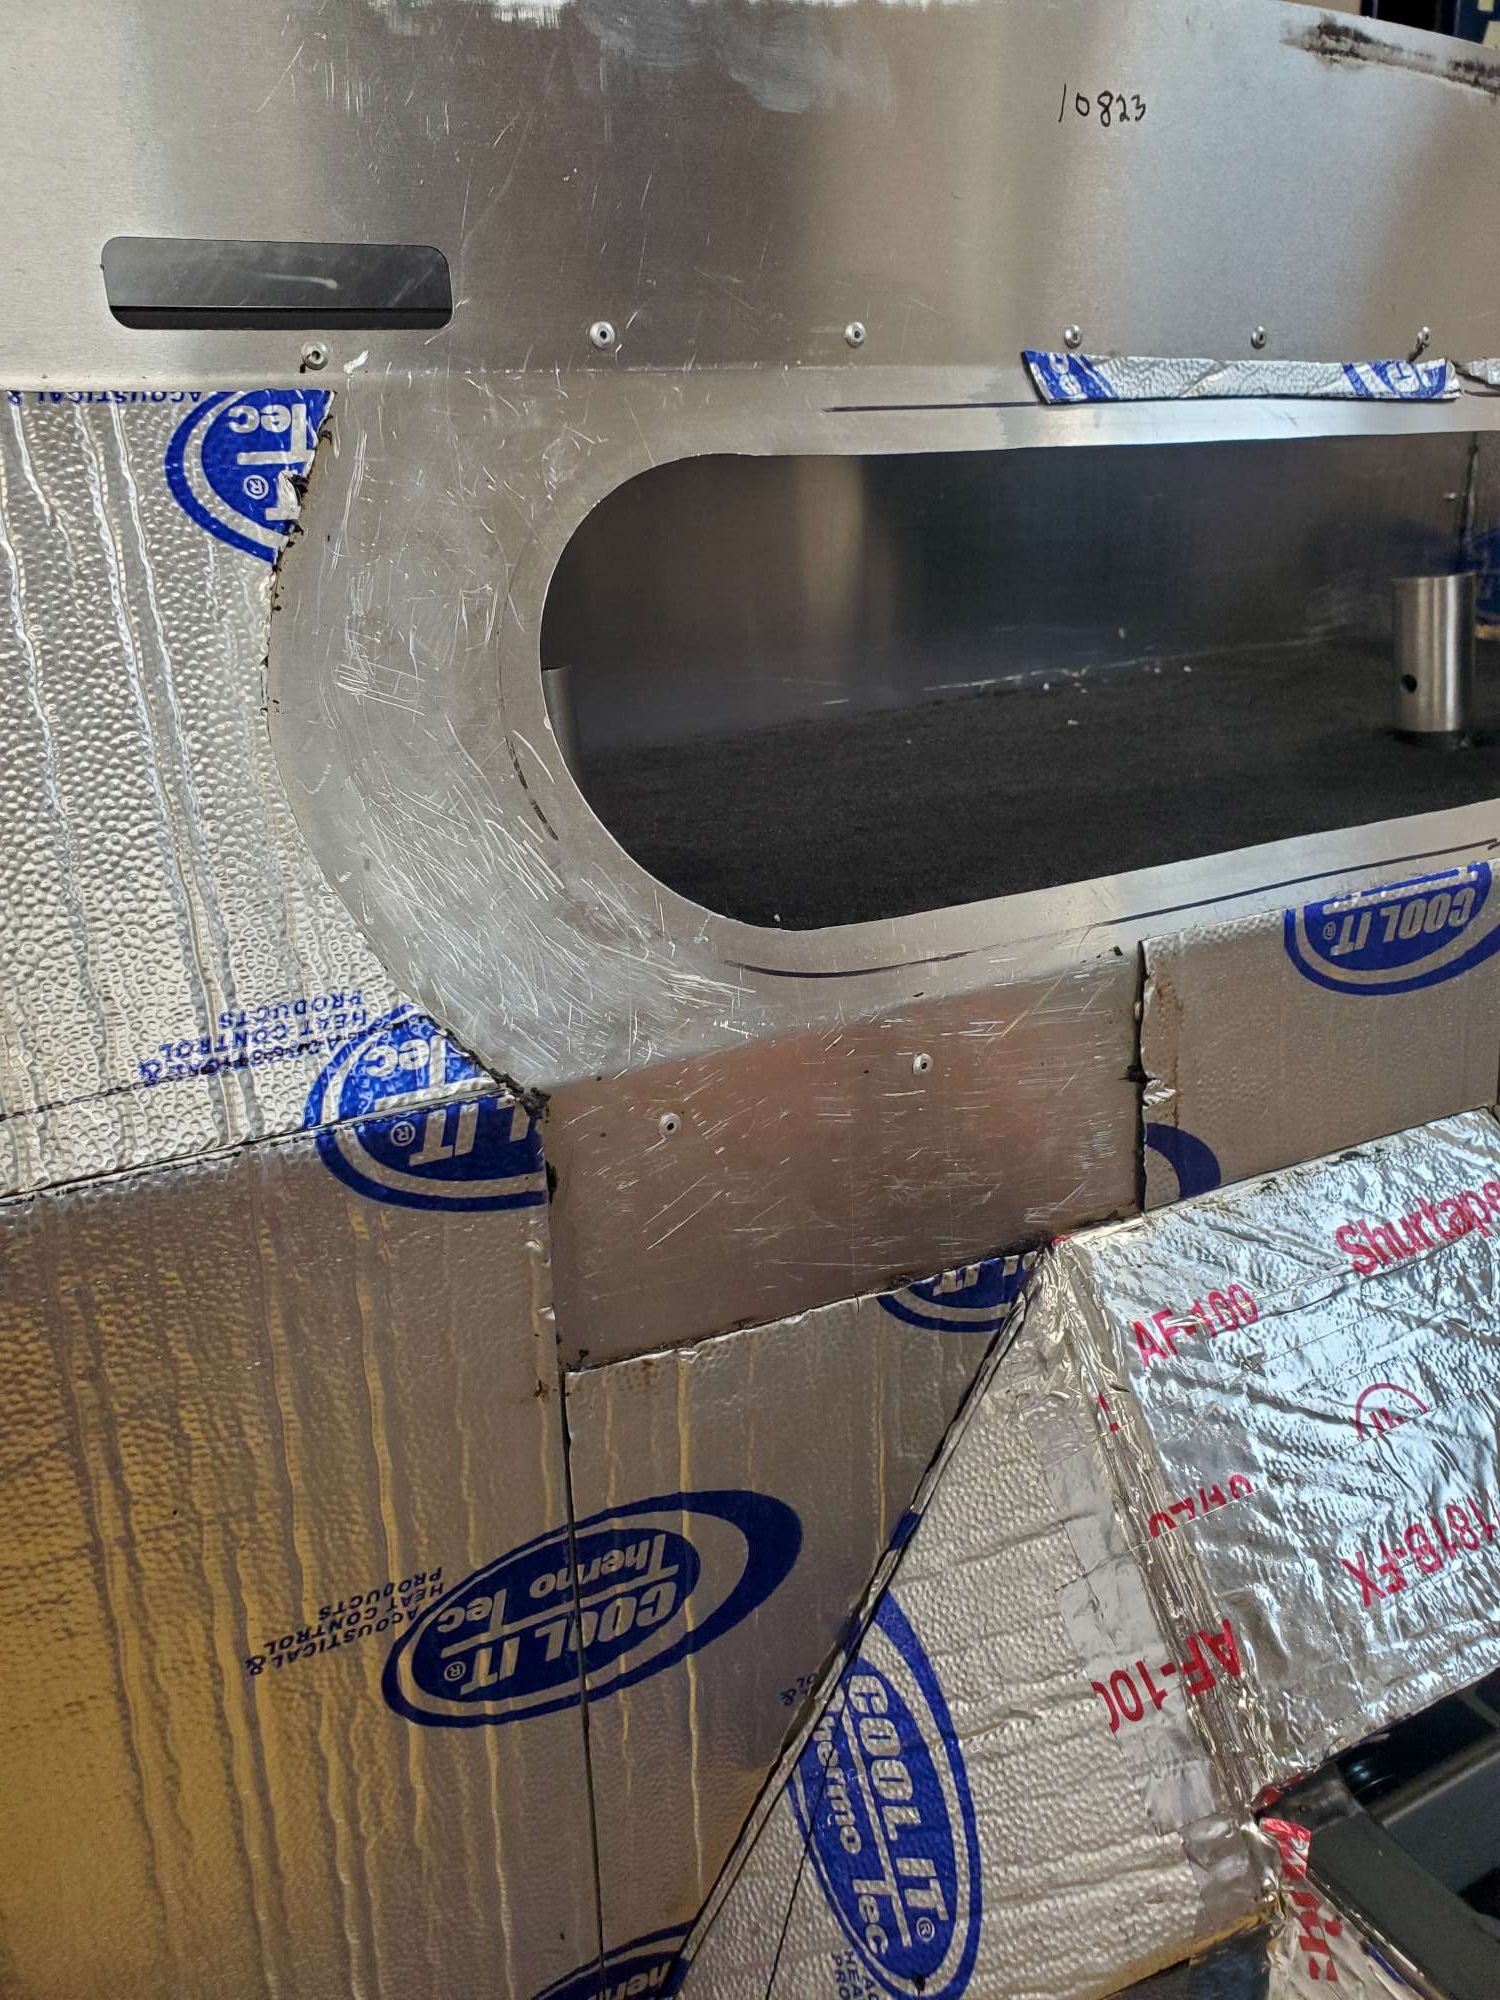
Removing Heat/Sound Mat (Thermo-Tec)
Unknowingly, I installed the Thermo-tec very close to the Breeze cubby opening. Leaving it like this would have left a gap around the vinyl trim. So, I had the "pleasure" of removing some Thermo-tec.
In case it's helpful to someone, figured I'd share what helped with the removal, and left a clean surface.
- Slicing mat into smaller sections with a utility knife. 2" wide sections is a good size.
- Use small (~1 inch) but stiff putty knife to remove most of the material.
- Apply generous amount of Goo Gone with a rag.
- Follow with a razor blade. This removes the rest of the very sticky material.
- Clean-up with Windex.
I wanted the area clean and free of the sticky mat, so the Roberts 6700 would adhere well to the cockpit wall. Worked pretty good. If someone else has a better way, please share.
Last edited by 460.465USMC; 09-10-2022 at 06:01 PM.
Chris
Coupe complete kit. Index. Delivered: 4/22/24.
Build Thread. Coyote Gen 4X. T-56. IRS w/3.55. Wilwoods. PS. HVAC. Side windows.
MK4 Complete kit.
Build Thread Index. Delivered: 10/15/2020. Legal: 7/25/23. Coyote Gen3. TKO600 (0.64 OD). IRS w/3.55. PS. Wilwoods. Sway bars. This build is dedicated to my son, Benjamin.
Build Thread.
-
09-10-2022, 06:00 PM
#475
Looking good, Chris. You're getting close now!
Dave
-
Post Thanks / Like - 1 Thanks, 0 Likes
-
09-10-2022, 06:02 PM
#476
MkIV Roadster build: Gen 2 Coyote, IRS, TKO600. Ordered 10/24/18. Delivered 1/29/19. Engine installed 8/8/21. First start 9/12/21. First go-kart 9/17/21. Off to paint 4/11/22. Back from paint 12/30/22.
Build thread here.
-
Post Thanks / Like - 1 Thanks, 0 Likes
-
09-11-2022, 11:18 AM
#477
Originally Posted by
Papa
Looking good, Chris. You're getting close now!
Dave
Thanks, Dave. Really good to have experienced eyes on my build. Appreciate it!
Originally Posted by
JohnK
Nice work Chris!
There was a loud slap a couple weeks back--my hand hitting my forehead. I was thinking, "A cardboard template to mock up for my FFMetal trans cover. Of course! Why didn't I think of that?" Thanks again.
Chris
Coupe complete kit. Index. Delivered: 4/22/24.
Build Thread. Coyote Gen 4X. T-56. IRS w/3.55. Wilwoods. PS. HVAC. Side windows.
MK4 Complete kit.
Build Thread Index. Delivered: 10/15/2020. Legal: 7/25/23. Coyote Gen3. TKO600 (0.64 OD). IRS w/3.55. PS. Wilwoods. Sway bars. This build is dedicated to my son, Benjamin.
Build Thread.
-
09-16-2022, 08:07 PM
#478
Still plugging away on carpet. Have the rear cockpit wall, rear corners, and transmission tunnel sides in so far. The trunk is mostly done, except for the Breeze cubby wall, and the upper trunk inside panels I made. Will cover those once the extra carpet I ordered from F5 arrives.
How many clamps does it take to glue in the piece beneath the driver's side door? Four. The front edge of this piece does three 90* bends around the 2" square tube. I want to end up with crisp corners in the carpet. I've used clamps on some other sections where there are tight bends or other obstacles. This approach definitely holds the carpet down for a nice contour around the bend. Just costs me time.

I'll be glad when the carpet install is over. Not my favorite part of the build so far. But, it sure does a lot to bring the project forward in terms of finish.
Chris
Coupe complete kit. Index. Delivered: 4/22/24.
Build Thread. Coyote Gen 4X. T-56. IRS w/3.55. Wilwoods. PS. HVAC. Side windows.
MK4 Complete kit.
Build Thread Index. Delivered: 10/15/2020. Legal: 7/25/23. Coyote Gen3. TKO600 (0.64 OD). IRS w/3.55. PS. Wilwoods. Sway bars. This build is dedicated to my son, Benjamin.
Build Thread.
-
Post Thanks / Like - 0 Thanks, 2 Likes
-
09-17-2022, 12:14 PM
#479
^^ Yep, I get it. But still, there's a big visual change that comes with it, which is satisfying. Congrats on the progress, Chris, it's looking great.
MK4 #7838: IRS 3.55 TrueTrac T5z Dart 347
The drawing is from ~7th grade, mid-1970s
Meandering, leisurely build thread is
here
-
Post Thanks / Like - 1 Thanks, 0 Likes
-
09-17-2022, 01:08 PM
#480
Hey Chris, just sent you a PM after missing some previous ones from you. If you didn't get it, we've got some possible PM flakiness on our hands ...
MK4 #7838: IRS 3.55 TrueTrac T5z Dart 347
The drawing is from ~7th grade, mid-1970s
Meandering, leisurely build thread is
here


 Thanks:
  Likes:


 Reply With Quote