Infinitybox

Visit our community sponsor

Thanks Thanks:  36
Likes Likes:  54
Page 2 of 4 FirstFirst 1234 LastLast
Results 41 to 80 of 157

Thread: Jesse builds a pickup #329 - Front cowl and hood

  1. #41
    Senior Member
    Join Date
    Oct 2020
    Location
    Albany, NY
    Posts
    2,489
    Post Thanks / Like
    Quote Originally Posted by Jeff Kleiner View Post
    Not making excuses, just an FYI---two weeks ago two of the tech support guys were at SEMA and then last week two of the tech support team were at the Build School.

    Jeff
    Thank Jeff,

    I got a hold of them today. They were very helpful. Gave me some solid dates I can work around. I told them that my front line customer service experience has always been top notch. This experience was no different. Must be a fun place to work.
    Build 1 MK4 #10008 - Delivered 03/03/21, Graduated 7/20/22 - Sold 6/6/24 Build Thread #1 https://shorturl.at/K9fuy
    Build 2 MK4 #11061- Delivered 08/24/24 Build Thread #2 https://shorturl.at/OZowi
    Build 3 35 Pickup #329 - Delivered 10/28/25 Build Thread #3 https://shorturl.at/Ty4QQ

  2. #42
    Senior Member
    Join Date
    Feb 2016
    Location
    Prescott, AZ
    Posts
    367
    Post Thanks / Like
    "The rear end I got from Moser has the fox body pinion. I dug into some other builds and see that previously they shipped them with the S197 pinion. I am curious if this will have an impact on driveshaft length."
    This depends on a few things, such as the trans you are running and the yoke length etc. I had the same concern, I sent pictures and measurements to tech. They stated the length was within specs.

    "There is now a .200 difference, instead of contacting FFR and waiting for new spacers seemed easier just to grind .100 off of the four lower ones."
    This is the fix that most people find.


    Just curious, what is the extended full length of your rear shocks?

  3. #43
    Junior Member
    Join Date
    Sep 2025
    Posts
    29
    Post Thanks / Like
    Quote Originally Posted by Blitzboy54 View Post
    Thank Jeff,

    I got a hold of them today. They were very helpful. Gave me some solid dates I can work around. I told them that my front line customer service experience has always been top notch. This experience was no different. Must be a fun place to work.
    I'm waiting on spindles and brakes also. How far out did they say they were? I would assume they are waiting on a sizable order.

  4. #44
    Member
    Join Date
    Mar 2011
    Posts
    32
    Post Thanks / Like
    Jesse
    Can you post dimensions of your frame Dolly seams simple and looks like it works well. Is it 4x4s

  5. #45
    Senior Member
    Join Date
    Oct 2020
    Location
    Albany, NY
    Posts
    2,489
    Post Thanks / Like
    Yeah will do.

    It's two 48" 4x4's. I will measure the gap when I get home. It was my MK4 dolly, I had four pieces of 4x4 mounted for the 4" tubes. I simply removed those and got lucky that the rest worked so well with the truck frame.
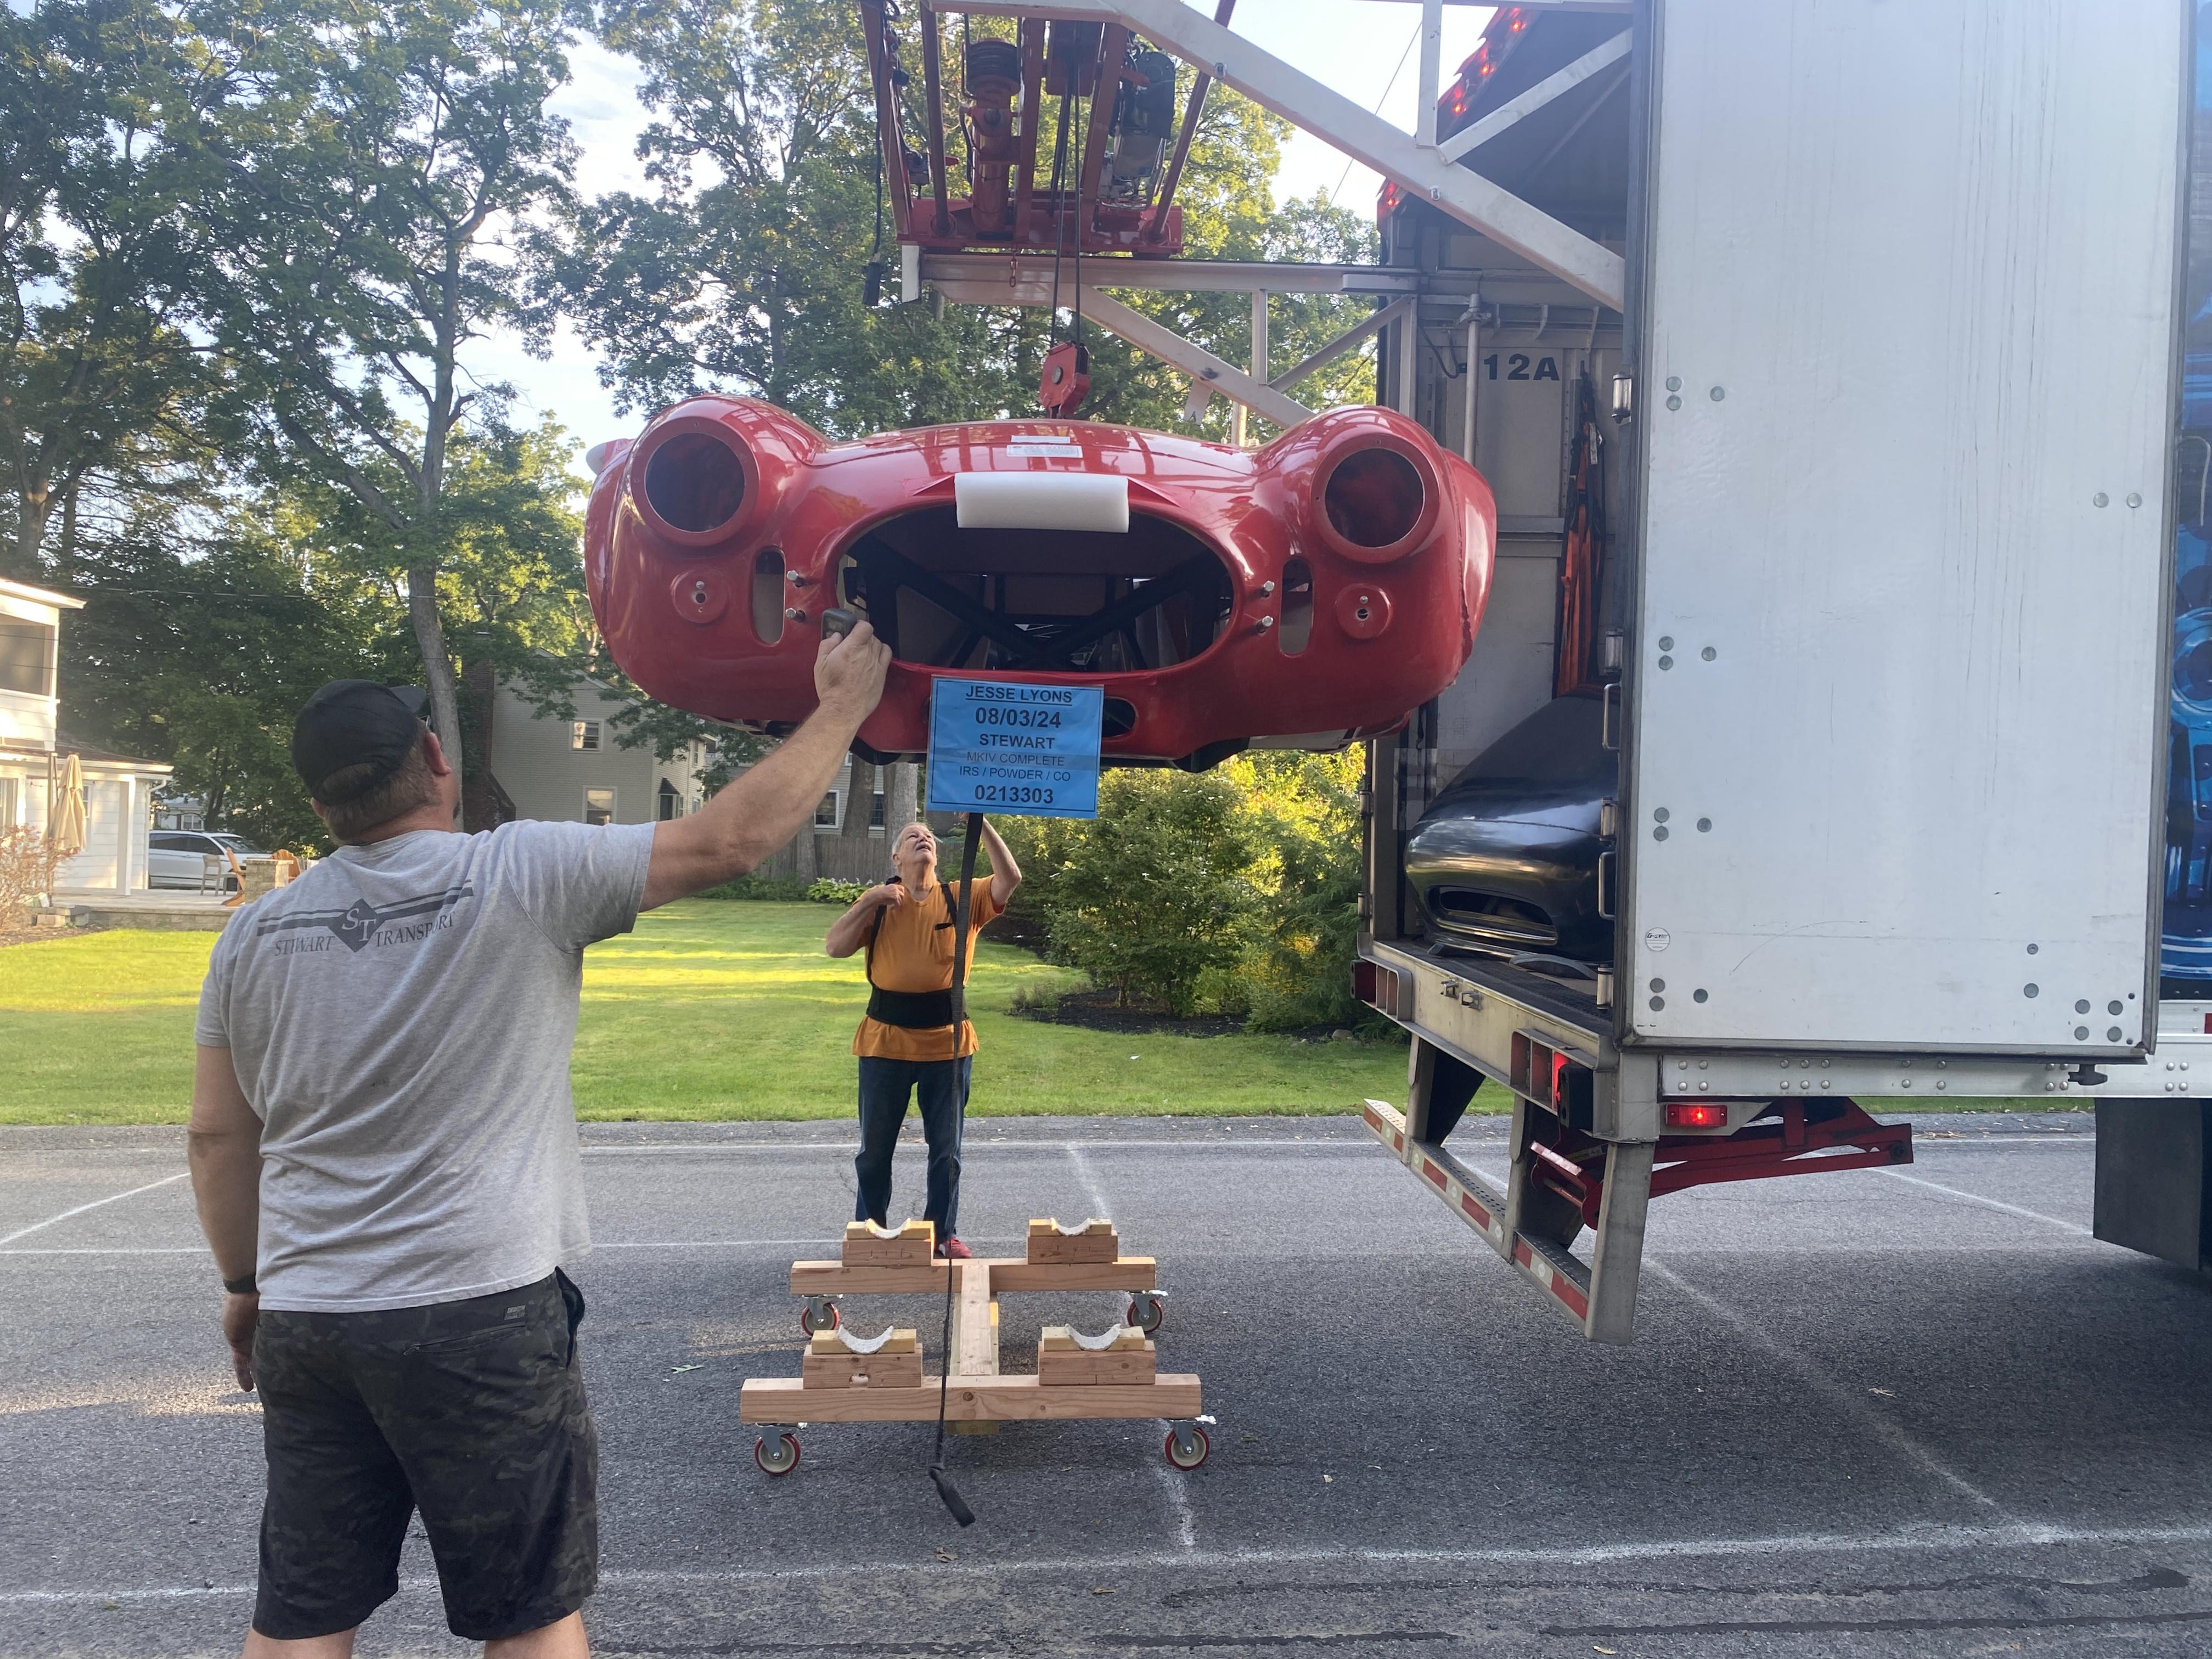


    ***Update***

    The gap is 42”. Total length is 48”. It’s essentially 48x48 in total.
    Last edited by Blitzboy54; 11-26-2025 at 06:54 PM.
    Build 1 MK4 #10008 - Delivered 03/03/21, Graduated 7/20/22 - Sold 6/6/24 Build Thread #1 https://shorturl.at/K9fuy
    Build 2 MK4 #11061- Delivered 08/24/24 Build Thread #2 https://shorturl.at/OZowi
    Build 3 35 Pickup #329 - Delivered 10/28/25 Build Thread #3 https://shorturl.at/Ty4QQ

  6. Thanks THUNDERSTRUCK thanked for this post
  7. #46
    Senior Member
    Join Date
    Oct 2020
    Location
    Albany, NY
    Posts
    2,489
    Post Thanks / Like
    The FFR fairy made a visit. I now have everything I need for the foreseeable future except spindles. I now have plenty to do.

    Started by finishing up the rear end with the panhard bar


    I also took the opportunity to set and drill the underside aluminum. I spent a lot of time trying to find just the right spot so the center would touch evenly while not over or under lapping elsewhere. I did have to trim a couple mm's from one edge to keep it flush with the frame but mostly it fit out of the box.


    Moving on to the firewall. I really struggled to figure out how to get the lower pieces to set in there. I read Paul's post on how to do it and still struggled until I realized the bottom lip that tips into the footbox siits just in front of the frame not on top of it. Once I got it one and off it seemed silly that I struggled at all. The thick aluminum comes from FFR with heavy almost razor like burrs. The edges need a lot of cleaning up even before your first test fit.

    I did get set and drilled. I used 1/8 drill bit for now. I actually only own 1/8 cleco's. I was about to buy 3/16 when I decided that I would keep it 1/8 until powder coated. I have to re drill all the holes anyhow to clean them up, I mind as well hit it with the 3/16 then. I did drill 2 holes I don't like how they look. I will fill those in with a TIG before coating. Other than that I really like the fit.


    This brings me to the power steering module. If you follow the mounting instructions there is really no way to make the electrical connections without extending the wires.


    I also will have a lot going on back there and want to keep it clear. I am thinking this for now. I saw this was done on another build by bending the bracket. Anyone have any interference issues by placing it here?

    Last edited by Blitzboy54; 11-29-2025 at 07:01 PM.
    Build 1 MK4 #10008 - Delivered 03/03/21, Graduated 7/20/22 - Sold 6/6/24 Build Thread #1 https://shorturl.at/K9fuy
    Build 2 MK4 #11061- Delivered 08/24/24 Build Thread #2 https://shorturl.at/OZowi
    Build 3 35 Pickup #329 - Delivered 10/28/25 Build Thread #3 https://shorturl.at/Ty4QQ

  8. #47
    Senior Member
    Join Date
    Oct 2020
    Location
    Albany, NY
    Posts
    2,489
    Post Thanks / Like
    Steering Shaft

    With the firewall up I mocked up the rest of the steering shaft. The Roadster manual comes with instructions to index the shaft so that the shaft can't slip. I find it odd the truck does not have the same instructions, considering the sheer number of joints. On my first roadster I had a little bind and it is incredibly dangerous. Once I had the whole assembly in place I pulled the set screws one at a time, marked and drilled them.


    I completed the mock up with every shaft end indexed. Its tight but I have not used loctite on the set screws yet as this has to come apart a couple more times before going in for good. I also had to trim the "twisted" shaft more than the instructions called for. It says to take .375 from one end but I was still way too long. I ended up taking .375 from both ends. I had to trim the roadster shaft as well, your mileage may vary.


    Reservoirs

    For the brake and clutch reservoirs I used the mounting bracket as a template from the inside. I wanted to mount to the firewall without going through the frame. This seemed the best spot while giving me max adjustability. I also wanted it level to the firewall rivets.


    This truck will have a hood but I am well clear of that from this position.


    Last edited by Blitzboy54; 11-30-2025 at 07:26 PM.
    Build 1 MK4 #10008 - Delivered 03/03/21, Graduated 7/20/22 - Sold 6/6/24 Build Thread #1 https://shorturl.at/K9fuy
    Build 2 MK4 #11061- Delivered 08/24/24 Build Thread #2 https://shorturl.at/OZowi
    Build 3 35 Pickup #329 - Delivered 10/28/25 Build Thread #3 https://shorturl.at/Ty4QQ

  9. #48
    Senior Member
    Join Date
    May 2018
    Location
    Pinckney, MI
    Posts
    425
    Post Thanks / Like
    I had the same question on those rear spacers. Played around and ground down a bit and it’s fine. Not a critical dimension anyway..
    - Peterh226
    35 Hot Rod Truck (Ext) Delivered 11/21/24
    33 Hot Rod Gen 2 #1134 ~1400 miles
    54 Pontiac Star Chief
    05 F-150

  10. Thanks Blitzboy54 thanked for this post
  11. #49
    Senior Member
    Join Date
    Oct 2020
    Location
    Albany, NY
    Posts
    2,489
    Post Thanks / Like
    Front Brake lines

    Definitely more challenging than the Roadster. Took quite a bit more time and I had to remove the steering shaft, power steering motor and firewall. But so far so good.


    I ran into a conflict with the manual concerning the instructions on running the brake lines. They have you place (but not install) the front corner aluminum. This created a lot of conflict for me as I wasn't ready to put that piece in and there didn't seem to be any way to install it properly later with the brake lines int the way. So I followed the advice given by one of the hot rod builders and dog legged them out of the way and modified the filler piece.


    Last edited by Blitzboy54; 12-04-2025 at 01:34 PM.
    Build 1 MK4 #10008 - Delivered 03/03/21, Graduated 7/20/22 - Sold 6/6/24 Build Thread #1 https://shorturl.at/K9fuy
    Build 2 MK4 #11061- Delivered 08/24/24 Build Thread #2 https://shorturl.at/OZowi
    Build 3 35 Pickup #329 - Delivered 10/28/25 Build Thread #3 https://shorturl.at/Ty4QQ

  12. #50
    Senior Member
    Join Date
    Oct 2020
    Location
    Albany, NY
    Posts
    2,489
    Post Thanks / Like
    Rear Brake lines

    Moving on to the rear FFR provides a cut out that I can only assume is for the rear brake line in the bracket that would hold the running board (if I had one). I popped in the rear aluminum to ensure clearance. All pretty straight forward. The most complicated bit is making a 60" line fit into a 50" space, but much easier to route than the front.


    I realized when attempting to connect the flex lines that the brakes where rearward facing. This needed to be reverse. Unfortunately I had to take them back off and change the brackets from the let to right side.


    Wheel fitment... In the process of ordering custom wheels. In terms of offsets and wheel fitment I would like to get it just right. I found this tool from Speedway. It allows you to test fit a wheel of just about any diameter and width up to 12 inches. You can set any offset/backspace for fitment. This will be an open wheeler so for the rear I am just looking at body clearance but if I had fenders that could be accounted for as well. I really have it so I can get the correct fitment in the fronts but I don't have spindles yet. I did test it out on the rear and you can see it in action. This is currently setup for 19x12 with a 0mm offset.


    Moving on to the firewall I have the my MC reservoir hose routing sorted as well.

    Last edited by Blitzboy54; 12-06-2025 at 06:07 PM.
    Build 1 MK4 #10008 - Delivered 03/03/21, Graduated 7/20/22 - Sold 6/6/24 Build Thread #1 https://shorturl.at/K9fuy
    Build 2 MK4 #11061- Delivered 08/24/24 Build Thread #2 https://shorturl.at/OZowi
    Build 3 35 Pickup #329 - Delivered 10/28/25 Build Thread #3 https://shorturl.at/Ty4QQ

  13. #51
    Senior Member
    Join Date
    Oct 2020
    Location
    Albany, NY
    Posts
    2,489
    Post Thanks / Like
    Fire breathing Dragon has arrived

    In other news the Blueprint Fairy made a delivery.


    Seems to have plenty of power.


    Also comes with this fun little warning.

    Build 1 MK4 #10008 - Delivered 03/03/21, Graduated 7/20/22 - Sold 6/6/24 Build Thread #1 https://shorturl.at/K9fuy
    Build 2 MK4 #11061- Delivered 08/24/24 Build Thread #2 https://shorturl.at/OZowi
    Build 3 35 Pickup #329 - Delivered 10/28/25 Build Thread #3 https://shorturl.at/Ty4QQ

  14. Likes Salty Chief 35 liked this post
  15. #52
    Senior Member
    Join Date
    Feb 2016
    Location
    Prescott, AZ
    Posts
    367
    Post Thanks / Like
    Congrats on the Blue Print Fairy arrival. a couple of things to take into consideration:

    1) That offset tool looks great. Drop a plumb line or level down from the "Bed side mounting tab/hole just above the rear brakes. this is where the bed mounts, keep in mind the wheel opening arch has a bulge of about 3/4 inch that sticks farther out, so your wheel/tire- body interference is closest at this point. Obviously as the suspension moves up and down there is a arc moving towards the body if only one side lifts, (diagonally going over a speed bump for instance) this will draw the wheel even closer to the body side of the bed.

    2) Please check the measurements of the serpentine belt tensioner. Mine was a SBF but the tensioner was in contact with the chassis diagonal brace at the front corner of the engine bay.
    Mod need.jpg

  16. #53
    Senior Member
    Join Date
    Feb 2016
    Location
    Prescott, AZ
    Posts
    367
    Post Thanks / Like
    Congrats on the Blue Print Fairy arrival. a couple of things to take into consideration:

    1) That offset tool looks great. Drop a plumb line or level down from the "Bed side mounting tab/hole just above the rear brakes. this is where the bed mounts, keep in mind the wheel opening arch has a bulge of about 3/4 inch that sticks farther out, so your wheel/tire- body interference is closest at this point. Obviously as the suspension moves up and down there is a arc moving towards the body if only one side lifts, (diagonally going over a speed bump for instance) this will draw the wheel even closer to the body side of the bed.

    2) Please check the measurements of the serpentine belt tensioner. Mine was a SBF but the tensioner was in contact with the chassis diagonal brace at the front corner of the engine bay.
    Mod need.jpg

    Chassis mod.PNG

    The solution was a call to FFR tech and discussion of a gusset to notch the brace. I was told "If I feel comfortable building the gusset that would work"
    Tube-tensioner gusset.jpg

    Mod Solution.jpg
    Last edited by Guardm16; 12-09-2025 at 01:28 PM.

  17. Thanks Blitzboy54 thanked for this post
  18. #54
    Senior Member
    Join Date
    Oct 2020
    Location
    Albany, NY
    Posts
    2,489
    Post Thanks / Like
    That is super interesting about the belt tensioner. I appreciate the heads up. It's mildly concerning they would not know that was a problem seeing as Blue print makes these engines specifically for FFR.

    I plan to do a proper wheel fitment once the front spindles arrive. I will set the sides at that time for clearance. The idea is to cheat as close as possible as you can adjust with a spacer if need be. Much tougher to go the other way.


    Thanks for the pics!! Really helpful stuff.
    Build 1 MK4 #10008 - Delivered 03/03/21, Graduated 7/20/22 - Sold 6/6/24 Build Thread #1 https://shorturl.at/K9fuy
    Build 2 MK4 #11061- Delivered 08/24/24 Build Thread #2 https://shorturl.at/OZowi
    Build 3 35 Pickup #329 - Delivered 10/28/25 Build Thread #3 https://shorturl.at/Ty4QQ

  19. #55
    Senior Member
    Join Date
    Feb 2016
    Location
    Prescott, AZ
    Posts
    367
    Post Thanks / Like
    Quote Originally Posted by Blitzboy54 View Post
    That is super interesting about the belt tensioner. I appreciate the heads up. It's mildly concerning they would not know that was a problem seeing as Blue print makes these engines specifically for FFR.

    I plan to do a proper wheel fitment once the front spindles arrive. I will set the sides at that time for clearance. The idea is to cheat as close as possible as you can adjust with a spacer if need be. Much tougher to go the other way.


    Thanks for the pics!! Really helpful stuff.
    I don't think it is a blueprint issue, but CVF who make the accessory drive. They also make a model of drive without the tensioner, but has adjustable brackets for the A/C and Alternator.

    I bought 2009 mustang wheels thinking they would fit (thoughts of mustang donor) Turns out they are too close to the bed of the truck, so I had to use a spacer. The front was also too narrow looking. There is no clearance issue, just what looks good. I added spacers there as well. I am not out at the track so I was not too worried about stress. I will say that I did have a Ford F250 with 6 inch lift. that truck had 2 inch spacers on it when I got it, and I beet the hell out of it off road rock crawling.
    Last edited by Guardm16; 12-09-2025 at 03:32 PM.

  20. #56
    Senior Member
    Join Date
    Oct 2020
    Location
    Albany, NY
    Posts
    2,489
    Post Thanks / Like
    Firewall mock up

    Lots of updates, I've been working on getting the firewall set. I have read through the build manual several times to see where things will ultimately end up. I was very close to setting the overflow tank when I suddenly realized I had not considered the heater/AC unit. That is a totally different set of instructions you need to download from FFR. I then spent the next couple of days re thinking my original plan. I am not entirely sold on where they have the hoses routed.

    One of the early steps in the install is attach the trinary switch to the dryer. I need everything connected so I can see how it looks. I initally ran into a problem as the dryer seems to have a port but it's powder coated over and may not actually be removable.


    I didn't want to assume, put force on it and break it. I sent a note to FFR but then looked up the PN on the label. This unit is sold at speedway and in says in the description that those are in fact ports so I put a wrench on it and removed the plug. The powder coat cracked and split around the port but its invisible behind the switch.


    I did in fact purchase some 3/16 cleco's and drilled all the 1/8 holes out. I am putting the AC lines lower near the frame with the drier underneath (hopefully out of the way) and kept the heater lines along the edge. I think this will give me the cleanest look. I flirted with running hoses out of the lower firewall (I have seen several builds doing this) but at the end of the day I didn't want any of them running into the foot box.


    The heater AC mounts cleanly enough. The instructions are straight forward.


    Build 1 MK4 #10008 - Delivered 03/03/21, Graduated 7/20/22 - Sold 6/6/24 Build Thread #1 https://shorturl.at/K9fuy
    Build 2 MK4 #11061- Delivered 08/24/24 Build Thread #2 https://shorturl.at/OZowi
    Build 3 35 Pickup #329 - Delivered 10/28/25 Build Thread #3 https://shorturl.at/Ty4QQ

  21. #57
    Senior Member
    Join Date
    Oct 2020
    Location
    Albany, NY
    Posts
    2,489
    Post Thanks / Like
    Cockpit Aluminum

    The engine and engine bay will be blacked out for the most part. I can't powder coat the power steering motor or the rack. I am instead using a product called Spray Max 2k in "hot rod satin black". It has hardener that before use you punch a valve at the bottom of the can. This mixes with the paint and gives you 24ish hours to use. I am very pleased with how it came out. I will also be using it on the steering shaft when the time comes.


    I spent the better part of the day drilling the cockpit aluminum. I have both sides of the floor complete. Will need to decide if any of it will get coated. Aside from partially drilling into my left index finger this all went without any real fanfare.


    Gas tank

    Since I am still waiting for spindles I am not ready to install the engine so I figured it was a good time to put the tank in. I am using a hanger from Quantum Fuel. This is my 3rd go round with this arrangement. It has 3/8 delivery and return lines with either 6an or 8an (can be ordered with either) fittings attached. I know folks like the Pro-M but last I checked its $400 for just the hanger. I purchased the Quantum unit for $270 and it includes a 400lpm Walbro pump.


    You do have to notch the fuel pump port to clear the thicker return line just like the Pro-M. I forgot to take a picture before I installed it but I used tin snips to make 2 small cuts then used pliers to work it back and forth until it broke free. Easy peasy.

    I put in the vent and sending unit. The instructions call for the filler neck but I forgot to order the Ford seal. The Dorman part that comes with the kit is a notorious leaker so I put on on order and hung the tank.


    Last edited by Blitzboy54; 12-14-2025 at 08:20 AM.
    Build 1 MK4 #10008 - Delivered 03/03/21, Graduated 7/20/22 - Sold 6/6/24 Build Thread #1 https://shorturl.at/K9fuy
    Build 2 MK4 #11061- Delivered 08/24/24 Build Thread #2 https://shorturl.at/OZowi
    Build 3 35 Pickup #329 - Delivered 10/28/25 Build Thread #3 https://shorturl.at/Ty4QQ

  22. Likes JMD liked this post
  23. #58
    Senior Member
    Join Date
    Aug 2019
    Location
    Spokane, WA
    Posts
    1,286
    Post Thanks / Like
    Quote Originally Posted by Blitzboy54 View Post
    The heater AC mounts cleanly enough. The instructions are straight forward.

    Hey Jesse! Just found your truck build thread. This is cool. It will be fun to follow along.

    On the HVAC unit, I read on the forum that at least for the Coupe application it's recommended to silicone around the gaps in the plastic housing where you can see daylight. Idea being to maximize the amount of airflow across the coils. Especially helpful for cooling operation, per forum wisdom. Passing along in case you weren't aware.

    Merry Christmas and Happy New Year!
    Chris
    Coupe complete kit. Index. Delivered: 4/22/24. Build Thread. Coyote Gen 4X. T-56. IRS w/3.55. Wilwoods. PS. HVAC. Side windows.
    MK4 Complete kit. Build Thread Index. Delivered: 10/15/2020. Legal: 7/25/23. Coyote Gen3. TKO600 (0.64 OD). IRS w/3.55. PS. Wilwoods. Sway bars. This build is dedicated to my son, Benjamin. Build Thread.

  24. #59
    Senior Member
    Join Date
    Oct 2020
    Location
    Albany, NY
    Posts
    2,489
    Post Thanks / Like
    Quote Originally Posted by 460.465USMC View Post
    Hey Jesse! Just found your truck build thread. This is cool. It will be fun to follow along.

    On the HVAC unit, I read on the forum that at least for the Coupe application it's recommended to silicone around the gaps in the plastic housing where you can see daylight. Idea being to maximize the amount of airflow across the coils. Especially helpful for cooling operation, per forum wisdom. Passing along in case you weren't aware.

    Merry Christmas and Happy New Year!

    Chris, Merry Christmas to you and yours as well.

    I did see something about that in the manual. It was light on specifics, it was on my list of things to get to the bottom of. I need to take it back out at some point and figured I could do it before putting it back in. Thank you for the heads up.
    Last edited by Blitzboy54; 12-20-2025 at 04:52 PM.
    Build 1 MK4 #10008 - Delivered 03/03/21, Graduated 7/20/22 - Sold 6/6/24 Build Thread #1 https://shorturl.at/K9fuy
    Build 2 MK4 #11061- Delivered 08/24/24 Build Thread #2 https://shorturl.at/OZowi
    Build 3 35 Pickup #329 - Delivered 10/28/25 Build Thread #3 https://shorturl.at/Ty4QQ

  25. #60
    Senior Member
    Join Date
    Oct 2020
    Location
    Albany, NY
    Posts
    2,489
    Post Thanks / Like
    Fuel integration

    I permanently installed the lower aluminum. I need to run my 3/8 fuel line along it so it needed to go in. I had flirted with coating it but there really is no reason to do it. This would be a lot easier with a lift. At the very least I could have raised the frame up higher on the jack stands but I opted to be lazy and muscle through as is. Pro tip if you do that same as me, much easier to silicon the panel then rivet in place vs putting on the frame like most panels. I left the lines on because its sandwiched between 2 layers with the foam. You will never see them again.


    The manual calls for a supply and return line with the regulator in the engine bay. I am planning on putting the regulator by the tank with a short return line. Therefore only needing a single delivery line. My feeling is this is a cleaner look IMO.


    I ran the line into the engine bay through the frame support hole. I was able to clean up the look with a grommet.


    Moving on to the tank vent I am repeating what I did on my last built. This idea was shamefully stolen from fellow Roadster builder Chad. Purchased an inexpensive 100 micron filter, removed the guts and added a hose barb to one end. Makes for a clean look.


    Last edited by Blitzboy54; 12-20-2025 at 09:01 PM.
    Build 1 MK4 #10008 - Delivered 03/03/21, Graduated 7/20/22 - Sold 6/6/24 Build Thread #1 https://shorturl.at/K9fuy
    Build 2 MK4 #11061- Delivered 08/24/24 Build Thread #2 https://shorturl.at/OZowi
    Build 3 35 Pickup #329 - Delivered 10/28/25 Build Thread #3 https://shorturl.at/Ty4QQ

  26. #61
    Senior Member
    Join Date
    Oct 2020
    Location
    Albany, NY
    Posts
    2,489
    Post Thanks / Like
    E-Stopp

    This turned out to be a much bigger project than I assumed. First is this an enormous unit. There are a couple natural spots you can put it on the roadster but I really struggled to find a home that didn't require me to modify the frame. After puttering around with it for a couple days I ultimately landed on this.


    While the frame lines up for 4 points of contact it still has some challenges. I decided on 1/4 20 nutcerts. Another pro tip is if you decide to install the E-Stopp the same way as I did best to do it before the fuel tank goes in. Getting all the holes drilled turned out to be a challenge. Had to use a 90 angle adapter quite a bit as a well as bit extensions.


    I also found I wanted to make an adjustment to the parking brake. Turns out this is adjustable by 360 deg. You remove the 1/2" bolt out of the back, pull off the spring and the hex nut. Then gently work the edges until the arm comes off the spline.


    Truth be told I made way too big an adjustment not considering how the truck sides might interfere so I had to go back and fix it.

    The 1.5" inch tube is much taller from underneath than the 1/2" one so I used spaces to make up the difference. It worked pretty well.


    I tested the slack with the rear shocks fully extended and compressed before securing the lines with clamps. All in all it cam out pretty clean


    I had no idea the E=Stopp comes with an audible alarm. I have seen these installed and have never read it mentioned. I will definitely be disconnecting the backup beep.

    Last edited by Blitzboy54; 12-20-2025 at 05:44 PM.
    Build 1 MK4 #10008 - Delivered 03/03/21, Graduated 7/20/22 - Sold 6/6/24 Build Thread #1 https://shorturl.at/K9fuy
    Build 2 MK4 #11061- Delivered 08/24/24 Build Thread #2 https://shorturl.at/OZowi
    Build 3 35 Pickup #329 - Delivered 10/28/25 Build Thread #3 https://shorturl.at/Ty4QQ

  27. Likes peterh226 liked this post
  28. #62
    Senior Member
    Join Date
    Jul 2021
    Location
    Tonganoxie, KS
    Posts
    2,139
    Post Thanks / Like
    Does Wilwood not offer an electric park brake for the rear brakes you're running? Its such a more compact, simpler solution than e-stopp. And no cables is a huge plus.

    Greg
    Built an early MkIII years ago, sold years ago. Back after 18 years to build a MkIV
    Build Thread Here Partners: Levy Racing, Summit Racing, LMR, Breeze, Forte's Parts, Speedhut, ReplicaParts
    MkIV Complete Kit Ordered 4/18/23, Delivered 7/11/23, First start 3/15/25. Legal 6/13/25. Boss 427W, Edelbrock Pro Flo 4, TKX (.68 5th), IRS, Wilwood Brakes, 18" Halibrands, Toyo R888R Tires, Custom Speedhut Gauges

  29. #63
    Senior Member
    Join Date
    Oct 2020
    Location
    Albany, NY
    Posts
    2,489
    Post Thanks / Like
    Quote Originally Posted by gbranham View Post
    Does Wilwood not offer an electric park brake for the rear brakes you're running? Its such a more compact, simpler solution than e-stopp. And no cables is a huge plus.

    Greg
    They offer a universal brake, I would have needed to contact them to see what brackets I would have needed. The real issue is it’s more than double the price.

    Completely agree on how clean it is.
    Build 1 MK4 #10008 - Delivered 03/03/21, Graduated 7/20/22 - Sold 6/6/24 Build Thread #1 https://shorturl.at/K9fuy
    Build 2 MK4 #11061- Delivered 08/24/24 Build Thread #2 https://shorturl.at/OZowi
    Build 3 35 Pickup #329 - Delivered 10/28/25 Build Thread #3 https://shorturl.at/Ty4QQ

  30. Likes Nigel Allen liked this post
  31. #64
    Senior Member
    Join Date
    Oct 2020
    Location
    Albany, NY
    Posts
    2,489
    Post Thanks / Like
    Flexible Fuel Lines and Regulator

    With the black them of the engine bay I chose black braided PTFE lines and black fittings. I used 3/8 compression to 6AN fittings at the end of the SS hard line.


    I found the best spot for the regulator for me was pointing down on the 1.5" tube. Can lift the truck and see it from underneath. This also is a great place to give a short return. I have a 10 micron filter inline


    Foam Core

    Moving on to the foam core I test fit all the pieces. Like most items in the kit they are slightly oversized. I used a straight edge and and a razor and was able to take just enough off to make everything snug.


    I used the Marine adhesive per the instructions. Took 2 tubes for the bottom. I will say this, the 3M 5200 gives off the closest thing to a "new car smell" I have ever seen. It's only a frame but it smells like a brand new Lexus. Lol


    The pieces are glued in from underneath. I will not put the top on until the firewall is coated. So I will stop here for now.

    Build 1 MK4 #10008 - Delivered 03/03/21, Graduated 7/20/22 - Sold 6/6/24 Build Thread #1 https://shorturl.at/K9fuy
    Build 2 MK4 #11061- Delivered 08/24/24 Build Thread #2 https://shorturl.at/OZowi
    Build 3 35 Pickup #329 - Delivered 10/28/25 Build Thread #3 https://shorturl.at/Ty4QQ

  32. #65
    Senior Member
    Join Date
    Oct 2020
    Location
    Albany, NY
    Posts
    2,489
    Post Thanks / Like
    The Spindle Fairy arrived

    I got the tracking number email. Still have a couple rando missing items but now fully able to keep working without waiting on the mother ship. Continue to use torque seal to ensure the fittings are torqued.


    I do have to break some of this back down. I am dropping my first batch of parts off to the powder coater this weekend and I have decided to add the lower A arm adjustment sleeve to that batch. With spindles of course comes brakes. I am also able to put my wheel fitment tool on and check for clearance.


    The planned wheel size is 19x12 with a 0 offset. This will create a real deep dish look. I have the tool set for both 0 offset and -25mm (will push the wheel out 1"). Need to decide whether to offset the fronts right away or leave at 0 and potentially add a spacer.

    Last edited by Blitzboy54; 01-02-2026 at 03:50 PM.
    Build 1 MK4 #10008 - Delivered 03/03/21, Graduated 7/20/22 - Sold 6/6/24 Build Thread #1 https://shorturl.at/K9fuy
    Build 2 MK4 #11061- Delivered 08/24/24 Build Thread #2 https://shorturl.at/OZowi
    Build 3 35 Pickup #329 - Delivered 10/28/25 Build Thread #3 https://shorturl.at/Ty4QQ

  33. Likes KZGUNS liked this post
  34. #66
    Senior Member
    Join Date
    Oct 2020
    Location
    Albany, NY
    Posts
    2,489
    Post Thanks / Like
    PT 2

    Here is the full turn at 0 offset. Outer is not an issue


    The inner at 0 is potentially an issue. Obvious full turn interference


    Here at the -25mm (pushing the wheel out 1") it just clears.


    The total width of the rear from center is 38", the total width at the front from center is 35" at 0 offset and 36" at -25mm. Still some things to figure out before pulling the trigger on the wheel order. I will post more about that when it's official but I am using a custom wheel company that will make virtually anything at any size for a fixed price.

    Moving on I have been trying to figure out what to do with the power steering module. Now that I know how the wires need to be routed I am 1000% sure you can't put it where they recommend without making the power and control cables longer. I really don't want to re work the harness unless I need so I have been thinking about alternatives. It will be busy back there so this is ultimately what I came up with.


    I test fit the fuse panel with the harness attached and everything seems to clear just fine. I still need to make a pedal mount but it should all fit just fine but I may need to move the fuse panel away from the pedal box at some point. Will need to make a bracket of some kind if I do.

    Build 1 MK4 #10008 - Delivered 03/03/21, Graduated 7/20/22 - Sold 6/6/24 Build Thread #1 https://shorturl.at/K9fuy
    Build 2 MK4 #11061- Delivered 08/24/24 Build Thread #2 https://shorturl.at/OZowi
    Build 3 35 Pickup #329 - Delivered 10/28/25 Build Thread #3 https://shorturl.at/Ty4QQ

  35. Likes KZGUNS liked this post
  36. #67
    Junior Member
    Join Date
    Sep 2025
    Posts
    29
    Post Thanks / Like
    Lookin good! I'm hoping my spindles and hubs ship soon!! I still need those, wire harness and A/C box.

  37. Thanks Blitzboy54 thanked for this post
  38. #68
    Senior Member
    Join Date
    Feb 2016
    Location
    Prescott, AZ
    Posts
    367
    Post Thanks / Like
    Your Power Steering control module looks good there, I set mine on the left side of the pedal box. The exact opposite of yours. Remember, you have about 1 inch above the firewall metal before you contact the cowl. No real need to lay it over on a 45.

  39. Thanks Blitzboy54 thanked for this post
  40. #69
    Senior Member
    Join Date
    Oct 2020
    Location
    Albany, NY
    Posts
    2,489
    Post Thanks / Like
    Dome light

    I mounted some round LED's up in the frame supports. I saw one of the other truck builders do it and thought it was a great idea. Bonus was I already had some round LED's on hand. It seemed the best way to hide the wires was in the frame. I drilled a 5/16 hole on both ends and ran a grommet clean it up.


    I ran my power supply to them to test them out. I plan to tie them into the courtesy circuit of the headlight switch.


    Since I am in a wiring mood I routed and cleaned up the power steering wiring along the frame. A little sheathing to clean it up.


    Pedal PT 1

    We broke the engine down to get it painted. A little fun fact I didn't see coming is Blueprint uses the Holley Terminator on the LS. I assumed it would be GM's version of the control pack. I have experience with the Sniper and while easy to install wasn't all that awesome but I have heard really good things about the Terminator. It is also all black so it will fit with the engine theme.

    I picked up the DBW pedal that came with it so I could mock it up. It is designed to mount to the firewall but I would have to walk it up a couple inches if I did that. I again dug into the forum wisdom and decided to follow Paul's lead and mount it to the side of the pedal box. I picked up some sheet steel but after playing around a bit found that if slightly modified the existing mount worked perfectly. You cut the 3 back tabs off and revers it.


    Build 1 MK4 #10008 - Delivered 03/03/21, Graduated 7/20/22 - Sold 6/6/24 Build Thread #1 https://shorturl.at/K9fuy
    Build 2 MK4 #11061- Delivered 08/24/24 Build Thread #2 https://shorturl.at/OZowi
    Build 3 35 Pickup #329 - Delivered 10/28/25 Build Thread #3 https://shorturl.at/Ty4QQ

  41. #70
    Senior Member
    Join Date
    Oct 2020
    Location
    Albany, NY
    Posts
    2,489
    Post Thanks / Like
    Pedal PT 2

    I drilled 3 holes in the side of the pedal box mount and used some thick washers to create enough space between the DBW and the mount. The spacing is really nice. I am pleasantly surprised at how much room there is between pedals. So much better than the Roadster.


    I also made a spacer with a piece of 3/8 stainless tubing and was able to move the fuse box over 1.5 inches to clear the DBW. This seemed like the best solution without creating an entirely new mounting system.


    Wheels

    One of the more fun parts of the early planning was wheels. I want a very specific look. After shopping around for available wheels it was hard to find just the right thing. Bolt pattern, hub bore and spacing were all limiting factors. I found a company called KRNC Forged. A friend of mine used them for his truck and he really like them. They will make virtually any wheel design you want at any size. These are currently being made.


    They are a 2 piece design 19x12 with a 0 offset with an SN95 bolt pattern and bore. Very affordable considering they are full custom at $700 a wheel.

    I have the tires. I can't test mount the fronts yet as the adjustment sleeves on the lower control arms are at the powder coater but I can set the rears and they look so good.


    Build 1 MK4 #10008 - Delivered 03/03/21, Graduated 7/20/22 - Sold 6/6/24 Build Thread #1 https://shorturl.at/K9fuy
    Build 2 MK4 #11061- Delivered 08/24/24 Build Thread #2 https://shorturl.at/OZowi
    Build 3 35 Pickup #329 - Delivered 10/28/25 Build Thread #3 https://shorturl.at/Ty4QQ

  42. #71
    Senior Member
    Join Date
    Nov 2017
    Location
    Johnson City, TN
    Posts
    466
    Post Thanks / Like
    The pictures looks like the gas pedal is pretty close to the trans tunnel?? Once you add sound / heat proofing and carpet, it may rub? If it does, a quick fix would be to remove some of the pedal.... and because the trans tunnel get wider as you depress the pedal.... something to consider.

    Mark
    Mark
    '35 Truck
    Build Thread: https://thefactoryfiveforum.com/show...35-Truck-Build
    Johnson City, Tennessee

  43. Thanks Blitzboy54 thanked for this post
  44. #72
    Senior Member
    Join Date
    Oct 2020
    Location
    Albany, NY
    Posts
    2,489
    Post Thanks / Like
    Quote Originally Posted by mkassab View Post
    The pictures looks like the gas pedal is pretty close to the trans tunnel?? Once you add sound / heat proofing and carpet, it may rub? If it does, a quick fix would be to remove some of the pedal.... and because the trans tunnel get wider as you depress the pedal.... something to consider.

    Mark
    Thanks, I considered it. My plan is 2 fold, the insulation will go on the inside (plan to use a spray on product) and if I need to move the pedal I will modify the arm. I can move it close to an inch that way if I need to.

    Really appreciate you looking out!
    Last edited by Blitzboy54; 01-14-2026 at 08:29 AM.
    Build 1 MK4 #10008 - Delivered 03/03/21, Graduated 7/20/22 - Sold 6/6/24 Build Thread #1 https://shorturl.at/K9fuy
    Build 2 MK4 #11061- Delivered 08/24/24 Build Thread #2 https://shorturl.at/OZowi
    Build 3 35 Pickup #329 - Delivered 10/28/25 Build Thread #3 https://shorturl.at/Ty4QQ

  45. #73
    Namrups's Avatar
    Join Date
    Sep 2021
    Location
    Mechanicville, NY
    Posts
    1,306
    Post Thanks / Like
    The forcast is for single digits in the near future! I have two double head 30 lb propane heaters to help keep you warm if your interested. Let me know.

    Scott
    Scott Pregont
    Present build: 65 Daytona Coupe #393 - Forte 427 EFI crate w/TKX 2.87/ .81 - Ordered 11/16/21 - Delivered 6/23/2022
    Location: Mechanicville, NY
    Build Thread: https://thefactoryfiveforum.com/show...na-Coupe-build
    My Albums
    Build album: https://thefactoryfiveforum.com/album.php?albumid=2151
    Build album 2: https://thefactoryfiveforum.com/album.php?albumid=2437
    Special Tools, Custom Parts, misc supplies: https://thefactoryfiveforum.com/album.php?albumid=2045
    Garage Pics: https://thefactoryfiveforum.com/album.php?albumid=2041
    POR15 First Try: https://thefactoryfiveforum.com/album.php?albumid=2068
    Silicone application tips: https://thefactoryfiveforum.com/album.php?albumid=2063

  46. #74
    Senior Member
    Join Date
    Oct 2020
    Location
    Albany, NY
    Posts
    2,489
    Post Thanks / Like
    Quote Originally Posted by Namrups View Post
    The forcast is for single digits in the near future! I have two double head 30 lb propane heaters to help keep you warm if your interested. Let me know.

    Scott
    Thanks Scott, I appreciate the offer. I will reach out if I need it.
    Build 1 MK4 #10008 - Delivered 03/03/21, Graduated 7/20/22 - Sold 6/6/24 Build Thread #1 https://shorturl.at/K9fuy
    Build 2 MK4 #11061- Delivered 08/24/24 Build Thread #2 https://shorturl.at/OZowi
    Build 3 35 Pickup #329 - Delivered 10/28/25 Build Thread #3 https://shorturl.at/Ty4QQ

  47. #75
    Senior Member
    Join Date
    Oct 2020
    Location
    Albany, NY
    Posts
    2,489
    Post Thanks / Like
    Parts back from Powder Coat!

    Got my first batch of parts back from PC and I have to say I am really pleased. The engine and engine bay is largely black with accents that will match the red in the wheels.


    Since my lower control arm adjustment sleeves came back I was able to test fit the front tire as well. Looks good and looks like it should just clear. I will probably put in a rack limiter if its real close.


    With the firewall back in I permanently re mounted the steering shaft. I was concerned that if I painted it off the car it would be difficult to re fit it together without a bunch of issues so I decided to mask off and paint it in place. Repurposed FFR parts packing paper to the rescue.


    I think it came out pretty clean.


    I spent the rest of my times spreading peanut butter consistent 3M 5200 all over the floor pan and riveting (so much riveting).

    Build 1 MK4 #10008 - Delivered 03/03/21, Graduated 7/20/22 - Sold 6/6/24 Build Thread #1 https://shorturl.at/K9fuy
    Build 2 MK4 #11061- Delivered 08/24/24 Build Thread #2 https://shorturl.at/OZowi
    Build 3 35 Pickup #329 - Delivered 10/28/25 Build Thread #3 https://shorturl.at/Ty4QQ

  48. Likes Salty Chief 35, KZGUNS liked this post
  49. #76
    Senior Member
    Join Date
    Nov 2020
    Location
    Damascus OR USA
    Posts
    1,132
    Post Thanks / Like
    Just caught up with your build thread. You're doing good work and it's all coming together. Many years ago I worked at a wooden boat restoration shop and we used 3M 5200 by the case. If you set a tube on a heater vent in your house for an our or so before using it lowers the viscosity by about 50% and makes it a lot easier to use. Otherwise, like you said, uncooperative peanut butter at best. Keep up the good work.
    Build 1 - 1969 Camaro Build Thread Here: https://www.camaros.net/threads/tims...y-getter.45926
    Build 2 - 1965 Daytona Coupe # 620 Build Thread Here: https://thefactoryfiveforum.com/show...-Type-65-Build

  50. #77
    Senior Member
    Join Date
    Oct 2020
    Location
    Albany, NY
    Posts
    2,489
    Post Thanks / Like
    Quote Originally Posted by PNWTim View Post
    Just caught up with your build thread. You're doing good work and it's all coming together. Many years ago I worked at a wooden boat restoration shop and we used 3M 5200 by the case. If you set a tube on a heater vent in your house for an our or so before using it lowers the viscosity by about 50% and makes it a lot easier to use. Otherwise, like you said, uncooperative peanut butter at best. Keep up the good work.

    Oh man, do me a favor and text that to me a couple weeks ago. lol.

    Thanks for the kind words, appreciate it!
    Build 1 MK4 #10008 - Delivered 03/03/21, Graduated 7/20/22 - Sold 6/6/24 Build Thread #1 https://shorturl.at/K9fuy
    Build 2 MK4 #11061- Delivered 08/24/24 Build Thread #2 https://shorturl.at/OZowi
    Build 3 35 Pickup #329 - Delivered 10/28/25 Build Thread #3 https://shorturl.at/Ty4QQ

  51. #78
    Senior Member
    Join Date
    Oct 2020
    Location
    Albany, NY
    Posts
    2,489
    Post Thanks / Like
    Making a roller

    I got ahold of some temp mustang wheels. The tires are in tough shape but plenty good for my needs right now. I inflated all four and found one was completely flat in the morning. On closer inspection I found a nail embedded. So I purchased a cheap tire repair kit and fixed it. I re inflated and again found it flat in the morning. One soapy water test later showed its leaking from the bead along the outside. I could take it to a shop and have it re mounted but I am in no mood to purchase a new tire if it doesn't survive so what to do? I decided to purchase a can of fix a flat. Reading the instructions it says to inflate the contents of the can then drive for 2 miles. This makes sense but I am in a pickle. I need it to hold air and have a long time before I can drive it. So I did this for 15 minutes.


    My arm was tired but it worked. Tire holds air just fine now. She's lookin like a roller


    Heat and AC

    Moving on to the heat and AC the instructions call for the mixer valve to be attached to the engine. I had the bracket powder coated but don't really like the look. I decided to try and find a way to mount it inside the cockpit instead. This is what I came up with. It's tucked up underneath. Close enough to the transmission tunnel to I believe not get in the way of the footbox.


    I borrowed my friend Scott's AC crimp tool and complete the inner AC connections.


    Everything clears and fits in the space nicely.


    The plan was to wrap the engine lines back around but there really isn't a way to do it without creating a kink. I ordered a couple of 90 fittings to take the bend out of it and will complete that part when they arrive.

    Build 1 MK4 #10008 - Delivered 03/03/21, Graduated 7/20/22 - Sold 6/6/24 Build Thread #1 https://shorturl.at/K9fuy
    Build 2 MK4 #11061- Delivered 08/24/24 Build Thread #2 https://shorturl.at/OZowi
    Build 3 35 Pickup #329 - Delivered 10/28/25 Build Thread #3 https://shorturl.at/Ty4QQ

  52. Likes Salty Chief 35 liked this post
  53. #79
    Junior Member
    Join Date
    Nov 2020
    Posts
    10
    Post Thanks / Like
    Hello, following your build and was wondering what size the tires are? Cant make it out in the picture. Would like them for my build as well.

    Thanks
    David Willouby

  54. #80
    Senior Member
    Join Date
    Oct 2020
    Location
    Albany, NY
    Posts
    2,489
    Post Thanks / Like
    Quote Originally Posted by dwillouby View Post
    Hello, following your build and was wondering what size the tires are? Cant make it out in the picture. Would like them for my build as well.

    Thanks
    David Willouby
    Hi David,

    I assume you are talking about the big ones. They are Falken Aznenis 315/30ZR19
    Build 1 MK4 #10008 - Delivered 03/03/21, Graduated 7/20/22 - Sold 6/6/24 Build Thread #1 https://shorturl.at/K9fuy
    Build 2 MK4 #11061- Delivered 08/24/24 Build Thread #2 https://shorturl.at/OZowi
    Build 3 35 Pickup #329 - Delivered 10/28/25 Build Thread #3 https://shorturl.at/Ty4QQ

Page 2 of 4 FirstFirst 1234 LastLast

Posting Permissions

  • You may not post new threads
  • You may not post replies
  • You may not post attachments
  • You may not edit your posts
  •  

FFMetal

Visit our community sponsor